Showing posts with label Citrus. Show all posts

May 25, 2011

Wednesday Want- Microplane


I'm back with the Wednesday Want finally (and provided my kids keep playing nicely, I'll even queue up a few more posts like I've been meaning to do!) My blogging break was inadvertent but with blogger going crazy and messing up my Google Reader to boot, I kind of stepped away for a while. It's good timing really with my brother's wedding coming in a couple weeks and all the craziness that comes with that, but it's time to crack the whip here. After all, no matter how busy we get, my family still insists on being fed!

Today's favorite tool is the Microplane. I can't remember how I was introduced to this baby but it was love at first sight. If you've ever tried to remove the zest (peel) from a piece of citrus you know how tricky it can be. The pith, the white layer under the colored peel, is bitter and should be left on the fruit. The Microplane is sharp enough to effectively remove the zest so you get all the great citrus flavor. It's also the best way to grate hard cheeses like Parmesan or to make chocolate shavings. Sometimes I use it for garlic (whatever you do, watch your knuckles- this baby is sharp!)

Most often, I use my Microplane when I'm making a citrus flavored frosting (usually lemon or orange). A little bit of fresh lemon zest brightens so many dishes- green beans, asparagus, simple cakes, even cinnamon roll dough. The flavor is often so subtle that you don't notice the citrus but the food just tastes brighter and better. Do you have a favorite use for a rasp grater? They come in a lot of sizes and I'm dying to add a few more to my collection...

April 22, 2011

By the Book Friday- Parmesan Asparagus for Easter

{printable recipe here}
Can you believe Easter weekend is here? It's snuck up on me again. We are going to have our standard menu- ham (Costco style), potatoes, homemade rolls, and Parmesan asparagus or green beans (whichever is on sale, is that awful?) I usually make something fruity for dessert, like Lemon Curd Cheesecake. This week I tried out a Cherry Pineapple Cobbler thanks to Lucky Leaf Pie Filling. I will post that delicious recipe later today (crossing my fingers!)

The recipe that inspired today's By the Book Friday Post comes from Ina Garten's Barefoot Contessa Family Style. It's no secret that I have a big crush on Ina and she really can't do any wrong in my eyes. I'll admit that I didn't follow the recipe exactly, as she roasts the asparagus and my oven was full at the time (oh, to have a double oven!) So instead, I blanched the asparagus by cooking them for two or three minutes in boiling water, then stopping the cooking by covering them with ice water. Then I crisped them up in a hot skillet with a little butter and olive oil and added the rest of the flavors in Ina's recipe- kosher salt, freshly ground pepper, generous Parmesan cheese, and lemon juice. It just takes a couple minutes and the final product is really fragrant and delicious (even my little man ate these up). And like I said, you can use fresh green beans instead- either makes a delicious spring dinner side dish.

Do you have any Easter favorites that you make every year? I hope you have a wonderful Easter weekend!

Parmesan Asparagus with Lemon from Anne Strawberry
{printable recipe here}
adapted from Ina Garten

2 1/2 pounds fresh asparagus (about 30 large)
2 tablespoons good olive oil
1/2 teaspoon kosher salt
1/4 teaspoon freshly ground black pepper
1/2 cup freshly grated Parmesan
2 lemons cut in wedges, for serving

Preheat the oven to 400 degrees F. (note- I blanked them instead, so I boiled a large pan of water to begin).

If the stalks of the asparagus are thick, peel the bottom 1/2 of each. Lay them in a single layer on a sheet pan and drizzle with olive oil. Sprinkle with salt and pepper. Roast for 15 to 20 minutes, until tender. Sprinkle with the Parmesan and return to the oven for another minute. Serve with lemon wedges.

Variation: Instead of roasting in the oven, I blanched the asparagus for three minutes in salted boiling water. Next, submerge the asparagus in ice water to 'shock' it. Transfer to a skillet warmed over medium high with a couple tablespoons of olive oil or butter and brown for just one or two minutes. Then season and garnish as above, with salt, pepper, sliced Parmesan cheese, and the juice of half a lemon. Serve immediately.

April 8, 2011

By the Book Friday- Sheet Cakes

Photobucket
I kind of hate sheet cake. Not really, I mean, it's easy to make, transport, and serve- but there's no way to try a bit just to make sure things are okay before you send them off! Or to snitch a bit of the tempting mint brownies! I've been hoping to get some great new recipe tried this week for today's post but when it came down to it, I needed to make dessert for 80 guys tonight I didn't really want to make something new and fancy when I needed quantity and dependability, so I stuck with trusty old favorites. They don't technically meet my own 'by the book Friday' parameters but if there was an Anne Strawberry Cookbook (At Home with Anne Strawberry? See Anne Strawberry Burn through a Ton of Butter and Flour? All the Stuff Anne Strawberry Tries to Fatten Her Friends and Family with?) these would each be in there. Well, minus the Rice Krispie treats. Those are just not my style but my tall man will jump through hoops for them so I included a batch. I bet they will get eaten quickly even if I don't like them! And the chocolate, well, I couldn't decide between the mint brownies and the Texas sheet cake as I mentally tried a piece. Fortunately for me, I thought the sheet cake looked a little full before I baked it (ahem, that's a lie) so I reserved a tiny bit of batter for two mini cakes for the ladies tonight. They look so great in their tiny little pans, covered with pretty chocolate icing and pecans. Yum. I hope the men appreciate the chocolate (do they really?)

I read this poem today on Clover Lane and had to share. It's very sweet and I think I need to print it up for my house. Loving BMWs, pretty furniture, and expensive chocolate is easy enough. I need to focus on finding the beautiful in the everyday (even Rice Krispie treats?)

Learn to like what doesn't cost much.
Learn to like reading, conversation, music.
Learn to like plain food, plain service, plain cooking.
Learn to like fields, trees, brooks, hiking, rowing, climbing hills.
Learn to like people,
even though some of them may be different...
different from you.
Learn to like to work and enjoy the satisfaction of doing your job as well as it can be done.
Learn to like the songs of birds, the companionship of dogs.
Learn to like gardening, puttering around
the house and fixing things.
Learn to like the sunrise and sunset, the beating of the rain
on the roof and windows,
and the gentle fall of snow on a winter's day.
Learn to keep your wants simple and
refuse to be controlled by the likes and dislikes of others.
Lowell Bennion

Now if you'll excuse me, I'm off to enjoy some girl time with Baby Strawberry. We're going to try painting her toe nails again (and hopefully we'll have better results this time!) And cross your fingers that all my well loved, carefully labeled (if not shined) sheet pans and lids make it home. I'm not going to lie, I'm a little nervous...

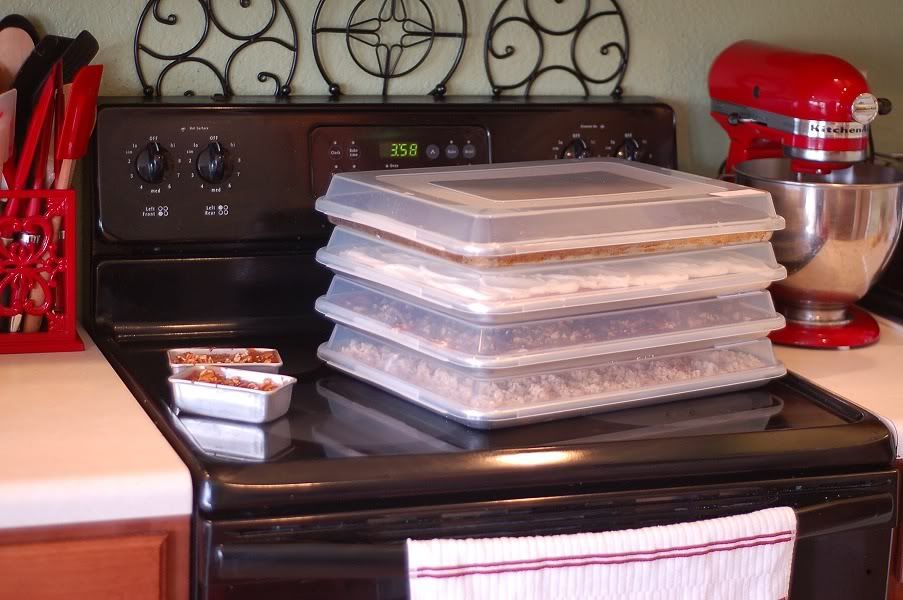
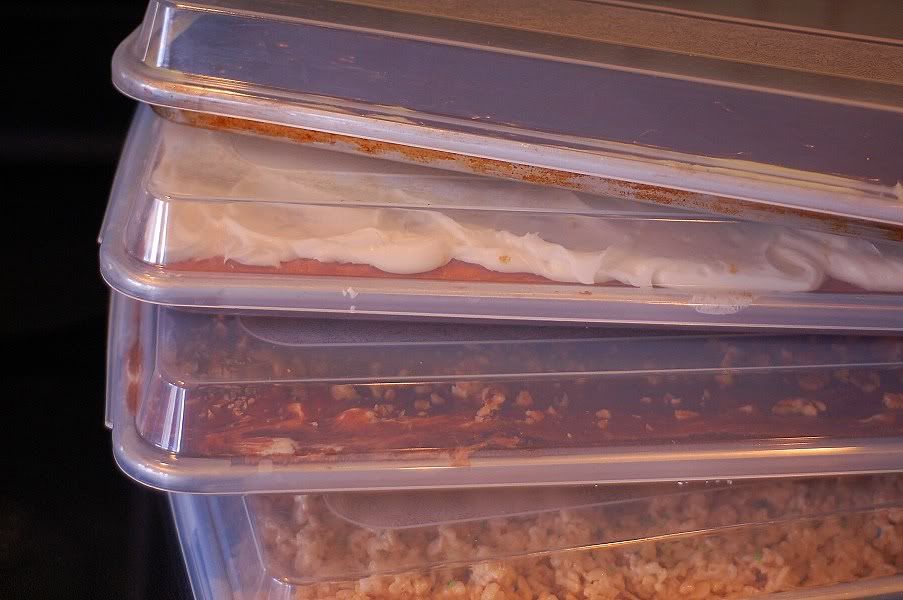
PhotobucketTop to bottom:
Mint Brownies (aka BYU Brownies)
Lemon Cake (this time I used a lemon cream cheese icing instead of the citrus glaze since I was out of juice)
Texas Sheet Cake
Rice Krispie Treats (from the box, plus some sprinkles to jazz them up!)

March 15, 2011

TWD- Cherry Sunshine Muffins

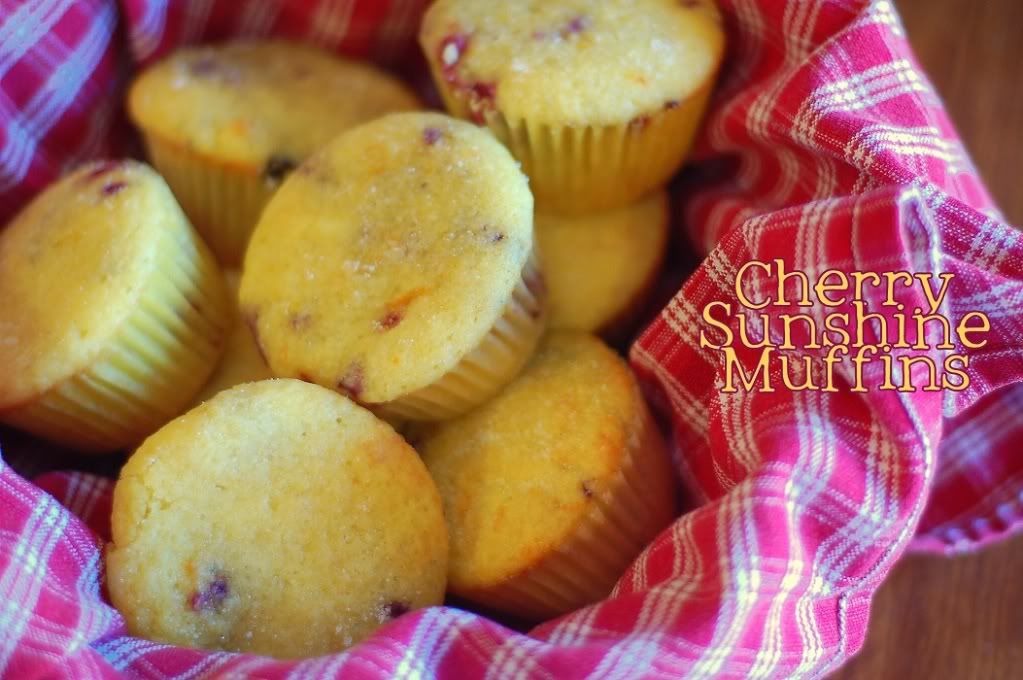
Cherry Sunshine Muffins
I have a love hate relationship with muffins. They're so easy and quick to make, so flexible on ingredients. They're also usually so full of butter- and they taste so good. So yeah, we try to limit our muffin making but of course we loved these! Next time I'll sub in some whole wheat flour to make up for the butter. With some extra tart dried cherries and lots of citrus zest and juice (orange and lemon both), I don't think you'd really notice. The trick to muffins is just to handle the batter delicately and to make sure that you don't try to work out every single lump. And the actual hardest part? Don't eat too many- don't let the dried fruit fool you, they're chock full of butter (and SO good!) And since I can't leave well enough alone, I brushed them with butter right out of the oven and sprinkled them with sugar so they were a little sparkly.

Photobucket
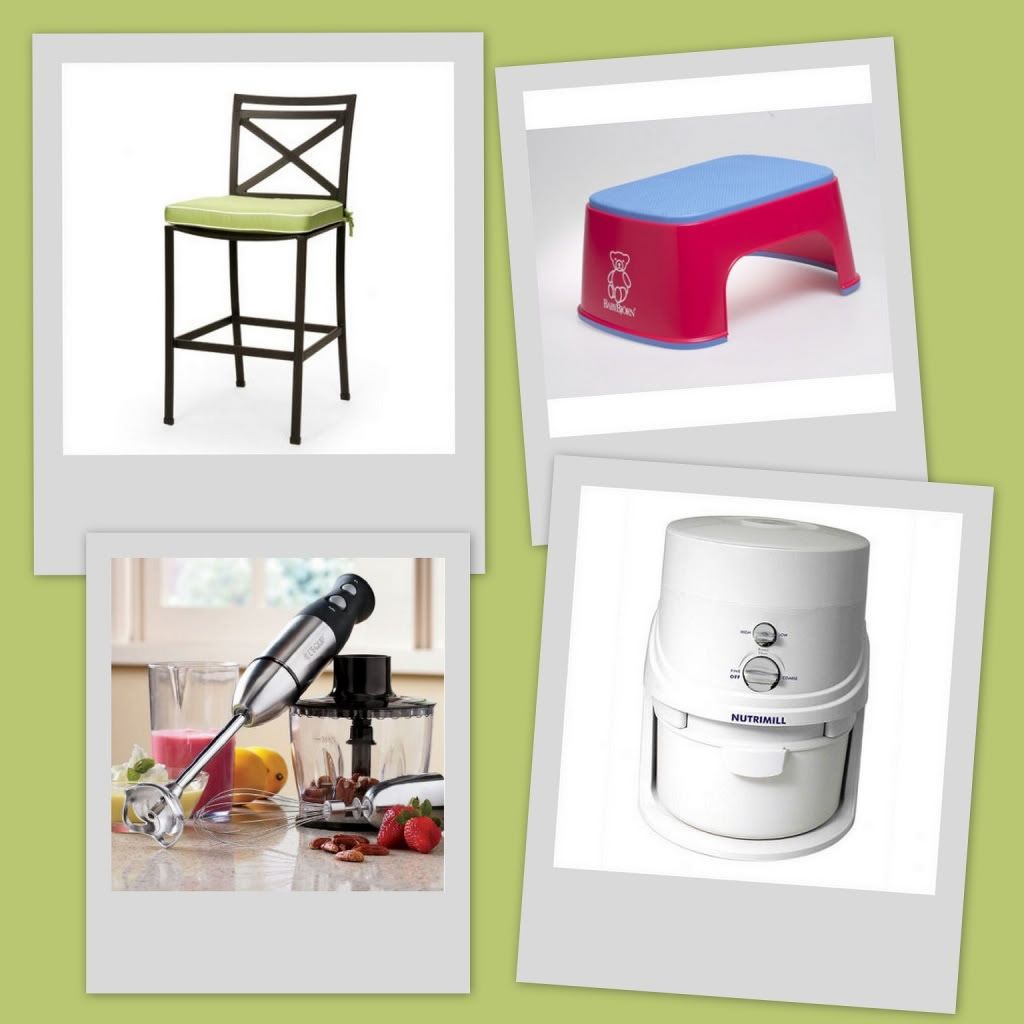
I'm super excited to have the chance to do another review for CSN Stores. I seem to always have furniture on my mind and love these gorgeous modern bar stools. Around here though it seems like baby step stools are more practical even if they aren't as pretty as that apple green cross-backed beauty above! As always though, kitchen stuff is on my mind. I've been trying to nicely steal my mom's immersion blender for ages and she's not budging (not fair considering I made her buy and fall in love with it in the first place!) My real hope is to finally get a grain mill. I've been mooching *I mean borrowing* my friends' Nutrimill when I make bread and I think it's about time, but I'm having a hard time committing to the cost! Suggestions anyone? Anyone of you have an love a Nutrimill? Fortunately they're all available on CSN Stores and I think it's going to be a win win, if I can ever decide!

PS Come back tomorrow for a nice, minty St. Patty's day treat!

February 7, 2011

Lemon Velvet Cupcakes

Lemon Velvet Cupcakes 
{printable recipe here}
I tend to post a lot of lemon recipes but not only is lemon one of my favorite flavors, but my parents also have an enormous lemon tree that produces hundreds (maybe more) of lemons each year. When I'm over, it's super convenient to run out to the tree and grab a handful of fruit, to make homemade lemonade, lemon curd, lemon poppyseed muffins, garlic rosemary lemon chicken, etc. Lemon cake of course is delicious and the simple addition of lemon zest to the frosting and the cake makes all the difference.

We started calling these "lemon velvet" when we had to come up with a new red velvet replacement after my tall man couldn't eat chocolate any more. I still enjoy red velvet but we make this crowd-pleaser more often. It doesn't stain like the red velvet but is based off the same easy recipe. Instead of starting with a German chocolate cake, I used a lemon mix and add the zest of two lemons (in addition to the vanilla, sour cream, and extra eggs to doctor the mix). Then for the light cream cheese frosting, I replace the milk with fresh squeezed lemon juice and add the zest of another lemon. Now is the perfect time of year to make these, but even when I don't have fresh lemons on the tree, I reach for my stock of zest and juice in the freezer that I've built up during the winter. It's not a lot of work but has a huge impact on flavor.

I've had a lot of people ask me about the meringue powder I put in my cupcake frosting. I buy the Wilton brand- you can get it at Walmart, Michaels, or Hobby Lobby (or at Amazon of course). I usually buy the big can at Michael's with a 40% off coupon for the best price. It lasts forever and just a tablespoon mixed into the frosting with the powdered sugar will help "set" your icing so it holds its shape after you frost the cupcakes. The end result is a lot better and there's no taste difference. Try it and let me know what you think.

Lemon Velvet CupcakesLemon Velvet Cupcakes with Lemon Cream Cheese Frosting
from Anne Strawberry
{printable recipe here}

1 cup sour cream (reduced fat is fine)
1/2 cup water
1/2 cup canola oil
3 eggs
1 tablespoon vanilla
zest of one or two lemons
1 box lemon cake mix (I prefer Betty Crocker and stock up when they are on sale)

Preheat the oven to 350.

Combine all ingredients in stand mixer and beat for two minutes until combined. Using a 2-tablespoon scoop, scoop into 24 paper-cup lined muffin tins.

Bake for 21-24 minutes or until cupcakes spring back slightly when touched and a tooth pick inserted into the middle comes out clean. Cool on racks and frost once completely cooled.

Lemon Cream Cheese Frosting


1 8 ounce package of cream cheese, softened (I like to use Neufchatel, less fat and I don't notice much difference)
1/2 cup butter, softened (one stick)
juice of one lemon (about two tablespoons)
1/2 teaspoon pure vanilla extract
zest of one lemon (about 1 teaspoon)
dash of salt
6 cups of powdered sugar (more or less to achieve desired consistency, this is a baseline)
1 Tablespoon meringue powder

In a mixer with the whisk attachment, combine the cream cheese and butter until light and fluffy. Add in the lemon juice, vanilla, zest, and salt, and blend.

Next, add the powdered sugar and meringue powder, cover the bowl of the mixer with a dish towel, and turn it on low until everything is combined. Then increase the speed for a minute or so until the frosting is light, fluffy, and delicious. The meringue powder will help set the frosting after it dries so it holds its shape.

January 18, 2011

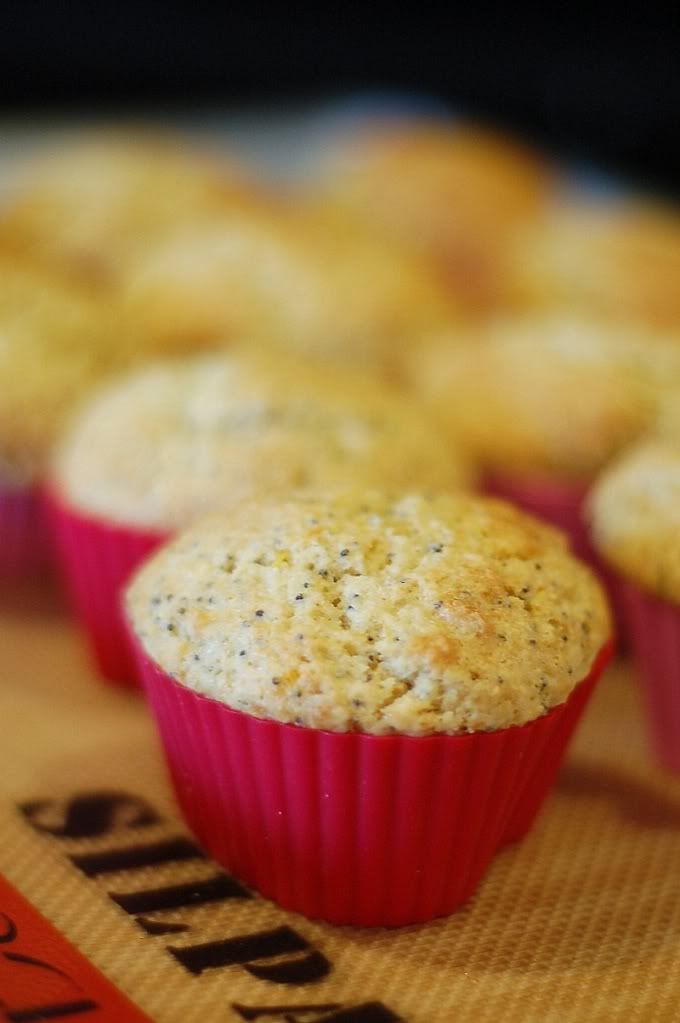
Orange Poppyseed Muffins

Orange PoppySeed Muffins 
I love to try a fancy, new dessert recipe but I also really appreciate a simple Tuesdays with Dorie recipe like these muffins. Right now it's citrus season and the trees are beautiful and heavy with delicious fruit, so I had a hard choice to make between lemon and orange for these babies. I went with orange merely because my little man asked so nicely (it is his favorite color still!) These muffins came together quickly and were super yummy, especially after the glaze went on top. I even subbed in 1/3 whole wheat flour and no one was the wiser. I can't seem to get my muffins to stay fresh more than one day (tips anyone?) but I am going to make these again for Sunday breakfast for sure. My favorite muffin from Dorie is still her Orange Berry muffins but this was a fun chance of pace. Get the recipe from Betsy or from Dorie's wonderful book here or try my favorite Lemon Poppyseed Muffin recipe. It's a classic. Just take it easy on the mixing and have a quick and special breakfast! Come back later this week for my first try with fondant (and overly ambitious pirate cupcakes for my little man's birthday!)

PS- I used some silicone muffin cups for the first time. NOT recommended in case you were wondering! I scored a whole stack of heart shaped ones for a buck at Goodwill at thought it would be fun, but instead of getting heart shaped muffins I have blobs in muffin liners that need to be washed (lame!) I do, however, 100 percent recommend buying a few Silpats to line your baking sheets. No more burned cookies or muffins, easy clean up, a million uses- I can't say enough about these things.

November 16, 2010

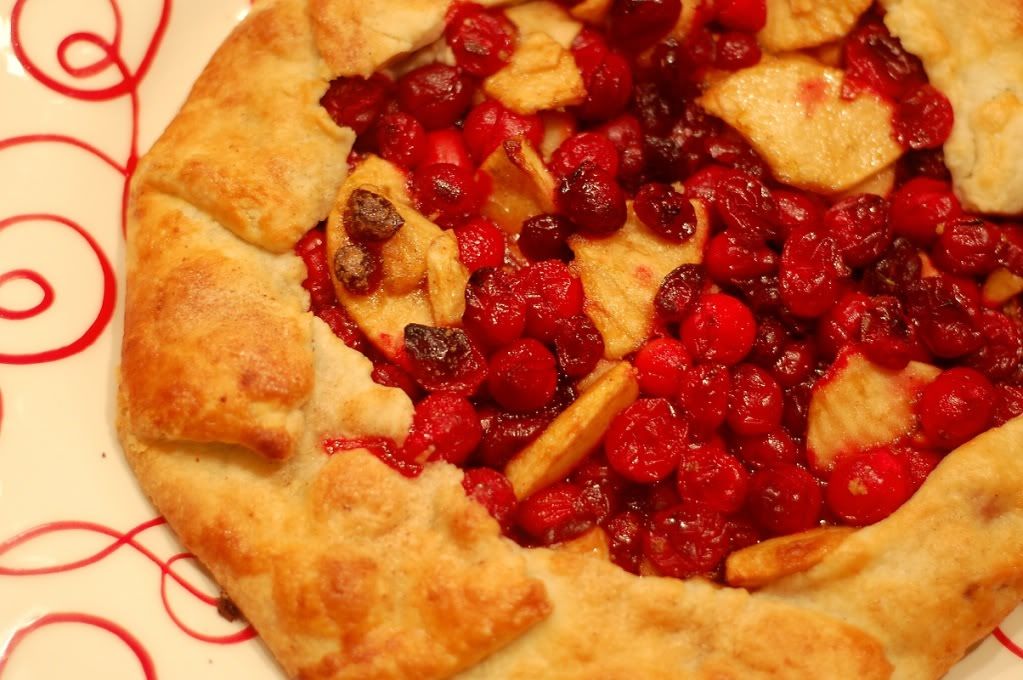
Cranberry Lime Galette & a Giveaway

Cranberry Lime Galette
It's Tuesday and today I have a quick and delicious cran-apple galette. I don't think most people know what a galette is, but it's actually just an open-faced pie. I think it might even be easier than a pie because there's no need to put a pretty crust on top or crimp (I know that bugs some people). Just roll out the dough, put the filling in the center, and fold over the edges. Bake and enjoy. Dorie's pie crust is absolutely amazing- buttery, easy, and delicious. This lime and cranberry combo is new to me but it's really fun and tangy- just make sure you use enough sugar to compensate for the tart, fresh cranberries.

Now for the giveaway. I'm sure you've heard about CSN Stores in the blog world before- where you can buy anything from a suitcase to a rice cooker (that's what I just bought from them this weekend- I'll let you know how I like it once it's here!). This time around I have a $75 store credit to CSN Stores (for US or Canada residents only). Just leave a comment and let me know what your favorite type of pie is- I'll leave the giveaway open until Friday at midnight. I love apple pie (so I put extra in this galette of course). Whatever pie you make for thanksgiving, I would try Dorie's amazing dough and her tip to put a little bit of graham or bread crumbs on the bottom to soak up juice- it makes all the difference.

Good for Almost Everything Pie Dough
adapted from Dorie Greenspan

Ingredients
3 cups all-purpose flour
1/4 cup sugar
1 teaspoon salt
2 sticks very cold unsalted butter, cut into tablespoon-size pieces
3/8 cup very cold (frozen is even better) Crisco (plain, not butter flavored), cut into 4 pieces
About 1/2 cup ice water

Put the flour, sugar and salt in a food processor fitted with a metal blade; pulse just to combine the ingredients. Drop in the butter and shortening and pulse only until the butter and shortening are cut into the flour. Don't overdo the mixing—what you're aiming for is to have pieces the size of fat green peas and others the size of barley.

Pulsing the machine on and off, add 3 tablespoons of the water—add a little water and pulse once; add some more water and pulse again; and keep going that way. Then use a few long pulses to get the water into the flour. If after a dozen or so pulses, the dough doesn't look evenly moistened or form soft curds, pulse in as much of the remaining water, or even a few drops more, to get a dough that will stick together when pinched. If you've got big pieces of butter, that's fine. The dough is ready and should be scraped out of the work bowl and on to a smooth work surface. (be careful not too add too much water- if the dough looks dry after adding most of the water, pinch it with your hands to check if it's coming together, and finish combining it by hand)

Shape the dough into a disk and wrap it. Refrigerate the dough at least 1 hour before rolling. The dough can be kept in the refrigerator for up to 5 days or frozen for up to 1 month.

October 28, 2010

Halloween Orange and Vanilla Bean Cupcakes

Orange Creamsicle Cupcakes{Orange Creamsicle Cupcakes- printable recipe here}
{Vanilla Bean Filled Cupcakes- printable recipe here}
Today my son had his first big Halloween party at his cute preschool. He dressed up as a pirate and was so excited- even down to his little drawn on goatee! His teacher asked for volunteers helping in the class room and bringing cupcakes and other treats. I wasn't chosen to make the cupcakes (oh the rejection!) but got to come be a "mom helper" instead. The kids were so cute and excited about every single thing that I'm sure they would have eaten cupcakes made out of dirt as long as they included brightly colored toppings. That said, either of these happy cupcakes would have been perfect for the party! Instead, the vanilla bean cupcakes were destined to go to my husband's work event, where they were happily devoured by a bunch of lawyers. Honestly, the little Disney-clad preschoolers couldn't have appreciated the pastry cream filled vanilla bean cupcakes as much as they adults. I'll save the Orange Creamsicle Cupcakes (in their brightly colored glory) for the littles! Have a safe and happy Halloween, surely filled with candy, costumes, and baked goods!

Halloween Vanilla Bean CupcakesAnne Strawberry's Vanilla Bean Cupcakes
{printable recipe here}
1 cup sour cream (reduced fat is fine)
1/2 cup water
1/2 cup canola oil
3 eggs
1 tablespoon vanilla
seeds scraped from one vanilla bean
1 box betty crocker french vanilla cake mix

Preheat the oven to 350 and line a muffin tin with cupcake liners. Place atop a baking sheet and set aside.

Combine all ingredients in stand mixer and beat for two minutes until well combined. Using a 2-tablespoon scoop, scoop into muffin tins.

Bake for 21-24 minutes or until cupcakes spring back slightly when touched and a tooth pick inserted into the middle comes out clean. Cool on racks and frost once completely cooled.


Anne Strawberry's Favorite Frosting

1/2 cup butter, softened (one stick)
1 package of cream cheese, softened (I like to use Neufchatel, less fat and I don't notice much difference)

2 Tablespoons milk
2 teaspoon pure vanilla extract or the seeds of one vanilla pod, scraped
dash of salt
6 cups of powdered sugar (more or less to achieve desired consistency, this is a baseline)
1 Tablespoon meringue powder

In a mixer with the whisk attachment, combine the cream cheese and butter until light and fluffy. Add in the milk, vanilla, and salt, and blend.

Next, add the powdered sugar and meringue powder, cover the bowl of the mixer with a dish towel, and turn it on low until everything is combined. Then increase the speed for a minute or so until the frosting is light, fluffy, and delicious. The meringue powder will help set the frosting after it dries so it holds its shape.

Variation:
Add 1 T. Lemon or orange zest and substitute juice for the milk to make a tangy citrus frosting

For the filling:
Anne Strawberry's Slightly Lightened Pastry Cream
After the cupcakes have cooled, fit a pastry bag with a long, medium tip. Fill with cooled pastry cream and squeeze one or two tablespoons into the center of each cupcake, filling until the top of the cupcake starts to bulge slightly. Frost and decorate the cupcakes and serve.

July 12, 2010

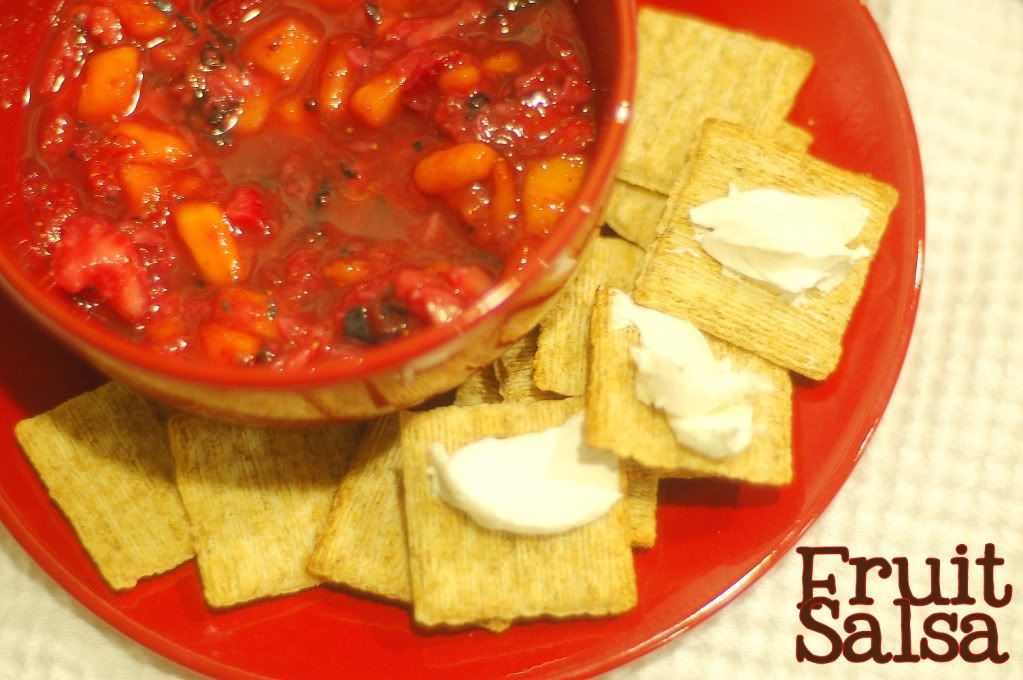
Fruit Salsa with Triscuits and Cream Cheese

Photobucket
{printable recipe here}
Oh it's so hot. It's not as bad as last summer (when I was super pregnant) but it's really, really hot. To compensate, we've been spending all of our time in the pool. Baby Strawberry, Ms. Happy herself, loves it of course and my Little Man is getting used to the idea. I think three is the age of irrational fears but hey, we're all afraid of things (me? Mayonaise. SUPER creepy.) Well last weekend was no exception and we were in the water almost all day Saturday. We had a Church swim party and there was also a Salsa contest. While it seems contradictory I love super hot food in the summer and I think everyone else agreed, practically drinking up the hot salsas. I brought this fruit salsa for something different and even though it didn't win, when I took it home and tried it on top of triscuits I couldn't believe how great the combo was. Then I got thinking, "This just needs some cream cheese" (not a rare thought for me, I'll admit) and so I spread a little on and it was perfect. Creamy, crunchy, sweet, salty, everything. It even distracted me from the heat so I think this is a winner!

Have you heard about the home farming movement from Triscuit? They sent me a couple of boxes of Triscuits that include seed packets to start an herb garden. I have a pretty good little one growing on my front patio and love the smell of the fresh basil as I walk outside. They also included a giftcard to buy supplies to grow the herbs (basil and dill) and I have a new little pot sitting on my counter waiting to sprout. I've never grown anything from a seed before so we'll see. It was a really fun little project for my Little Man and I and Baby Strawberry loves Triscuits (I love that they don't make an enormous mess!) Try the reduced fat Triscuits with this salsa (and my favorite- Neufchatel reduced fat cream cheese) and let me know what you think.

Anne Strawberry's Fruit Salsa
{printable recipe here}
Note: This recipe easily accomodates whatever fruit you have on hand- try to chop everything to the same size for better presentation. A food processor makes nice work of this (particularly with the copious strawberries) but make sure to pulse, not puree, to end up with perfectly chopped fruit.

2 pounds of strawberries, chopped
2 peaches, peeled and diced
2 apples, peeled, cored, and chopped
1 pint of blueberries, roughly chopped
1 mango, peeled and diced
2 tablespoons fruit jam (I used raspberry)
2 tablespoons brown sugar
zest and juice of two limes
3 ounces neufchatel cheese, softened
1 box of reduced fat triscuits

Prepare all of the fruit and stir together into a large bowl. Stir in the jam, brown sugar, zest, and lime juice until nicely combined. Refrigerate for an hour and serve with Triscuits spread with cream cheese.

June 29, 2010

TWD- Citrus Drenched Cake

Photobucket
{printable recipe here}
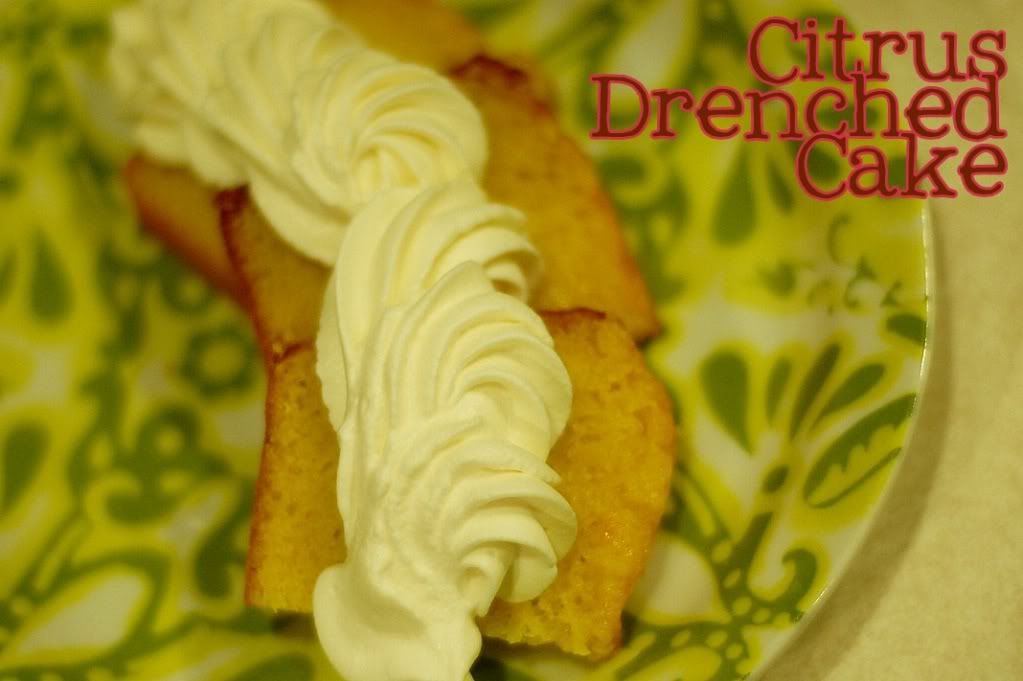
Do I put whipped cream on everything? No. Really, no, but apparently I do it put it on almost everything that goes on my blog. And of course, whipped cream was a delicious accompaniment to my loose adaptation of Dorie's Rum Drenched Vanilla cake (thanks for the great choice, Wendy!) After ten too many trips to the store, I opted to make do with what was in the kitchen, so my halved version of the recipe doesn't include the rum, the vanilla bean, or even the cream (except on top- I thankfully had some of that in the fridge!) It does have lots of zest and fresh juice. It's delicious. Just make sure you don't underbake it, like I have a tendency to do!

PhotobucketCitrus Drenched Cake
from Anne Strawberry
{printable recipe here}
adapted from Baking by Dorie Greenspan

For the Cake-

1 1/3 cups all-purpose flour
1 1/4 teaspoons baking powder
Pinch of salt
1 1/4 cups of sugar
1 teaspoon pure vanilla extract
1 teaspoon lemon extract
1 teaspoon lemon or orange zest
3 large eggs, room temperature
1/3 cup of heavy cream (I used milk- it was fine, but I'm sure cream would make this even better!)
1 stick butter, melted and cooled

For the Syrup
1/3 cup water
1/4 cup sugar
1/4 cup freshly squeezed orange juice

Center a rack in the oven and preheat the oven to 350. Butter a 8 1/2-x-4 1/2-x-2 1/2 -inch loaf pan, dust the inside with flour and tap out the excess. Place the pan on an insulated baking sheet or on two regular sheets stacked one on top of the other.

Sift the flour, baking powder and salt together.

Put the sugar and the lemon zest in a large bowl and, working with your fingers, rub them together until the sugar is moist and fragrant. (If you are using vanilla extract, add it later, after you’ve added the eggs.) Add the eggs and whisk them into the sugar, beating until they are thoroughly incorporated. Whisk in the extract, if you are using it, then whisk in the cream, followed by the rum. Continuing with the whisk or switching to a large rubber spatula, gently stir in the dry ingredients in 3 or 4 additions; the batter will be smooth and thick. Finish by folding in the melted butter in 2 or 3 additions. Pour the batter into the pans, smoothing the tops with a rubber spatula.

Bake for 55 to 60 minutes, or until a knife inserted into the center of the cakes comes out clean. (As soon as the cakes go into the oven, make the syrup.) After about 30 minutes in the oven, check the cakes for color–if they are browning too quickly, cover them lightly with foil tents.
Meanwhile, Make the Syrup: Stir the water and sugar together in a medium saucepan over medium heat until the sugar melts, then bring to a boil. Remove the pan from the heat and stir in the juice. Pour the syrup into a heatproof bowl and let cool.

When the cake tests done, transfer to a wire rack to cool for 5 minutes before unmolding and turning right side up on the rack. Place the rack over a baking sheet lined with wax paper and, using a thin skewer, cake tester or thin-blade sharp knife, poke holes all over the cake. Brush all over with the syrup, working slowly so that the cake sops it up. Cool to room temperature.

June 13, 2010

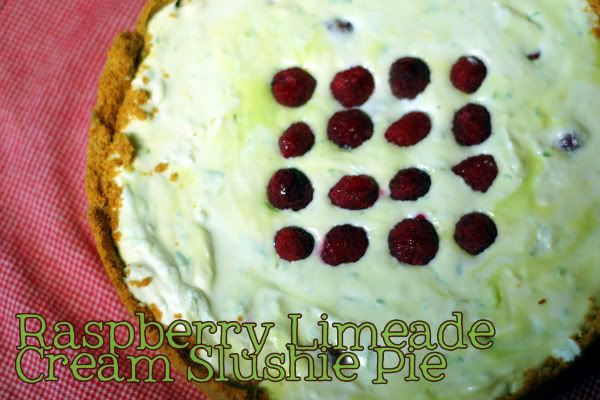
Raspberry Limeade Cream Slushie Pie

Photobucket
{printable recipe here}
Oh I'm so sorry I fell off the face of the earth and left my blog all... stale I guess! Well, I'm back. We took a last minute trip to Utah and I've been in recovery mode since. My laundry (and kids' sleep schedules) are finally back under control and I'm excited to post some fun recipes I've been working on. For today, though, I have my submission to this month's "You Want Pies with That" event- and the theme is Summer Drinks. Well, I don't really drink anything but water (or an occasional glass of milk with a cookie) but everytime I drive by Sonic I crave a cream slushie. So, when limes and berries were on sale, I knew my choice was made for me.

Now I really wanted this pie to turn out cute and fun, so I thought I would swirl the two batters together for some color contrast. I froze the pie and when I served it up it was so SOFT! I'll admit I was pretty heart broken. Just now, though, I realized my problem- I had forgotten to bake the key lime for a few minutes (I think I mixed my two baking favorites, Ina and Dorie, up- Ina's key lime pie is frozen but Dorie bakes hers first!) So, I guess the moral of the story is to "do as I say not as I do". Either way, this was yummy and I'm going to make it again and actually follow my own proper directions. Ahem. I think I needed a nice summer drink to cool my head down and pay attention! Don't forget to check out the rest of the Pies!

Raspberry Limeade Cream Slushie Pie
{printable recipe here}
from Anne Strawberry

For the crust:
1 3/4 cups graham cracker crumbs (about one sleeve)
3 tablespoons sugar
1/2 stick (4 tablespoons) unsalted butter, melted
1 teaspoon Lime Zest

For the lime filling:
4 large egg yolks
1 14-ounce can sweetened condensed milk
1/2 C. Fresh Key (or regular) lime juice (from about 5 regular limes)
1 teaspoon Lime Zest


For the cheesecake filling:
1 package Neufchatel (reduced fat cream cheese), softened
1/4 cup sugar
1 cup whipped cream (the recipe calls for Cool whip which would be fine I'm sure, but I prefer the real deal!)
1 teaspoon Lime Zest

To make the crust:

Butter a 9-inch springform pan (or pie plate or tart pan). Stir the crumbs and sugar together in a medium bowl. Pour over the melted butter and stir until all of the dry ingredients are uniformly moist. Turn the ingredients into the buttered springform pan and use your fingers to pat an even layer of crumbs along the bottom of the pan and about halfway up the sides. Don't worry if the sides are not perfectly even or if the crumbs reach above or below the midway mark on the sides—this doesn't have to be a precision job. Put the pan in the freezer while you preheat the oven.

Center a rack in the oven, preheat the oven to 350°F and place the springform on a baking sheet. Bake for 10 minutes. Set the crust aside to cool on a rack while you make the filling.

Working with a stand mixer, preferably fitted with a paddle attachment, or with a hand mixer in a large bowl beat the egg yolks and lime zest at high speed until thick and pale. Reduce the mixer speed to low and beat in the condensed milk. Still on low, add half of the lime juice. When it is incorporated, add the remaining juice, again mixing until it is blended. Pour into the shell and bake the pie for 12 minutes. Transfer the pie to a cooling rack and cool for 15 minutes.

Meanwhile, whip the cream cheese and sugar until it's soft and fluffy. Fold in the whipped cream and lime zest and pour over the key lime pie. Stir in or garnish with some raspberries and transfer to the freezer for an hour or two. Serve and enjoy! 

Crust and Lime filling adapted from Baking by Dorie Greenspan, Cheesecake recipe from Kraft Foods

March 26, 2010

Strawberry Lemonade Bars

{printable recipe here}
Auburn called to see if she could test drive my food processor for an awesome new recipe she found. Lemon, strawberries, pastry crust? You bet! These are made with a quick crust pressed into a pan and then the strawberry lemon puree is poured over top. The whole thing took us onto 10 minutes or so, even with five million little children asking for drinks, balls, attention, treats, you know. Don't forget to take the extra 30 seconds to line the pan with foil before starting. After they cool, lift them right out and slice. They'll look better, make less waste, and less mess around the edges of the pan. Not that my husband MINDS cleaning up that mess!

We made these in a big baking dish but decided we'd like them better a little thicker, so I'm including my changes below. You could also make this without a food processor if you don't have one by pureeing the strawberries in a blender. Whichever method you use I would remove the seeds from the strawberry puree with a mesh sieve. The final product will have a much better texture that way.

Come back Monday for a giveaway!

Strawberry Lemonade Bars
from AnneStrawberry
adapted from Baking Bites

for the crust-
1/4 cup sugar
1/2 cup butter, room temperature
1 1/2 cups all purpose flour
1/4 tsp salt

for the filling-
1 cup fresh squeezed lemon juice
3 teaspoons lemon zest
1/2 cup pureed strawberries (about 3/4 cup berries, pureed and seeds removed)
1 1/4 cups sugar
4 large eggs
1/4 cup all purpose flour
1/2 teaspoon baking powder
1/4 teaspoon salt

Preheat oven to 350F. Line a small rectangular pan with foil (a 9 x 13 works for thinner bars, but I like my small rectangular Pyrex- it's bigger than a square dish but not too big).
In a large bowl, cream together sugar and butter till fluffy. Gradually beat in flour and salt until mixture is crumbly. Pour into prepared pan and lightly press into an even layer. Bake for about 17 minutes, until set at the edges.

Meanwhile, prepare the filling. In the bowl of a food processor, combine lemon juice, lemon zest, strawberry puree, sugar and eggs and process until smooth. Add in flour, baking powder and salt, then pulse until smooth.

Gently pour the filling over the hot crust when it has finished baking. Return pan to oven and bake for about 30 minutes. The filling should be a little set. It may have a sugary crust on top- just make sure it's semi solid. It will continue to harden in the fridge.

Cool completely in the fridge then slice with a damp knife, cleaning between cuts to get the best final product. Top with sliced strawberries if desired. Help bars to keep their shape by storing in the fridge.

February 11, 2010

Happy Valentine's (Cookies)!

{printable recipe here}

Happy Valentine's! It's amazing to me how fast time flies. Last year we sent Valentine's cards to our families announcing Baby Strawberry's coming arrival in September. Now she's smiling, begging to try real food, and getting to be more fun every day. She's also pretty insistent on having my undivided attention so we've been keeping things pretty simple around here. You can't get much better than sugar cookies (especially since my Valentine can't eat chocolate!) I'm hoping to frost a bunch for the kids at Church on Sunday but for me I really love a yummy, light orange glaze. I cut the centers out with a small heart cutter and was surprised that everyone wanted the tiny hearts the most. I'll probably make just those next time! Thanks for reading along with my little blog. I'd give you each a cookie if I could!

Don't forget- the $50 Safeway gift card giveaway ends tomorrow night. Enter here.

Grandma's All Occasion Sugar Cookie Dough
from Dorie Greenspan- see the full recipe on page 146 here

{printable recipe here}

1 stick plus 2 tablespoons butter, softened
1 cup sugar
1 large egg plus 1 yolk
1 teaspoon vanilla
2 cups flour
1/2 teaspoon salt
1/2 teaspoon baking powder

Cream together butter and sugar until light and fluffy. Add eggs and vanilla and beat thoroughly. Add in dry ingredients slowly mix until just combined, being careful not to over mix. Divide dough into two disks, wrap in saran wrap, and refrigerate for at least 30 minutes, or until nice and chilled (sometimes I use frozen flour to speed the process up!)

Preheat the over to 350. Line two baking sheets with silicone mats or parchment. Roll out dough onto lightly floured surface to about 3/8 or 1/2 inch thickness and cut cookies out with cutters. Bake for 8 minutes for soft cookies (my favorite), 10 for crisp. Remove from oven, place onto cooling racks, and frost after cooled.

Glaze
1 cup powdered sugar
Zest and juice of one orange
1 teaspoon meringue powder (optional)

Combine all ingredients in a small bowl until even and shiny. Dip cookies in glaze and set on a cooling rack to harden. Enjoy!

January 28, 2010

Orange Creamsicle Cupcakes

{printable recipe here}

My little man is three. I'm in total shock. He's been all about birthdays lately (what with everyone else in the family having a summer/fall day- so he's had a lot of birthday experiences to remember!) When his started getting close he kept asking for orange cupcakes and orange balloons. My mom asked him a couple weeks ago what we would have for his birthday and he again insisted, "People always have cupcakes for their birthdays!" She then said, "Sometimes people have brownies," to which he quickly replied, "Cupcakes with brownies on top?"

Maybe next year I'll make the cupcakes with brownies on top happen. For this year, though, we made Orange Cupcakes (my little man is a very willing helper when it comes to baked goods- sits right on the counter and is in charge of dumping in ingredients and locking and unlocking the mixer). I flavored a yellow cake with orange zest and made orange frosting by adding orange zest and subbing fresh orange juice for the milk in my usual cream cheese frosting. I also made a batch of chocolate cupcakes, thinking only the kids would go for the obnoxious orange colored food. I was wrong- the newly dubbed "Orange Creamsicle Cupcakes" flew off the pan (which explains the crappy picture, no time to play with your food when guests are clamoring!) Try these- they're good for adults and kids alike, although I would definitely go with a milder orange color if you aren't catering to the kiddos!

Orange Creamsicle Cupcakes for my Little Man
by Anne Strawberry

{printable recipe here}

1/2 Cup Water
1/2 Cup Oil
1 Cup Sour Cream
1/2 teaspoon vanilla
3 eggs
Zest from one Orange, finely grated
1 Yellow Cake Mix (I like Betty Crocker's)
Orange food coloring (or red and yellow)

Preheat the oven to 350.

Combine all ingredients except food coloring in stand mixer and mix on low to combine, about one minute. Then increase speed to medium high for two more minutes until well blended. Add drops of food coloring to achieve desired color and mix lightly until incorporated.

Using an ice cream scoop, portion batter into lined muffin tins and bake for 20 minutes, or until cupcakes spring back which touched with a finger tip and they look done.

Orange Cream Cheese Frosting
1 block Neufchatel (reduced fat) cream cheese, softened
1 stick of butter, softened
1 teaspoon orange zest
1/2 bag (1 pound) powdered sugar
Fresh squeezed orange juice (from the zested oranges), as needed (about 1 tablespoon)

Cream the cream cheese, butter, and orange zest until smooth and well combined. With the mixer off, add the powdered sugar. Cover with a clean dish towel and combine on low speed until the sugar is incorporated. Remove towel and increase speed to make a smooth frosting, adding orange juice or more sugar until desired consistency is reached. Using a large tip (or a gallon baggie with a small corner clipped off) pipe onto cooled cupcakes.

December 5, 2009

Lemon Tart Giveaway

Recently I heard about the book Lemon Tart- a culinary mystery. I couldn't get over the "culinary mystery" part so I decided to check it out. This book centers around a homemaker who loves to bake and includes the recipes along the way. I loved reading it and couldn't wait to try a recipe- so of course, I made the lemon tart. It was simple enough that I could make it with Little Man's help and Baby Strawberry in my arms. That's the kind of recipe I prefer these days. So really, anyone can make it. You could even sub out a graham crust if you don't want to bother with the pastry.

C&H also sent me some money to buy some of their sugar (which I did, in bulk, at Costco. I'm not the only one that buys the 30 pound bag and fills a huge bucket in the pantry, right? Right? Well, I know my mom does too, so I don't feel too bad). I used the granulated sugar in the tart and the powdered sugar in the crust and whipped cream. My husband loves to eat the C&H dark brown sugar right out of the bag. Don't let him know I told you that. They also have a huge selection of holiday recipes on their site. I'm going to feature one next week... as soon as I pick which one to try. I'm thinking maybe the egg-free sugar cookie dough for my beautiful (allergic to eggs) niece Carlee or the peanut butter topped toffee bars for my Tall Man. He's going to get hungry after he finishes off that bag of brown sugar (fortunately I have several back ups, he's lucky to be married to a stockpiler!) Either way, check back next week. It's going to be delicious.

You can read the first chapter here and see the recipes she has included. There is also a nice interview here about the book and how she came up with the ideas. I also contacted the author and she agreed to giveaway a copy of the book to one of my readers. Leave a comment letting me know the best book you've read lately. And don't forget to check out Lemon Tart and the next in the series, English Trifle for a fun and refreshing read. You can find out more about Josi Kilpack at her blog or site. Thanks Josi for the fun giveaway!

Here's a culinary mystery for you... who swiped a lick of that cream? I'll give you one guess...

Lemon Tart
adapted from the book "Lemon Tart" by Josi Kilpack

Crust
1 cup all-purpose flour
1/3 cup C&H powdered sugar
Pinch of salt
1/2 cup (1 stick) cold unsalted butter, cut into smaller pieces
1 egg yolk, beaten with 1 tablespoon cold water (I added this to get my dough to come together)

Preheat oven to 425 degrees. In a food processor or mixer, combine ingredients for crust. Pulse together until a dough starts to form in clumps (then I pulsed in the egg). Press into tart pan, making sure to cover bottom and sides evenly. Pierve the bottom of the crust with a fork and place in freezer for 10 to 15 minutes.

Place tart on a cookie sheet and bake until crust is a golden-brown color, approximately 12 minutes. Remove from oven and let cool.

Filling (I made about double of this, using the whole stick of cream cheese and 3 eggs, since my tart pan was especially deep)

5 ounces cream cheese, softened (I used neufchatel)
1/2 cup C&H granulated cane sugar (I would use another 1/4 cup like she suggests since my Tall Man likes things sweet)
3/4 cup fresh lemon juice
2 large eggs
zest from one lemon (get zest from lemon before juicing)

Reduce oven temperature to 350. Mix cream cheese with electric beaters until smooth. Add sugar. Mix until well blended. Add the eggs one at a time, mixing thoroughly after each egg. Stop and scrape bowl halfway through. Add the lemon juice and zest and mix until smooth.

Pour the filling into the tart crust and bake on cookie sheet for 20 to 30 minutes or until filling is set. Let tart cool on wire cooling rack. Cover and refrigerate until well chilled.

Use whipped cream as an optional topping. It can be piped on in stars or served on top with each piece (I liked lots and lots of top of mine!).


The giveaway will accept entries until next Thursday night, December 10, at midnight AZ time. U.S. addresses only and one entry per person please.

(This giveaway is now closed... thanks for all the entries!)

November 5, 2009

Orange Rolls (quick and light... you can do it!)

{printable recipe}

Okay maybe "light" isn't the best word for these rolls, but compared to some I've made and eaten (and certainly enjoyed) these are pretty light. I started with my new favorite cinnamon roll dough and instead of using lemon zest in the dough, I used orange zest. Then after I rolled the dough out I covered it with sugar rubbed with the zest of an orange, a fragrant, delicious mixture. Roll it up, slice, rise, bake. The if you want to go along with the "light" idea top with a thin powdered sugar glaze. Or go for the good stuff with a nice orange cream cheese frosting.

Halloween is over, my friends, and the holidays are here. Are you ready? Soon it will be Christmas and the citrus trees will be heavy with ripe oranges. I'm going to pretend like its already here and make another batch of these. You should too! And really, if my little man can do this, I know you can... your family will thank you!

Orange Rolls
adapted from the Bread Baker's Apprentice by Peter Reinhart

{printable recipe}

Yields one big baking sheet worth of rolls (about 12-18 depending on how you slice them- I like a little variation so people can choose a big or small roll- use a bench cutter for neat slices or dental floss in a pinch)

6 1/2 tablespoons sugar
1 teaspoon salt
5 1/2 tablespoons shortening or butter, at room temperature
1 large egg, slightly beaten
grated zest of two oranges, divided use
3 1/2 cups bread or all purpose flour (I used King Arthur's bread flour)
2 teaspoons instant yeast
1 1/8 to 1 1/4 cups milk, room temperature
1/2 cup sugar (for filling)

Cream together sugar, salt, and shortening on medium high speed in mixer with paddle attachment. Whip in the egg and one teaspoon of the orange zest until smooth. Then add the flour, yeast, and milk. Mix on low speed until the dough forms a ball. Switch to the dough hook and mix for about 10 minutes on medium, or until the dough is silky and supple, tacky but not sticky. Add a little flour or water if necessary to attain this texture.

Lightly oil a bowl and transfer the dough into it, cover, and let rise for about 2 hours, or until doubled in size.

Rub together remaining orange zest with 1/2 cup sugar in a small bowl until fragrant.

Lightly flour or oil a counter and roll the dough into a rectangle about 2/3 inch thick, or 18 by 9 inches wide. Sprinkle the orange sugar over the dough and roll it up into a log, with the seam down. Slice the log, making the pieces about an inch thick. Place on a parchment or silpat lined baking sheet and let rise until nearly doubled (about an hour in my lovely desert home).

Bake at 350 on the middle rack for 20 to 30 minutes, or until gold brown. Remove from oven, let cool, and glaze with powdered sugar icing or cream cheese icing.

Orange Cream Cheese Frosting
1 block Neufchatel (reduced fat) cream cheese, softened
1 stick of butter, softened
1 teaspoon orange zest
1/2 bag (1 pound) powdered sugar
Fresh squeezed orange juice (from the zested oranges), as needed (about 1 tablespoon)

Cream the cream cheese, butter, and orange zest until smooth and well combined. With the mixer off, add the powdered sugar. Cover with a clean dish towel and combine on low speed until the sugar is incorporated. Remove towel and increase speed to make a smooth frosting, adding orange juice until desired consistency is reached.

Spread on slightly cooled orange rolls and enjoy!

August 25, 2009

TWD- Creamy Lime Pie

I LOVE lime. I love it so much that the lime tree was the first we planted at our new house. I'll take my lime squeezed over buttered and powdered sugar french toast, on top of a shrimp taco, in my water, and my goodness, in dessert? Even better! So I was pumped to see the Creamiest Lime Cream Meringue Pie chosen for this week's Tuesdays with Dorie recipe.
I spent all day in the kitchen Monday making Greek food (I'll post the Greek Panzanella soon) for my brother's birthday, though, and by the time I went to make the pie I realized I didn't have the four hours necessary for fridge time. I hated to make gloppy, not-quite-set pie (though let's be honest, I would have been more than happy just to drink the lime cream- it looks so good), so I just opted for my version of the Florida Pie. It's quick, it's easy (so easy I feel almost like Sandra Lee, /gag), and it's a crowd-pleaser.

Of course it helps when the crowd is all starving 21 and 22 year old boys (and my little man- he insisted on sitting with "da boys"). While they'll eat anything and everything (they did, too, there's not one scrap of leftovers for tomorrow) this really is a delicious pie. Topped with whipped cream and with all the refreshing lime flavor, this pie's a winner.

Summer Key Lime Pie
Adapted from Baking by Dorie Greenspan

Note- I used a regular pie crust this time, but a graham comes together in much less time and tastes great too- either way you can't go wrong!


For the crust:
1 3/4 cups graham cracker crumbs (about one sleeve)
3 tablespoons sugar
1/2 stick (4 tablespoons) unsalted butter, melted

For the filling:
4 large egg yolks
1 14-ounce can sweetened condensed milk
1/2 C. Fresh Key (or regular) lime juice (from about 5 regular limes)
1 teaspoon Lime Zest

To make the crust:

Butter a 9-inch springform pan (or pie plate or tart pan). Stir the crumbs and sugar together in a medium bowl. Pour over the melted butter and stir until all of the dry ingredients are uniformly moist. Turn the ingredients into the buttered springform pan and use your fingers to pat an even layer of crumbs along the bottom of the pan and about halfway up the sides. Don't worry if the sides are not perfectly even or if the crumbs reach above or below the midway mark on the sides—this doesn't have to be a precision job. Put the pan in the freezer while you preheat the oven.

Center a rack in the oven, preheat the oven to 350°F and place the springform on a baking sheet. Bake for 10 minutes. Set the crust aside to cool on a rack while you make the filling.

Center a rack in the oven and preheat the oven to 350 degrees F. Put the pie plate on a baking sheet lined with parchment of a silicone mat.

Working with a stand mixer, preferably fitted with a paddle attachment, or with a hand mixer in a large bowl beat the egg yolks and lime zest at high speed until thick and pale. Reduce the mixer speed to low and beat in the condensed milk. Still on low, add half of the lime juice. When it is incorporated, add the remaining juice, again mixing until it is blended. Bake the pie for 12 minutes. Transfer the pie to a cooling rack and cool for 15 minutes, then freeze the pie for at least 1 hour. Serve with whipped cream and garnish with lime zest or lime wedges.

July 6, 2009

Summer Key Lime Pie

I've spent every summer of my life (except one in Utah and half of one in Paris) in Arizona. Let me tell you, summer here isn't about running around enjoying the weather and all the beautiful outdoor furniture Pottery Barn keeps emailing me. It's about surviving. And swimming. This is the first Arizona summer I've enjoyed "pregnant" (29 weeks today!) so I've really been trying to avoid the heat as much as possible.

This month's Pies with That challenge is to create a pie that means summer to you. While it is blistering hot and I'm aching for a nice February day, I've always loved living here and I'm more than willing to put up with the heat. I've been thinking a lot lately, too, that since I love my September birthday, I have to pay for it for my own daughter. So there you have it. I'm resorting to turning on every fan in the house, drinking tons of ice cold water, and eating lots of frozen dessert to get through these last seventy something days. I thought Dorie's Florida Pie was the perfect rendition of summer for me because it's refreshingly light and cool, only takes a couple of minutes in the oven (10 for the crust, which you could buy theoretically but I wouldn't recommend, especially since you can pile the crumbs high for a beautiful crust no problem, and 12 for the filling), and it includes coconut, which has always reminded me of sunblock. I know it's supposed to be the other way around, but I can't hardly smell coconut flavoring without picturing a public pool. Between that and the texture issue, I left it out. I needed this cooling, summer refreshment sans banana boat. Top it with shredded coconut if you're feeling daring. Keep this pie in the freezer for an extra refreshing treat, or let it soften for a few minutes if you're enjoying one of those Pottery Barn type summers I've read about.

In my anticipation of this pie, I couldn't wait to eat it. I took two quick pictures and served up a piece for my son and I to share. We were almost done when he said, "Wait Mommy!" He ran to the other room and found his toy camera and when he returned he said, "Take a picture Mommy!" After he did his thing, he figured we could finish off our slice. Wow, my poor kid. He is only two...

Summer Key Lime Pie
Adapted from Baking by Dorie Greenspan

For the crust:
1 3/4 cups graham cracker crumbs (about one sleeve)
3 tablespoons sugar
1/2 stick (4 tablespoons) unsalted butter, melted

For the filling:
4 large egg yolks
1 14-ounce can sweetened condensed milk
1/2 C. Fresh Key (or regular) lime juice (from about 5 regular limes)
1 teaspoon Lime Zest

To make the crust:

Butter a 9-inch springform pan (or pie plate or tart pan). Stir the crumbs and sugar together in a medium bowl. Pour over the melted butter and stir until all of the dry ingredients are uniformly moist. Turn the ingredients into the buttered springform pan and use your fingers to pat an even layer of crumbs along the bottom of the pan and about halfway up the sides. Don't worry if the sides are not perfectly even or if the crumbs reach above or below the midway mark on the sides—this doesn't have to be a precision job. Put the pan in the freezer while you preheat the oven.

Center a rack in the oven, preheat the oven to 350°F and place the springform on a baking sheet. Bake for 10 minutes. Set the crust aside to cool on a rack while you make the filling.

Center a rack in the oven and preheat the oven to 350 degrees F. Put the pie plate on a baking sheet lined with parchment of a silicone mat.

Working with a stand mixer, preferably fitted with a paddle attachment, or with a hand mixer in a large bowl beat the egg yolks and lime zest at high speed until thick and pale. Reduce the mixer speed to low and beat in the condensed milk. Still on low, add half of the lime juice. When it is incorporated, add the remaining juice, again mixing until it is blended. Bake the pie for 12 minutes. Transfer the pie to a cooling rack and cool for 15 minutes, then freeze the pie for at least 1 hour. Serve with whipped cream and garnish with lime zest or lime wedges.

May 12, 2009

TWD- Tartest Lemon Tart (sans crust!)

This would have been the perfect Mother's Day dessert. Before that (I love having all the recipes for Tuesdays with Dorie announced early) it would have been the perfect dinner party dessert. However, misreading the instructions (What's that, Dorie, you said partially baked tart crust? I followed your hints and cooked this thing until it was nice and golden brown...) and using my son's naptime on Sunday to nap myself prevented me from making these for either of those events. Instead, I found myself Monday night making this tart in the few minutes I had before my husband got home from work. Since we've gotten into our first real house of our own, my baking even seems to be dictated by the on peak/off peak hours for the electricity (my Dad would be so bugged to know I never learned these things while I was in his house).

So instead of making the time and electricity intensive crust (I don't mind the process at all, I love making tart shells now), I opted to make this beautiful tart into crustless ramekins. I followed the advice to remove the pith but just peeling the lemon with a vegetable peeler to remove the zest in big strips, then peeling the lemon like an orange (discard the pith), removing the seeds and throwing it all into the food processor. I was shocked at how quickly this came together- a few minutes pulverizing and it was smooth and delicious. I poured the cream into buttered ramekins, placed them in a dish with a hot water bath, and baked at 325 for about 30 minutes. After the were about set, I let them cool on the counter before putting them in the fridge for an hour. At this point they were begging for whipped cream, but my little guy has a tendency to rush out of bed if he hears the KitchenAid, so I ate mine without. Wow. This tartest crustless tart was AMAZING. It was thick on top and a little runny on the bottom- not quite puckery lemon but enough to liven things up. You can bet I'm whipping up some cream for tomorrows breakfast. These babies deserve it. Grab the recipe at Babette's and see for yourself (my modifications follow). You can bet I'm making this with a crust in the near future. During off peak hours, of course.

Tartest Lemon Tart

adapted from Baking by Dorie Greenspan
1 1/2 lemons, scrubbed and dried
1 1/2 cups sugar
1 large egg, room temperature
2 large egg yolks, room temp
1 1/2 tbsp cornstarch
1/2 cup heavy cream
1/2 stick unsalted butter, melted and cooled (I used room temperature butter, but it's warm in my AZ kitchen!)
Whipped cream

Getting Ready: Center a rack in the oven and preheat the oven to 325 degrees F.

Peel lemon with a vegetable peeler to remove zest. Remove all pith by peeling like an orange, then slice whole lemon in half and pull out seeds. Repeat with the rest of the lemon.

Put lemons and sugar in blender and pulse, blend and scrape down sides until you have smooth mix. Add remaining filling ingredients and pulse and blend until filling is homogeneous. Rap bowl on counter several times to de-bubble filling as much as possible, and pour it into buttered ramekins placed inside a casserole dish. Set into oven and fill the dish with hot water half way up the ramekins. Bake for 30-40 minutes, until almost set. Chill, if you'd like, before serving with cream or dusting of confectioners' sugar.

May 5, 2009

Pineapple and Tomatillo Pulled Pork for Cinco de Mayo

Today is Cinco de Mayo which is a pretty big deal in Arizona. To celebrate, we made some pulled pork slow cooked with pineapple, green chiles, and tomatillo (green) salsa. My cousin has a killer recipe for green salsa and if she doesn't mind I'll post it soon. I found the pork recipe at Prudy's and modified it to go with what I had on hand. Chicken would work great here, too (especially if you're still thinking about a certain flu and pork just doesn't sound yummy!)

I'm also including my favorite recipe for refried beans. Also done in the slow cooker, these are incredibly easy and so cheap- dried beans are a bargain especially for all the nutrition they pack! They taste so good that you'll forget all about those jarred beans. I know I don't even buy jarred pinto or refried beans anymore.

Pineapple and Tomatillo Slow Cooker Pulled Pork
adapted from Prudence Pennywise
2 pounds of pork (loin, chops, etc) or boneless chicken
1 large can of pineapple tidbits with juice
1 cup tomatillo salsa (green salsa or salsa verde)
2 4 ounce cans green chiles, undrained
1/3 cup brown sugar
Lime wedges

Combine all ingredients in the crock pot and cook on high for four hours or on low for six to eight hours. Shred pork, season to taste with salt and pepper and serve in soft flour tortillas with lettuce, tomatoes, chopped bell peppers, beans (if desired), cheese, and lime wedges. Alternate idea- omit the tortilla and serve as a salad.

Refried Beans
from Dinner's Ready
3 cups of dry pinto beans (rinsed)
1 onion, peeled & halved
9 cups of water
5 t salt
1 3/4 t pepper
2 T minced garlic (I use granulated when I'm in a hurry)
1/8 t ground cumin

Put all the ingredients in a crockpot and cook on high for about 8 hours. After the beans are soft, drain, reserving the liquid. Mash beans with a potato masher or use an immersion blender to reach the desired consistency. Add liquid, a bit at a time, to desired thickness, remembering they will thicken with time. Add salt and pepper to taste and enjoy!

These also taste amazing with our favorite Cafe Rio copycat recipe.