Showing posts with label Cupcakes. Show all posts

July 1, 2013

Lindt White Chocolate Strawberries and Cream Frosting

A few weeks ago Lindt Chocolate asked if I wanted to try some of their new Classic Recipe Strawberries and Creme bars. Perfect! Yes! I got to work thinking about what I should make with it and decided it would make delicious frosting.  I topped each cupcake with a little piece of the chocolate bar as a garnish. I found this cute little chalkboard bunting printable from Simpleklassichome.com (see the pin here) to fancy them up for my friend's birthday. I just printed it out, cut and glued onto some baker's twine. This is way fancy for me (and only took about 10 minutes).


I made a modified version of my favorite frosting and poured in the melted chocolate bar and gave it a quick mix before piping it out on devils food cupcakes.

I also brushed the tops of the cupcakes with a little raspberry Torani strawberry syrup to reinforce the berry flavor and keep them moist. They're great for making homemade Italian sodas or fancy lemonade. The salted caramel is yummy in hot chocolate too! They are cheap and so fun at Smart at Final locally or available on Amazon of course. This isn't a necessary step but it's quick and fun for Baby Strawberry to help with and adds a little more depth of flavor.

I loved how this chocolate had little pieces of strawberries in it that made the frosting really pretty with little bits of pink mixed in. It was delicious and a fun variant from my normal frosting I use for everything.


Lindt Strawberries and Creme White Chocolate Frosting
from Anne Strawberry
{printable recipe here}

4.2 ounces (one bar) of Lindt Strawberries and Creme Chocolate
1/2 C. butter, barely softened (one stick)
6 cups of powdered sugar (more or less to achieve desired consistency, this is a baseline. I usually use most of a standard two pound bag)
1 T. meringue powder
1 t. pure vanilla extract
1/2 cup sour cream
dash of salt

Chop up the chocolate and melt in the microwave on low for about 30 seconds. Stir and repeat until smooth.

In a mixer with the whisk attachment, blend the butter until light and fluffy. Add about two cups of powdered sugar, the meringue powder, and mix until combined. Add in the vanilla, sour cream, and salt and mix. After it's all smooth and combined, mix in the melted chocolate. Mix in powdered sugar on low speed until desired consistency is reached (I like thicker frosting for decorating, especially when it's so hot!)

The meringue powder will help set the frosting after it dries so it holds its shape. It's not necessary but makes for a much better final product. You can find it in the cake decorating section at Walmart, Michael's, JoAnn, or Hobby Lobby (or on Amazon!)

Pipe out onto your favorite chocolate cupcake and enjoy. I use an oversized pastry bag and tip like this to make them cute in a hurry.

Easy Devils Food Cupcakes
from Anne Strawberry

1 cup sour cream (reduced fat is fine)
1/2 cup water
1/2 cup canola oil
3 eggs
1 tablespoon vanilla
1 box Devils Food chocolate cake mix (I recommend Betty Crocker)

Preheat the oven to 350.

Combine all ingredients in stand mixer and beat for two minutes until combined. Using a medium cookie/ ice cream scoop, scoop into 24 paper-cup lined muffin tins.

Bake for about 20 minutes or until cupcakes spring back slightly when touched and a tooth pick inserted into the middle comes out clean. Cool on racks and frost once completely cooled.


disclosure: Lindt sent me a couple of chocolate bars but the opinions and info are my own.

July 23, 2012

Custom Cupcake Toppers & Pink-ifying Cupcakes

In keeping with my super stringent once a month summer posting schedule, today I'm sharing some cupcakes I made recently for my friend's birthday. My friend was having a super pink birthday party so I took out all of my pink supplies and overloaded them. I used my regular favorite cupcake recipe to make some chocolate cupcakes and my favorite light cream cheese frosting with a little pink food coloring.

I wanted something special and pink to top the cupcakes but didn't have anything bold so I used some marshmallow fondant I'd made before to make some heart toppers. It's simple to make (melting marshmallows, powdered sugar, and water then kneading it together) and will stay fresh for weeks and weeks well wrapped (I'll admit I made this batch in February!) Kneading in a color is a lot like making playdoh and really fun. I don't have any special fondant tools but used a regular little rolling pin and small cookie cutter to cut out the hearts. I let them dry over night and stuck them on top of the frosting the next day. I even made some extras and saved them in the freezer for Baby Strawberry's upcoming birthday. You can see some more about the marshmallow fondant at this post about my son's Pirate Birthday Cupcakes.

Here are a few supplies I used to pink-ify the cupcakes:


I used my Americolor Gel dye to get the vivid pink color. I think they do the best job of providing simple, vivid colors and they have a squeeze top bottle for ease of use. There a few dollars each at the Cake decorating store (or at Amazon of course) and last forever. I've used them to dye frosting, cake batter, homemade playdoh, and more with great results.


To add her initial, I used an edible food marker- Wilton sells some at Michael's, JoAnn, or Hobby Lobby but I hear the Americolor ones are better (thought my Wilton ones have lasted a long time so I guess that says something good about them after all! I have only ever tried the black though.)

Last I gave the cupcakes a hearty sprinkling with my edible glitter (It's called Pixie or Disco Dust and while it looks exactly like delicate craft glitter it claims to be safe to eat!) It's gorgeous and really makes a regular dessert something special. I buy mine locally from ABC Cake decorating (or on their site) but Amazon has something comparable as well.

A basic piping bag and tip doesn't have to cost a lot (this set is less than $8 with free shipping). While I've frosted cupcakes before with one of those small bags and tips a lot of people use, a little bigger one can make for some fast frosting and a high impact cupcakes. This set looks like a good place to start with my favorite brand- fill the bag up and practice piping some icing spirals on a plate or sheet of parchment, you can add it right back to the bag and keep on trying until you get the shape you like best. It's actually really fast and fun to frost a whole bunch of cupcakes and take it from the worst cake decorator in the world- if I can do it, you can.


Do you have a favorite way to decorate cupcakes or a favorite recipe? Birthday season is about to start around here and I think there is a lot of frosting in my future!!


February 10, 2012

Red Velvet Cupcakes

 
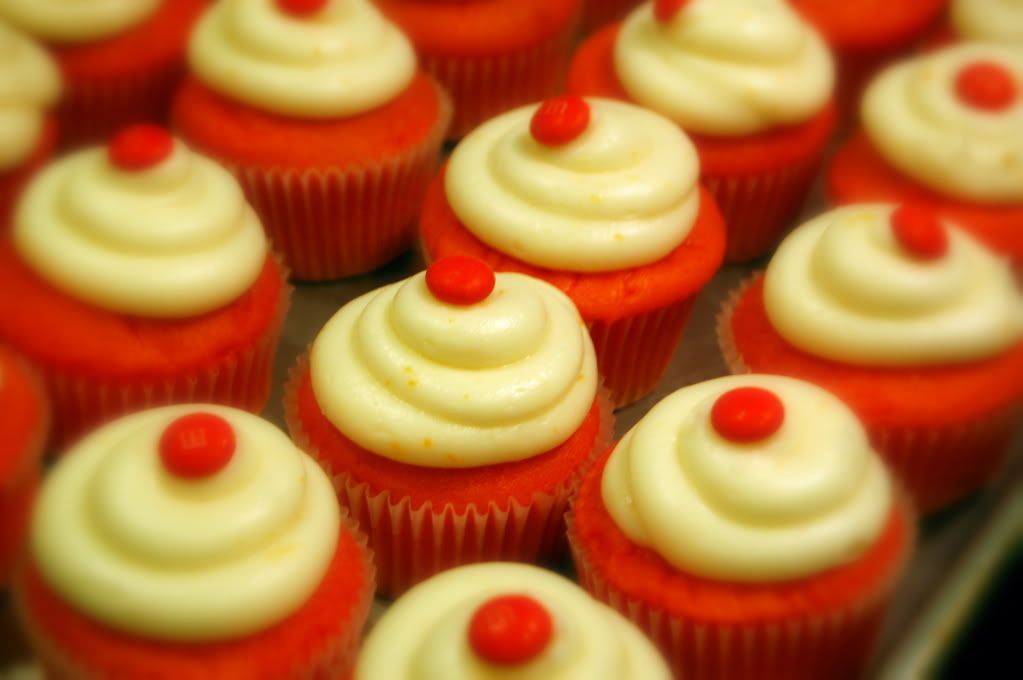
With red as a favorite color (and pink a close second) I would be remiss if I didn't post anything for Valentine's. My blog reader has exploded with red velvet desserts- cakes, brownies, cookies, even pancakes, and while red velvet is a personal favorite over here (since I chose it for our wedding) I'm still not sure about all the varieties. I love a good red velvet cupcake and every time I make these I get the same comment- "I don't like red velvet cake because it's usually so bitter, but these are amazing!" I've posted my box recipe before and know some people don't like it but the fact of the matter is these cupcakes are delicious and easy and with sick kids and busy schedules, that's just about perfect for me. 

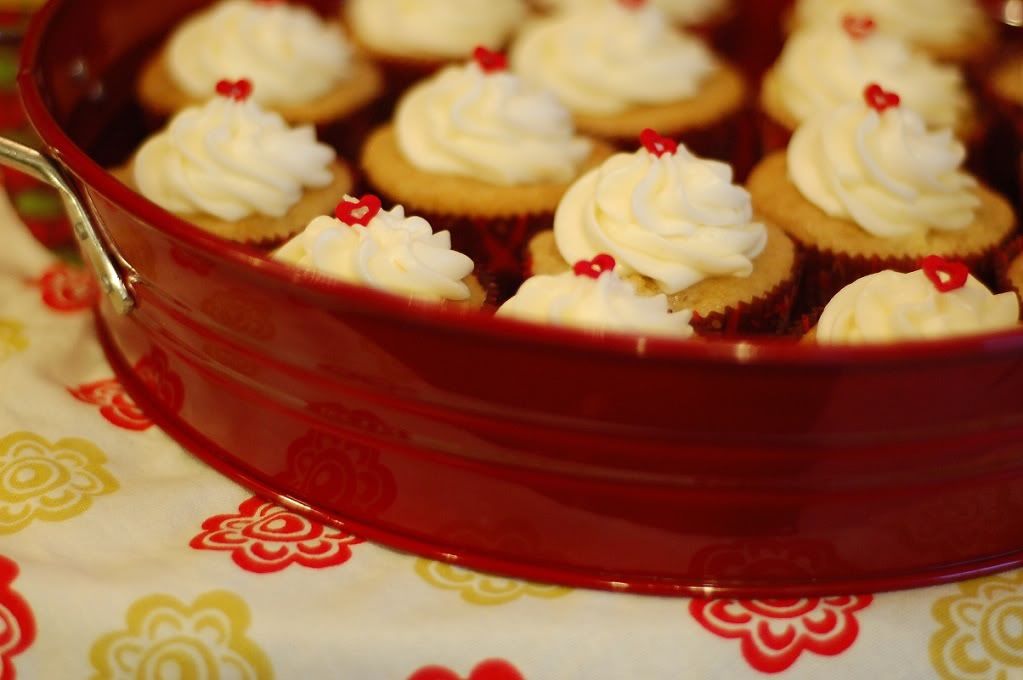
I made these cupcakes last Valentine's for a friend's wedding and I don't think I ever got to posting them. They turned out really cute and fun- I used a million different pink and red Valentine's cupcake wrappers from my collection (I always pick up a few packs on Valentine's clearance- red is a neutral around here and good for everything and I never regret buying these!)

I frost my cupcakes using a large plastic decorating bag (mine is from Ateco) and tip that I picked up at our local cake decorating store, ABC Cake Decorating in Phoenix. So far my biggest problem with them is that I want everything in their store (Edible glitter? Another decorating tip? A few more cookie cutters? Cupcake wrappers? More Americolor gel coloring? How did I just spend $50 and not even buy a cake pan?) They are awesome and I really recommend dropping by their store. You can also buy most of that stuff on Amazon and it's a bit of an initial investment but totally worth it. My $7 piping bag has literally frosted 1000's of cupcakes and it's so much faster than applying the frosting with a knife (not to mention the aesthetics!) Form meets function? Sign me up!

PS This kit looks like a good place to start if you are new to piping cupcakes- my bag is a little bigger but I think this could do a great job and would be easy to learn with.

 
What are you making for your Valentine this week? A tried a true recipe or something new? I've pinned a million recipes to try and am slowly getting there, one recipe at a time. I tried the homemade heart oreos floating around the internet last night and they didn't turn out quite as expected (I think my dough was a little soft for some reason?) Follow up post soon I hope. They were certainly delicious (I made mine chocolate) and need to be shipped out of my house asap.


Red Velvet Cupcakes
from Anne Strawberry
{printable recipe here}
1 cup sour cream (reduced fat is fine)
1/2 cup water
1/2 cup canola oil
3 eggs
1 tablespoon vanilla
1 ounce red food coloring (one small bottle- I buy mine in bulk at Smart and Final)
1 box German chocolate cake mix (I recommend Betty Crocker)

Preheat the oven to 350.

Combine all ingredients in stand mixer and beat for two minutes until combined. Using a 2-tablespoon scoop, scoop into 24 paper-cup lined muffin tins.

Bake for 21-24 minutes or until cupcakes spring back slightly when touched and a tooth pick inserted into the middle comes out clean. Cool on racks and frost once completely cooled.

Cream Cheese Frosting

from Anne Strawberry
1 package of cream cheese, softened (I like to use Neufchatel, less fat and I don't notice much difference)
1/2 cup butter, softened (one stick)
2 Tablespoons milk
2 teaspoon pure vanilla extract or the seeds of one vanilla pod, scraped
dash of salt
6 cups of powdered sugar (more or less to achieve desired consistency, this is a baseline)
1 Tablespoon meringue powder

In a mixer with the whisk attachment, combine the cream cheese and butter until light and fluffy. Add in the milk, vanilla, and salt, and blend.

Next, add the powdered sugar and meringue powder, cover the bowl of the mixer with a dish towel, and turn it on low until everything is combined. Then increase the speed for a minute or so until the frosting is light, fluffy, and delicious. The meringue powder will help set the frosting after it dries so it holds its shape.

Variation:
Add 1 T. Lemon or orange zest and substitute juice for the milk to make a tangy citrus frosting 

January 19, 2012

Valentine's Cupcakes, Brownies, and Sugar Cookies

My blog and I have missed the schedule (albeit, a loose one) that TWD provided. It's busy around here (Baby Strawberry is potty training!) and while I haven't posted much my kitchen has been bustling! I had a baby shower for my girlfriend who is having her first girl (after three boys!) any day now. Pink was a priority and a valentine's theme made it easy (considering all of my serving dishes are red!) These treats are all pretty simple and have a big wow factor with the amazing flavors and little details. I've posted the red velvet cupcakes and mint brownies before- though I've never made the mint brownies pink, that was a new one!  

Red Velvet Cupcakes (they're from a mix, but I promise no one will know)

The cookies (L's in honor of the baby) are Natalie's signature recipe. I'm no decorator but I've improved with her tips. Natalie uses a Wilton Squeeze bottle to pipe the outsides of the cookies (like drawing, nothing to stressful) and then uses another with thinned icing to 'flood' or fill the middle. In-a-hurry-not-so-steady-hands-Anne doesn't do them justice but they were yummy and cute (especially with the edible glitter, I love that stuff!) The best part about the cookies is you can bake off extras and freeze them to decorate and serve another time, all the end product without the stress. Natalie's recipe is pretty full proof- if I can do it- and you don't have fuss much with the dough. She doesn't chill hers, though I do normally, and they come out great every time. Sugar cookies take a lot more practice than cupcakes but the practice is enjoyable and delicious, worth the effort I think!

Note- I used Martha Stewart Alphabet Cookies Cutters I found at Macy's (similar to these here) that have been surprisingly practical- even adult are vain about their names! Smaller, thinner shapes will take less cooking time- watch them carefully!)


Natalie’s Sugar Cookies
from Anne Strawberry
1 cup butter or Crisco (Natalie uses the butter flavored kind, I usually use about 2/3 butter and 1/3 regular shortening)
2 cups sugar
2 eggs
2 teaspoons vanilla
1 cup sour cream
5-6 cups flour
2 teaspoons baking soda
1 teaspoon salt
 
Cream butter and sugar together. Add eggs, vanilla, and sour cream and beat. Add dry ingredients, being careful not to over mix. Reserve some flour for the counter and dump the almost mixed dough out and shape it as you would pie dough. Divide into two disks, chill for 15 minutes, then roll to ½ inch thickness and cut as desired. Bake at 400 for 8-12 minutes (depending on size of cookies).

Natalie’s Signature Almond Frosting
*note- Natalie uses almond extract and her frosting is so good but I usually sub in vanilla since my tall man is not so adventurous!)
⅓ cup butter, softened
3 cups powdered sugar
½ teaspoon almond extract
1-2 tablespoons milk

Blend butter and sugar. Stir in vanilla and milk- beat until smooth. Flavor and color as desired. Use plastic condiment bottles to pipe icing onto cookies (thin with milk or warm in microwave to flood centers).

October 3, 2011

Sam's Club & General Mill's Pink Giveaway

 
Can you believe it's October already? There are clues everywhere around here, from the 'nice-ish' morning weather, the ripe Utah peaches, and professional football players wearing hot pink. Even if it's still hot here, it's officially October and breast cancer awareness month already. Last night my mom said, "I know it's October when my Yoplait's have pink lids!" MyBlogSpark recently contacted me and let me know that Sam´s Club stores are featuring pink packaging on participating General Mills products for National Breast Cancer Awareness Month. This cause is close to my heart as my mom and grandma both fought and beat breast cancer. I don't know anyone who hasn't somehow been touched by this disease and appreciate all the efforts made to finding a cure.


This month if you purchase specially-marked General Mills products like Cheerios at your local Sam´s Club you can help decide how half of that contribution will be donated by voting at PinkTogether.com. General Mills´ donations will be divided between two important Komen programs: the Treatment and Assistance Program, which assists women in securing care they otherwise may not be able to afford, and Prevention Research, which helps unlock the keys to preventing breast cancer. Voting results will be announced on Mother´s Day 2012. You can see more about PinkTogether on their Facebook page.


It's no secret that we love General Mills products around here. For 5 years, General Mills has partnered with the Susan G. Komen for the Cure® Foundation and this year they are making their annual donation of $2 million to the foundation to advance breast cancer research and support education and community outreach projects.


And now for the giveaway! MyBlogSpark provided me with a $25 Sam's Club Giftcard to share with one of you (US Residents Only Please!) To enter the giveaway, please leave a comment letting me know how you give back to help the fight against breast cancer or your favorite General Mills products you would love to see featured in the Pink Promotion at Sam´s Club (I'm going to be getting a giant box of Chocolate Cheerios, along with the usual big bag of flour, sugar, and butter- my bulk staples!) This giveaway will close on 10/10/11 at midnight. Leave a comment before then to be entered (good luck!)

"Disclosure: The information and gift card(s) have been provided by Sam´s Club and General Mills through MyBlogSpark."

Chocolate Cheerio Crust
by Anne Strawberry

Crust:
2 1/2 Cups Chocolate Cheerios, crushed (in a baggie with a mallet or in the food processor)
1/4 Cup Melted Butter
1 Tablespoon Sugar
1 Tablespoon Cocoa Powder (I like Hershey's special dark)

Preheat the oven to 350. Combine all ingredients and press into four mini springform pans or one regular springform. A pie pan will also work if that's all you have. Make sure the layer is even and not too thick. Bake for 8 minutes and set aside to cool completely. 

May 2, 2011

Royal Cupcakes for my Prince and Princess

I'm sure you've seen way too much about the royal wedding already (but all my efforts to post these on Friday came to naught!) I DVR'd the event at my mom's and haven't been over to watch it yet, though I've loved seeing all the dress and crazy hat pictures. I've had to laugh at the copious facebook statuses exclaiming total excitement or annoyance at the whole thing, but I couldn't let the weekend go by without making a treat in honor of the wedding (it has something to do with my kids' super 'top secret' names, since, well, I don't actually call my own little princess Baby Strawberry around the house, though my little man does answer to that). 

In 2008 my family took a trip to Greece to pick my brother up from his mission, and we stopped in London on the way home for about 8 hours overnight. Our parents stayed in their hotel like sane people and my brother and I work up at 3 to take the tube (that's what they call it, right? I always want to say metro, but I'm a frenchie at heart!) downtown and see what we could see in three or four hours.

 
When we walked up the stairs from the 'metro' we were right next door to Big Ben, it was so fun! It was still totally dark but we wandered across the bridge and back, through the park, over to Buckingham Palace, through what must have been the business district, judging from all the people heading to work, and eventually back to Big Ben and to the airport. We made it barely on time and were totally exhausted but it was wonderful to have been there, if only for a couple hours! Now I want to go again and see all the places from my favorite British historical fiction books.

 
As for the cupcakes themselves, little additions really put them over the top. Adding vanilla bean to the batter, filling them with pastry cream or pudding after they cool (I fill a pastry bag and use Ateco tip #230, but any substantial round frosting tip could work), and frosting them extra high- with homemade frosting of course- are some of my favorite tricks. Of course the king of the castle over here doesn't like frosting, so I usually help him with his and he graciously finishes off my cake. We're good like that.

I've posted about making candy melt decorations for cupcakes before and will have a nice explanatory post up in a week or so with some college graduation cupcakes I made last year with ASU's logo. The short of it is, I print out the design or monogram I'm looking for, cover the sheet with wax paper, and trace using a parchment bag (or clipped baggie) filled with melted candy melts (you can buy a huge assortment of colors at Michael's or Joann's). Then I freeze the sheet and after a few minutes, you can pop the design right off the paper and stick on top of the cupcake. I really wanted to come up with a sapphire blue to match Kate's ring but the best I had was a pretty light blue my friend loaned me (plus some food coloring). I had to thin the candy with Crisco and it was still a little clumpy due to the coloring. All would have been well, though, had I remembered the piping tip- somehow I ended up with half of my supplies and half at my mom's (who was also out of wax paper). So my grand plans for individually labeled Kate and Will cupcakes didn't pan out, but my own little royalty loved them just the same. You can see a picture of the process here if you are interested.

Update- I just found the prettiest Will and Kate printables and hope to find a good use for them soon, check them out here!

Royal Cupcakes for Will and Kate
from Anne Strawberry

{printable recipe here}

1 cup sour cream (reduced fat is fine)
1/2 cup water
1/2 cup canola oil
3 eggs
1 tablespoon vanilla
seeds scraped from one vanilla bean
1 box betty crocker french vanilla cake mix

Preheat the oven to 350 and line a muffin tin with cupcake liners. Place atop a baking sheet and set aside.

Combine all ingredients in stand mixer and beat for two minutes until well combined. Using a 2-tablespoon scoop, scoop into muffin tins.

Bake for 21-24 minutes or until cupcakes spring back slightly when touched and a tooth pick inserted into the middle comes out clean. Cool on racks and frost once completely cooled.


Anne Strawberry's Favorite Frosting

1/2 cup butter, softened (one stick)
1 package of cream cheese, softened (I like to use Neufchatel, less fat and I don't notice much difference)

2 Tablespoons milk
2 teaspoon pure vanilla extract or the seeds of one vanilla pod, scraped
dash of salt
6 cups of powdered sugar (more or less to achieve desired consistency, this is a baseline)
1 Tablespoon meringue powder

In a mixer with the whisk attachment, combine the cream cheese and butter until light and fluffy. Add in the milk, vanilla, and salt, and blend.

Next, add the powdered sugar and meringue powder, cover the bowl of the mixer with a dish towel, and turn it on low until everything is combined. Then increase the speed for a minute or so until the frosting is light, fluffy, and delicious. The meringue powder will help set the frosting after it dries so it holds its shape.

Variation:
Add 1 T. Lemon or orange zest and substitute juice for the milk to make a tangy citrus frosting

For the filling:
Anne Strawberry's Slightly Lightened Pastry Cream
After the cupcakes have cooled, fit a pastry bag with a long, medium tip. Fill with cooled pastry cream and squeeze one or two tablespoons into the center of each cupcake, filling until the top of the cupcake starts to bulge slightly. Frost and decorate the cupcakes and serve.

P.S. Sorry about the world's longest post, but did you spot my favorite car ever in the pictures? So many beautiful things in Europe! Come back tomorrow for TWD- Chocolate Peppermint Pound Cake!

April 13, 2011

Wednesday Want- Cookie Scoops

Anyone know what's wrong with Photobucket? My pictures are all in hiding and it's making me crazy! Anyways, if you're new here, please come again. I'm trying to get it sorted out and today for my Wednesday Want I have one of my very favorite tools- the humble metal scoop. It's technically an ice cream scoop but I don't use mine for that, ever. I love this scoop for making the most typical cookies into something special. You could use store bought dough and scoop them out and they would come out perfectly shaped, bake evenly, and look like a million bucks (but making the dough is my favorite part, so I never do that!)


The same goes for cupcakes- I use a scoop this size for the perfect cupcake. Not only does a scoop make the job of dishing out the dough or batter (that used to be my least favorite part) much quicker, it's also much more effective. That's the best. I also use a cookie scoop to make gorgeous pancakes and be a hero to all the carb lovers in my house.


There's a ton of different sizes available- I have three or four. This one is a pretty good baseline- as well as the one tablespoon scoop. My mom also has a hard to find, tiny teaspoon scoop that makes the most adorable tiny cookies. They're easy to find at Target, TJ Maxx, or Pampered Chef. Just make sure to get one with all metal parts- the plastic ones aren't worth anything! Do you have a favorite use for cookie scoops (besides ice cream?) Come back for cake on By The Book Friday- I owe a friend a German Chocolate Cake, so if you have a great recommendation please let me know!

March 7, 2011

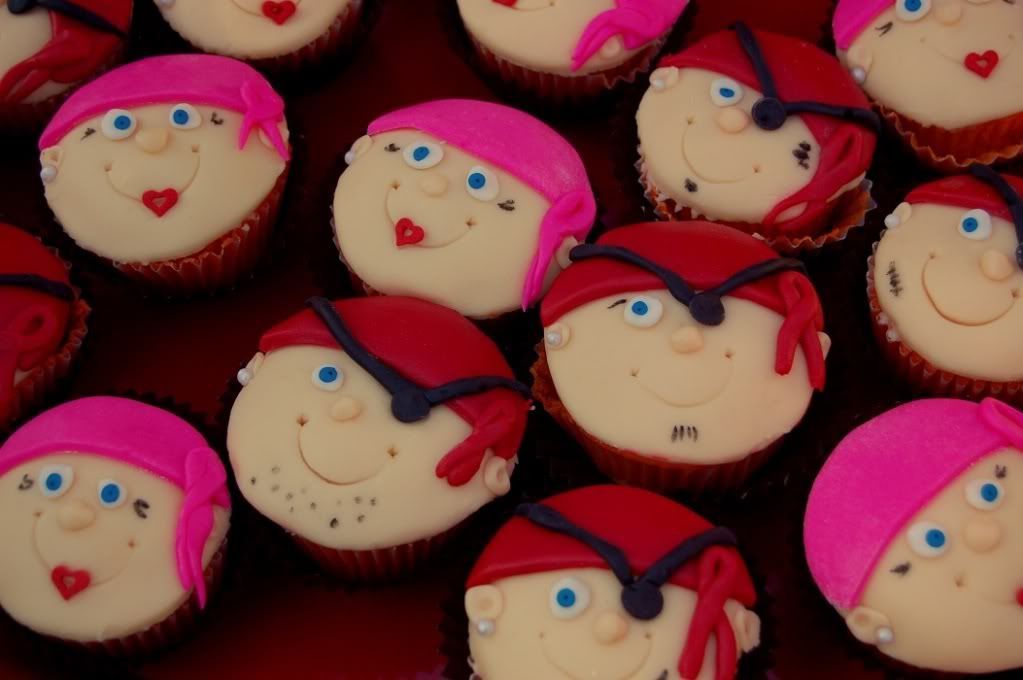
Marshmallow Fondant Pirate Cupcakes

Photobucket
My little man turned four a few weeks ago. We had a big pirate party and since I like to try to make myself crazy I thought I would try out fondant for the first time. I skipped to marshmallow fondant since it's supposed to taste better.
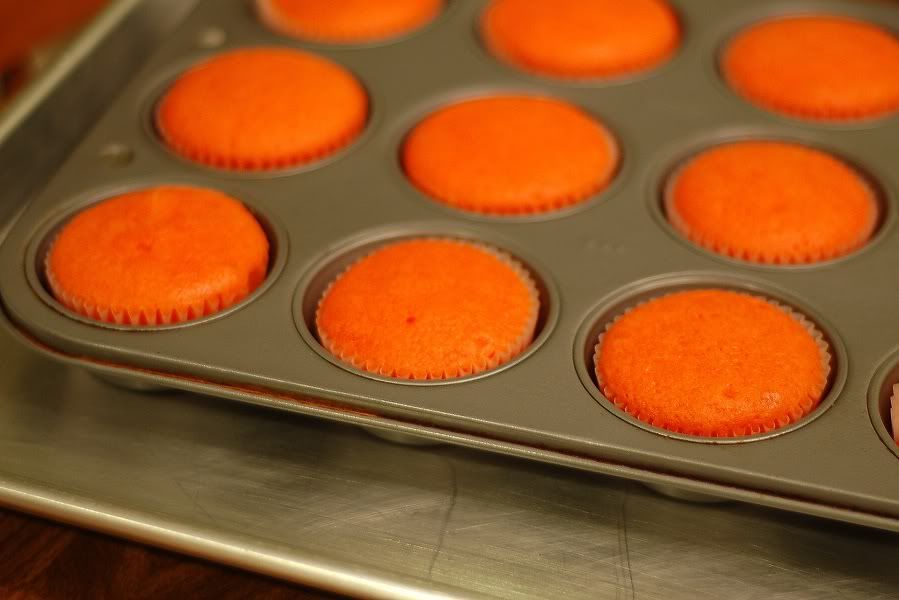
PhotobucketFirst, I made orange creamsicle cupcakes again (still his favorite color) with my standard doctored mix recipe.

PhotobucketThen I dabbed a little frosting on top of each (I just whipped up some softened butter and powdered sugar, you could even use canned frosting, bleh!)
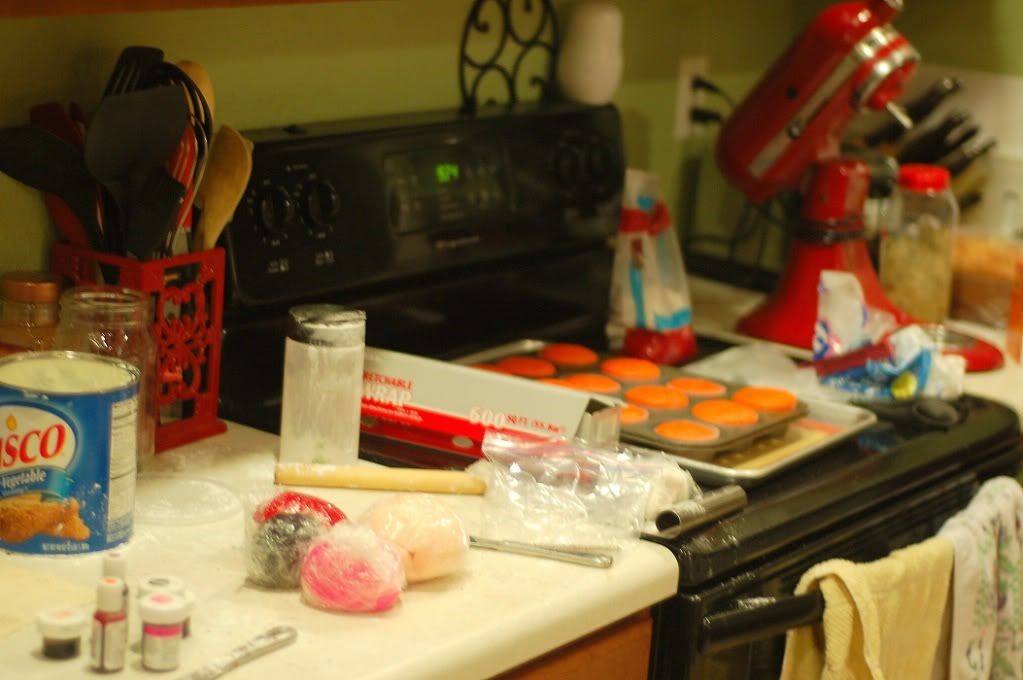
PhotobucketNext I made fondant. I followed Clara's awesome directions and made it in the microwave using C&H Powdered sugar, Jet Puff Marshmallows, and water. She's awesome and took pictures of the fondant process. You can see the recipe below. After you knead it and let it rest, you portion it out into the different colors you need. Get out the rolling pin, powdered sugar, and shortening. Look past the excessive mess. To color the fondant, you just knead in the gel food coloring until you reach the desired color. Make sure your hands are generously greased with Crisco (my tall man helped me knead my rich red, it took forever, and that really grossed him out!) Then rewrap and set aside each color.

*update*- I had a reader ask where I found the flesh colored gel food coloring. It is from a Wilton Dora the Explorer Gel Food Coloring Kit I found at Joann ages ago on clearance (red and pink are infinetely practical at this house!)The color is called 'Dora Skin Tone'. Here is a link where you can find it on Amazon for about $5 with free prime/super saver shipping.
Photobucket
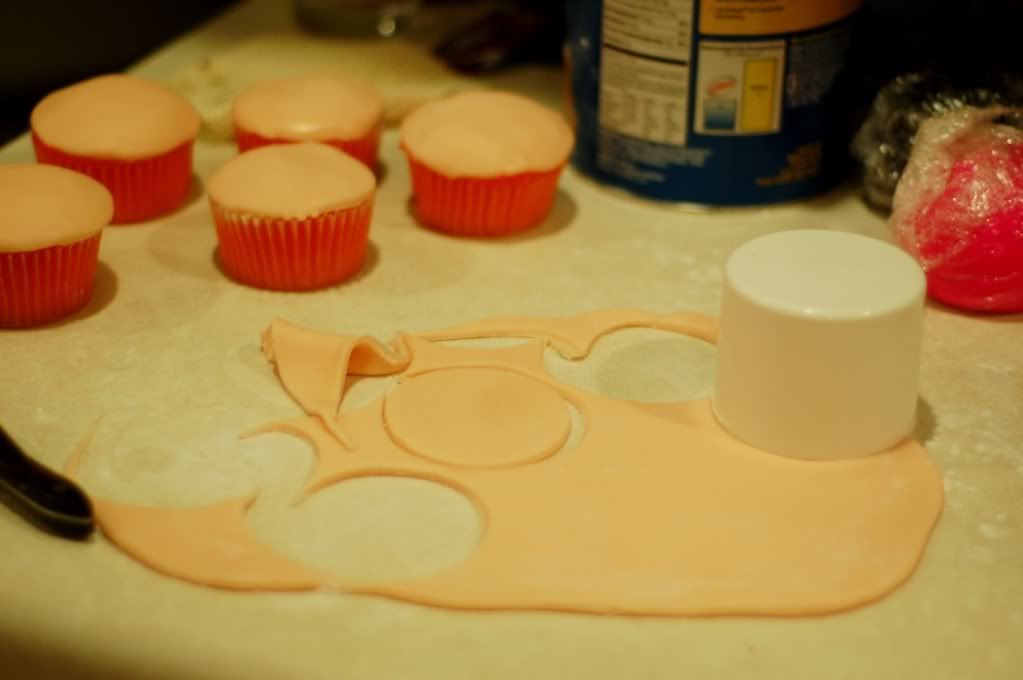
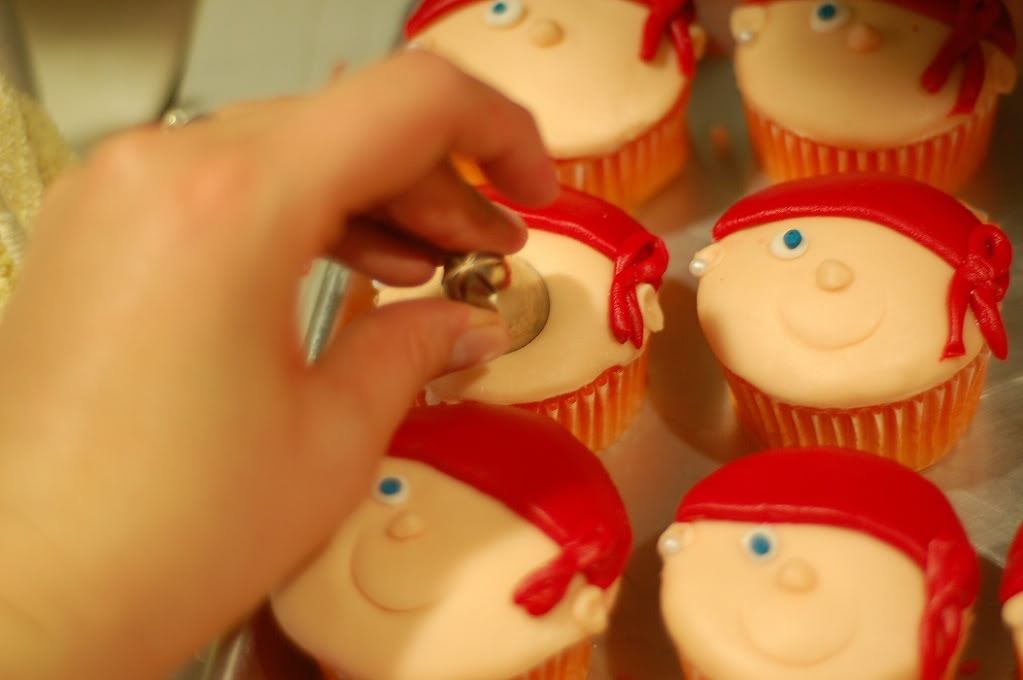
To make the pirates, generously dust your surface with powdered sugar. Roll out the skin tone and use a cutter to cut circles the same size as the cupcakes to make the faces. I used my cooking spray lid. Now I totally faked how to make these pirates off of a picture I found online (like this one but I can't find the original now). I forgot that I would also need to make pirate ears and noses with the flesh tone- so make sure you save a little extra. This color is the one you need the most of by far. Smooth the circle over the cupcake and then shape little ears and nose. Mine are far from perfect but that's okay. I used a new cheap paintbrush from Michael's and dipped it in water then brushed the back of the pieces and pushed them onto the fondant. Then I used the other end of the brush to make the ear indentations. I've never taken a fondant class and just read a couple things online and they were perfectly cute and fine, even if they were far from perfect! So don't stress it too much!

PhotobucketNext I rolled out the color for the scarves (pink and red). I cut strips about an inch wide and then used the same cutter to make the faces to cut matching circles for the hats. Paint brush, press on, etc. The I rolled little snakes out of the same color and criss crossed them to make the tie and put them on the right side. Then I did the same for little eyes- one for the boys and two for the girls. Then I pushed on big round blue sprinkles to be the irises (I marked them an edible food marker to be the pupils).
Photobucket
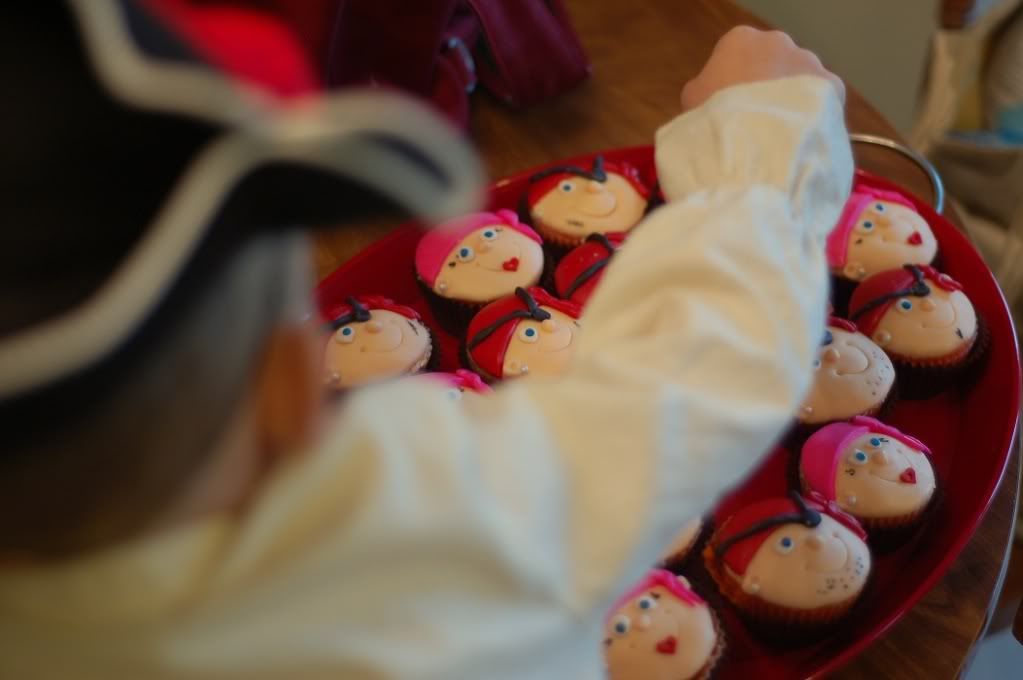
I used my big cake decorating tip, the fat end, to make their smiles. You could use a paring knife instead. Then made little smiley marks by pushing in the tine of a fork carefully. To make the patches, roll a little circle and squish it (or use another big round bullet frosting tip to cut a circle). Glue it on with the wet paintbrush. Roll a little of the black fondant into a long strip and attach it to make the straps for the patch. There you have it! Just use the marker to add facial hair and scars. You can draw little lips on the ladies or use a big heart sprinkle like I did. Don't forget their eyelashes and earrings (also a big sprinkle- I used edible pearls but regular dragees would be perfect). Check out Michael's or the cake decorating store. This was my favorite part of the whole process, it was really fun to do all the scars and different faces!

Photobucket 
And they were a hit! Don't be afraid to try something new. This was pretty fun, a lot like working with Playdoh, even if I was stressing the whole time about the party (seriously, a bunch of four year olds?!) And now I'm not too worried about trying fondant again! Give it a try and let me know how it goes. It doesn't really take any special equipment- basic ingredients and a rolling pin are all you really need. You can do it!
Photobucket
Marshmallow Fondant 
{printable recipe here}
from Fondant 101 via Cuppycakes

Makes about 3 lbs of marshmallow fondant

16 ounces Jet Puff White Mini-Marshmallows
2-5 tbsp water
2 lbs C&H Powdered Sugar
about 1/2 cup Crisco shortening, to grease hands and work surface

Melt marshmallows and 2 tbsp of water in a microwave safe bowl. Put the bowl in the microwave for 30 second intervals (stir between intervals) for about 2-1/2 minutes until marshmallows are melted. Place 1 to 1-1/2 lbs of the powdered sugar on the top of the melted marshmallow mix.

Grease your entire hands and surface generously and dump the bowl of marshmallow/sugar mixture in the middle.

Start kneading like you would bread dough. It will be VERY sticky at this stage! Add the rest of the powdered sugar and knead some more. Re-grease your hands and surface when the fondant starts sticking. If the mix is tearing easily or it is to dry, add water (about 1/2 tablespoon at a time). Continue to knead and add water until there are no bits of powder sugar visible. It usually takes about 8 minutes to get a firm smooth elastic ball so that it will stretch without tearing.

Prepare the fondant for storing by coating it with a good layer of Crisco shortening, double wrap with saran wrap and then put in ziploc bag. Squeeze out as much air as possible. Let rest overnight for best results.

Orange Creamsicle Cupcakes for my Little Man
by Anne Strawberry
{printable recipe here}

1/2 Cup Water
1/2 Cup Oil
1 Cup Sour Cream
1/2 teaspoon vanilla
3 eggs
Zest from two Oranges, finely grated
1 Yellow Cake Mix (I like Betty Crocker's)
Orange food coloring (or red and yellow)- I like Americolor Gel dyes but the basics will work just fine

Preheat the oven to 350.

Combine all ingredients except food coloring in stand mixer and mix on low to combine, about one minute. Then increase speed to medium high for two more minutes until well blended. Add drops of food coloring to achieve desired color and mix lightly until incorporated.

Using an ice cream scoop, portion batter into lined muffin tins and bake for 20 minutes, or until cupcakes spring back which touched with a finger tip and they look done.

February 7, 2011

Lemon Velvet Cupcakes

Lemon Velvet Cupcakes 
{printable recipe here}
I tend to post a lot of lemon recipes but not only is lemon one of my favorite flavors, but my parents also have an enormous lemon tree that produces hundreds (maybe more) of lemons each year. When I'm over, it's super convenient to run out to the tree and grab a handful of fruit, to make homemade lemonade, lemon curd, lemon poppyseed muffins, garlic rosemary lemon chicken, etc. Lemon cake of course is delicious and the simple addition of lemon zest to the frosting and the cake makes all the difference.

We started calling these "lemon velvet" when we had to come up with a new red velvet replacement after my tall man couldn't eat chocolate any more. I still enjoy red velvet but we make this crowd-pleaser more often. It doesn't stain like the red velvet but is based off the same easy recipe. Instead of starting with a German chocolate cake, I used a lemon mix and add the zest of two lemons (in addition to the vanilla, sour cream, and extra eggs to doctor the mix). Then for the light cream cheese frosting, I replace the milk with fresh squeezed lemon juice and add the zest of another lemon. Now is the perfect time of year to make these, but even when I don't have fresh lemons on the tree, I reach for my stock of zest and juice in the freezer that I've built up during the winter. It's not a lot of work but has a huge impact on flavor.

I've had a lot of people ask me about the meringue powder I put in my cupcake frosting. I buy the Wilton brand- you can get it at Walmart, Michaels, or Hobby Lobby (or at Amazon of course). I usually buy the big can at Michael's with a 40% off coupon for the best price. It lasts forever and just a tablespoon mixed into the frosting with the powdered sugar will help "set" your icing so it holds its shape after you frost the cupcakes. The end result is a lot better and there's no taste difference. Try it and let me know what you think.

Lemon Velvet CupcakesLemon Velvet Cupcakes with Lemon Cream Cheese Frosting

from Anne Strawberry
{printable recipe here}

1 cup sour cream (reduced fat is fine)
1/2 cup water
1/2 cup canola oil
3 eggs
1 tablespoon vanilla
zest of one or two lemons
1 box lemon cake mix (I prefer Betty Crocker and stock up when they are on sale)

Preheat the oven to 350.

Combine all ingredients in stand mixer and beat for two minutes until combined. Using a 2-tablespoon scoop, scoop into 24 paper-cup lined muffin tins.

Bake for 21-24 minutes or until cupcakes spring back slightly when touched and a tooth pick inserted into the middle comes out clean. Cool on racks and frost once completely cooled.

Lemon Cream Cheese Frosting


1 8 ounce package of cream cheese, softened (I like to use Neufchatel, less fat and I don't notice much difference)
1/2 cup butter, softened (one stick)
juice of one lemon (about two tablespoons)
1/2 teaspoon pure vanilla extract
zest of one lemon (about 1 teaspoon)
dash of salt
6 cups of powdered sugar (more or less to achieve desired consistency, this is a baseline)
1 Tablespoon meringue powder

In a mixer with the whisk attachment, combine the cream cheese and butter until light and fluffy. Add in the lemon juice, vanilla, zest, and salt, and blend.

Next, add the powdered sugar and meringue powder, cover the bowl of the mixer with a dish towel, and turn it on low until everything is combined. Then increase the speed for a minute or so until the frosting is light, fluffy, and delicious. The meringue powder will help set the frosting after it dries so it holds its shape.

December 14, 2010

Apple Orange Holiday Cupcakes

Apple Orange Holiday Cupcakes
Last week at a Christmas party, my girlfriend and I were laughing at another friend's ridiculous food aversion. "No way will I eat onions, they're like tapeworms!" she repeated and we laughed. "Come on, everyone knows onions are nasty." Another chimed in against onions and added another equally repulsive (to her) food- tomatoes. Natalie and I just had to look at each other and laugh. When she said, "Well if you don't like onions or tomatoes I don't think I could make you anything for dinner" I had to agree. I can't imagine never eating those delicious foods again (come on, lasagna, best food of them all) but do understand the ridiculous food aversion.

Apple Orange Holiday Cupcakes
My number one, can't do it food is coconut. No way on the texture (I'll refrain from posting what I identify it with since this is a food blog after all) and the flavor (sunblock? Apply not eat, thank you!) So when I saw this week's Tuesdays with Dorie recipe from Cobbler du Monde was an Apple Coconut cake I knew that wouldn't do. For a minute I even thought about growing up and making it with coconut since it was for my husband's coworkers anyway, but it turns out there isn't even any coconut in my house, which makes since considering I do all the shopping! So I just upped the apple, added some orange zest and juice to sub for the rum, and made it my own with a little more Greek yogurt (regular plain yogurt would work just fine, too) and a little less oil. Of course since I was already off the radar of the original recipe I added some orange zested frosting, why not? They are cupcakes, after all, and try as I may to grow up in my food preferences, frosting will always trump cake around here. Since they felt a little muffin-y I went light on the frosting, for me anyways. Really though, the orange, cinnamon, and vanilla pair so nicely with the apple and my house just smells like Christmas. Not bad for about 15 minutes of work (20 if you count the dishes). See the real deal with the other TWD bakers and come back later this week for a fun giveaway.

Apple Orange Holiday Cupcakes
from Anne Strawberry
loosely adapted from Baking by Dorie Greenspan

1 1/4 cups flour
2 teaspoons baking powder
1/4 teaspoon baking soda
1/2 teaspoon cinnamon
pinch of salt
3 apples, peeled and cored (a mix of whatever you have on hand, I used galas and granny smiths)
zest and juice of one orange 
2 large eggs
2/3 cup sugar
6 ounces plain yogurt (I used Greek Gods)
5 tablespoons canola oil
2 teaspoons vanilla

Preheat the oven to 350. Line about 18 muffin tins with paper wrappers, set on a baking sheet, and set aside.

Whisk together the dry team (flour, powder, soda, cinnamon, salt).

Peel and cut the apples into a small dice (I like to use my apple peeler). Zest the orange and then squeeze the juice from one half into the bowl- combine to prevent browning.

In a large bowl, whisk the eggs and sugar together for a minute or so. Add in the yogurt, oil, and vanilla and mix until nicely combined. Fold in the dry ingredients with a silicone spatula, being careful not to overbeat so the cake stays tender. Lightly mix in the apples and scoop into prepared muffin tins using an ice cream scoop.

Bake for about 20 to 25 minutes. Let cool and frost with my favorite frosting, whipped cream, or apple jelly.

October 28, 2010

Halloween Orange and Vanilla Bean Cupcakes

Orange Creamsicle Cupcakes{Orange Creamsicle Cupcakes- printable recipe here}
{Vanilla Bean Filled Cupcakes- printable recipe here}
Today my son had his first big Halloween party at his cute preschool. He dressed up as a pirate and was so excited- even down to his little drawn on goatee! His teacher asked for volunteers helping in the class room and bringing cupcakes and other treats. I wasn't chosen to make the cupcakes (oh the rejection!) but got to come be a "mom helper" instead. The kids were so cute and excited about every single thing that I'm sure they would have eaten cupcakes made out of dirt as long as they included brightly colored toppings. That said, either of these happy cupcakes would have been perfect for the party! Instead, the vanilla bean cupcakes were destined to go to my husband's work event, where they were happily devoured by a bunch of lawyers. Honestly, the little Disney-clad preschoolers couldn't have appreciated the pastry cream filled vanilla bean cupcakes as much as they adults. I'll save the Orange Creamsicle Cupcakes (in their brightly colored glory) for the littles! Have a safe and happy Halloween, surely filled with candy, costumes, and baked goods!

Halloween Vanilla Bean CupcakesAnne Strawberry's Vanilla Bean Cupcakes
{printable recipe here}
1 cup sour cream (reduced fat is fine)
1/2 cup water
1/2 cup canola oil
3 eggs
1 tablespoon vanilla
seeds scraped from one vanilla bean
1 box betty crocker french vanilla cake mix

Preheat the oven to 350 and line a muffin tin with cupcake liners. Place atop a baking sheet and set aside.

Combine all ingredients in stand mixer and beat for two minutes until well combined. Using a 2-tablespoon scoop, scoop into muffin tins.

Bake for 21-24 minutes or until cupcakes spring back slightly when touched and a tooth pick inserted into the middle comes out clean. Cool on racks and frost once completely cooled.


Anne Strawberry's Favorite Frosting

1/2 cup butter, softened (one stick)
1 package of cream cheese, softened (I like to use Neufchatel, less fat and I don't notice much difference)

2 Tablespoons milk
2 teaspoon pure vanilla extract or the seeds of one vanilla pod, scraped
dash of salt
6 cups of powdered sugar (more or less to achieve desired consistency, this is a baseline)
1 Tablespoon meringue powder

In a mixer with the whisk attachment, combine the cream cheese and butter until light and fluffy. Add in the milk, vanilla, and salt, and blend.

Next, add the powdered sugar and meringue powder, cover the bowl of the mixer with a dish towel, and turn it on low until everything is combined. Then increase the speed for a minute or so until the frosting is light, fluffy, and delicious. The meringue powder will help set the frosting after it dries so it holds its shape.

Variation:
Add 1 T. Lemon or orange zest and substitute juice for the milk to make a tangy citrus frosting

For the filling:
Anne Strawberry's Slightly Lightened Pastry Cream
After the cupcakes have cooled, fit a pastry bag with a long, medium tip. Fill with cooled pastry cream and squeeze one or two tablespoons into the center of each cupcake, filling until the top of the cupcake starts to bulge slightly. Frost and decorate the cupcakes and serve.

October 8, 2010

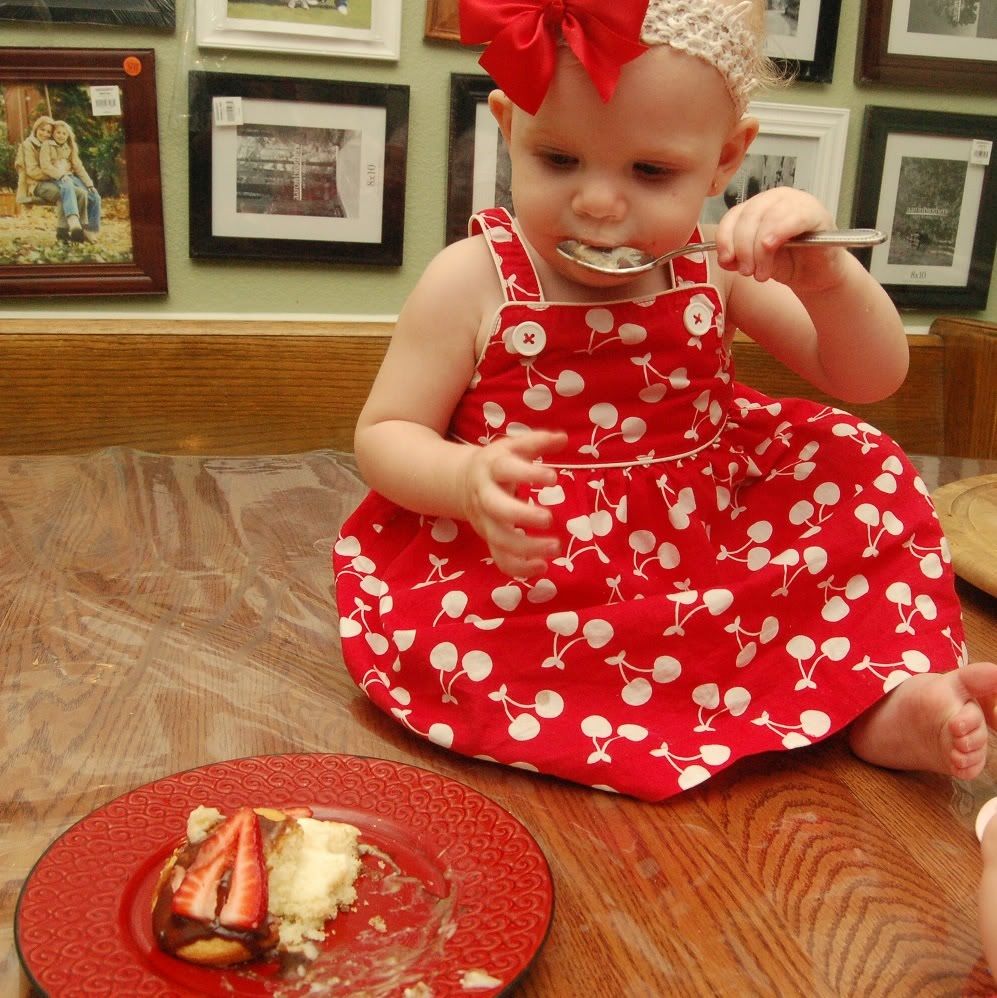
Boston Cream Cupcakes for Baby Strawberry

Photobucket
I mentioned it was Baby Strawberry's first birthday a couple of weeks ago (can you believe it?) We of course had lots of fun and lots of yummy food. With my little man, I had a big party at the house, fed everyone, made cute/high maintenance cupcakes, and loved it all! This time around (after another big birthday complete with Orange Creamsicle Cupcakes) I thought something simpler would be better. Since her birthday is right next to two of her cousins', we had an easy get together at the park with pizza and salads. I made vanilla bean and red velvet cupcakes that night and will post those next.

PhotobucketThen we decided to do a simple dinner, just my family and my "sister", and celebrate together. For dinner I made roasted chicken, mashed potatoes, and green beans. Kara brought cornbread and an amazing salad with locally made meyer lemon olive oil and strawberry balsamic vinaigrette! So I confess the simple dinner took a lot longer than I thought it would- it always does (big thanks to my mom for letting me mess up her kitchen all day and helping clean it all up!) But we all enjoyed it and Kara went into labor the next day, so I think the food did it's job!


Photobucket
For dessert I made Martha Stewart's Boston Cream Cupcakes. I'm not sure why I was crazing Boston Cream Pie (since I've never actually had it!) It probably has to do with my affinity to pastry cream. This recipe was very simple to make, just a ganache for the topping, a pastry cream for the filling, and a quick, easy cake. Baby loved it, of course (she has a huge sweet tooth!) There are three components to make but each is very simple and doesn't take much time. I worked on each them between other steps for dinner and didn't hardly notice the time to make these- don't be intimidated!

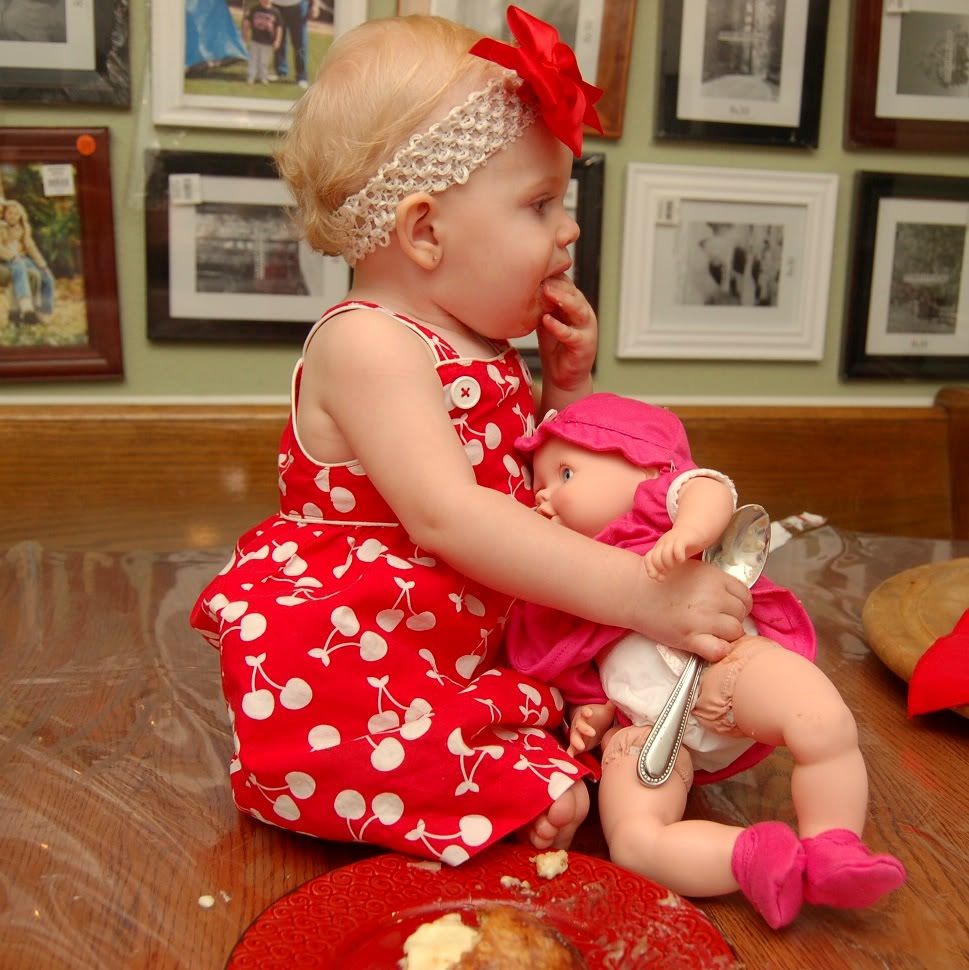
PhotobucketShe even shared with her new baby that she wouldn't let go of for two days straight (baby is playing with her right now, actually, she was a hit!) It was a great birthday and totally worth all the dishes (especially since so many people helped out)! Happy birthday Baby Strawberry!)

PhotobucketBoston Cream Cupcakes
from Anne Strawberry (recipe via Martha Stewart)

*note- My family has been (rightfully) accusing me of underbaking things so I tried to follow these directions exactly. However, I thought the cupcakes were just a minute overdone and a tiny bit dry for that reason, so I would be sure to remove them as soon they get a hint of color and their lovely smell wafts through your kitchen!

For the Cupcakes:
1 1/2 cups all-purpose flour, plus more for tins
1 1/2 teaspoons baking powder
1/2 teaspoon salt
1/2 cup whole milk
3 ounces (6 tablespoons) unsalted butter, softened, plus more for tins
3 large eggs
1 cup sugar
1 teaspoon pure vanilla extract

Preheat oven to 350 degrees. Butter and flour standard muffin tins. Whisk together flour, baking powder, and salt in a small bowl. Warm milk and butter in a saucepan over low heat.

Beat eggs and sugar with a mixer on high speed until thick and pale, about 5 minutes. Beat in dry ingredients.

Bring milk and butter to a boil. With mixer on low speed, add milk mixture to batter, and beat until smooth. Add vanilla. Divide batter among muffin cups, filling each halfway. Bake cupcakes until light gold (just barely starting to color), about 15 minutes. Let cool in tins for 10 minutes, then transfer to wire racks. Let cool.

Using a serrated knife, cut each in half horizontally. Spread 1 tablespoon vanilla cream (I used more) on each cupcake bottom. Sandwich with top. Spoon glaze over each, and serve immediately.


Vanilla Cream
*note- I prefer Dorie or Ina's pastry cream and will use my favorite "slightly lightened" version next time I make these.

2 large egg yolks
1/4 cup sugar
2 tablespoons plus 1/2 teaspoon cornstarch
Pinch of salt
1 cup whole milk
1/2 teaspoon pure vanilla extract

Whisk yolks until smooth. Mix sugar, cornstarch, and salt in a medium saucepan over medium heat. Add milk in a slow, steady stream. Cook, stirring, until mixture begins to bubble and thicken, about 5 minutes. 

Pour 1/3 of milk mixture into yolks, whisking constantly. Return mixture to saucepan, and cook over medium heat, stirring often, until thick, 2 to 4 minutes. Stir in vanilla. 

Pass vanilla cream through a fine sieve into a bowl. Press plastic wrap directly on surface. Refrigerate until cold, at least 1 hour, or up to 2 days.


Chocolate Ganache Glaze

2/3 cup heavy cream
6 ounces semisweet chocolate, finely chopped
1 tablespoon light corn syrup

Bring cream to a boil in a small saucepan. Remove from heat, and add chocolate and corn syrup. Let stand for 5 minutes. Whisk until smooth. Transfer to a bowl, and let cool, stirring often. Use immediately.