August 5, 2019
Chocolate Chip Cookies, currently
Friends always ask me exactly how I make my chocolate chip cookies so I'll do my best to lay out the ingredients and techniques, because even a little change makes a big difference.
Brown Sugar- I use dark brown exclusively and prefer the Target or Safeway brand
White Sugar- C & H (I get the 10 lb bags at Costco- they perfectly fill my canister as shown above)
Butter- I exclusively use regular salted butter from Costco except when I can get Land o' Lakes or Challenge inexpensively over the holiday baking season
Vanilla- I always buy Costco's pure vanilla extract. I love the flavor and they finally added a pour spout (I never measure and always dump in extra). This stuff is expensive and delicious. I always mean to make my own but haven't gotten to it yet. My friend gave me a bottle of homemade vanilla for Christmas a while back and I just store it in my pantry and admire it whenever I see it. I love good vanilla. This bottle costs $29.99 at my Costco right now which is a significant improvement from when it reached $38 last year but still a lot more than when I paid $17 a bottle a few years ago. It's expensive but I don't know of a decent substitute. Please leave a comment if you have a source or suggestion. I live in Arizona but Mexican vanilla isn't really my jam due to it's inconsistency, although some varieties are great.
Salt- I use Diamond Kosher Salt for everything at my house except making homemade playdoh (I break out the Morton from the back of the pantry for that!). It's really inexpensive at my local Kroger store.
Kosher and sea salts have a different shaped crystal and softer taste than iodized salt so recipes usually call for varied amounts. For me it works fine to interchange kosher or sea salt but not regular iodized salt. I use 2 teaspoons of kosher salt in this recipe but if you use regular salt you'd want to reduce to probably 1.5, according to taste. I used to use several kinds of salt in my cabinet but space is at a premium and Diamond Kosher tastes great and works well. So I use that for almost everything now. I do have a jar of Maldon I sometimes sprinkle baked goods with. Again, if it's good enough for Ina Garten it's good enough for me.
Baking soda- I buy Arm and Hammer and keep it in this functional and attractive air tight container I found on clearance at the grocery store years ago. When I dropped mine on the tile a few years ago and broke it, I replaced it full price on Amazon right away.
Flour- I use Gold Medal all purpose flour. I like to use freshly ground whole wheat flour for pancakes, waffles, rolls, etc, but for cookies I stick to the classic. I'm not pretending it's healthy magical white flour. Makes a good cookie though. I keep several bags in my spare fridge so I never run out. I buy the standard 5 pound bag and it fits in the same canister I use for my sugar (as seen above). I like using the smaller bags and storing them airtight so my flour is always fresh.
Chocolate chips- I like to use semisweet chocolate for at least half of the add ins. Sometimes I'll add some mint chips, M&Ms (I get the big canister of plain ones at Costco and store it hidden away in the corner of my pantry with the baking stuff), toffee chips, milk chocolate chips (my kids favorite), etc. My personal favorite combo lately is semisweet chocolate chips and M&Ms. That's probably the most common cookie in my Instagram feed. I prefer Ghirardelli, Guittard, Trader Joe's, or Costco (Kirkland) brand chocolate chips (only available in fall/winter at my Costco so I stock up) and don't generally buy Nestle. Everyone has a favorite and it will effect the taste of your final product. My favorite is Kirkland, or TJ's when it's off season.
All that to say- there's a million ways to make a chocolate chip cookie. They're generally delicious regardless of how you make them. This is my (current) method and it will probably continue to evolve. Leave a comment if you have a special tip or favorite kind of chocolate I should try.
One last thing about method- a lot of recipes call for chilling the dough and I appreciate that. However, I usually have lots of kids clamoring for cookies so I generally skip that step.
Anne's (Current Favorite) Chocolate Chip Cookies
by Anne Strawberry
(Printable version)
1.5 cups packed dark brown sugar
3/4 cup white sugar
3 sticks barely softened butter (1.5 cups)
2 eggs
2 teaspoons vanilla
3.5-4 cups flour
1.5 teaspoons baking soda
2 teaspoons kosher salt
3 cups of chocolate chips or M&Ms
Preheat the oven to 350.
Cream sugars and butter until light and fluffy (takes 1-2 minutes in my stand mixer depending on the temperature of the butter). Mix in eggs and vanilla for another minute. Scrape down sides of bowl to make sure everything is evenly incorporated.
Add in the flour (reserving a half cup or so), baking soda, and salt. Pulse mixer slowly until combined. Add the rest of the flour if the dough seems too tender. I usually use all 4 cups but your measuring style, temperature, etc will impact the amount needed. The dough should be pretty strong and able to hold its own, otherwise the cookies will be too fragile and a little greasy. Mix in chocolate chips gently, just enough to incorporate.
Scoop cookies on to Silpat lined baking sheet and bake for 9-10 minutes, until they look just about done and are starting to barely golden on the edges. Enjoy. Cookies freeze beautifully in airtight packages. I think they also taste best on the second day.
A note about scooping cookies- it's quite easy and worth it for the uniformity alone. I usually put 12 cookies on a regular tray but if I'm in a hurry (or trying to minimize oven on time) and the cookies aren't too "spready" I'll put 15 on a tray (3 by 5 pattern instead of the usual 3 by 4). I always use my Pampered Chef Medium Scoop to portion out the cookie dough into "regular" size cookies. I got this scoop in 2003 and have made approximately three million cookies with it and it's still going strong. Big advocate for the real deal here, if you know someone. I do have several other sizes of scoops I've bought in person, on Amazon, etc. Some hold up well and some don't. My nearly 20 year old Pampered Chef scoop is still trucking. Little cookies are fun for kids or for parties when people want to try lots of things or not look like they're eating big dessert (looking at you, bridal and baby showers). Big cookies feel extra special for big day- I just bought the large Pampered Chef scoop to replace mine from the local big box store.
If I have any leftover cookie dough I scoop it with my small scoop and freeze the balls on a plate or in a flat plastic food container. Once they set I transfer them to baggies and store them in the tiny nonsensical shelf on the top of my side by side freezer. My 4 year old calls these "ball cookies" and prefers them to the finished product. I regularly see my hungry 12 year old walking by to snitch them. He doesn't think I know. I know. I also know he's happier when he's not hungry and I don't mind him sneaking a little cookie dough occasionally.
Thanks for sticking with me on this ridiculously long cookie treatise. Leave a comment with your big feelings about chocolate chip cookies. We all have them.
Affiliate links used and theoretically support my expensive vanilla habit, although you should definitely post more than once every two years if you're looking to successfully monetize a blog. Now that I think about it I don't think the affiliate links even pay the hosting bills around here. So let's say "used affiliate links kind of keep this neglected food blog running."
October 20, 2014
New Cookbooks
Dorie Greenspan's new book, Baking Chez Moi- Recipes from My Paris Home to Your Home Anywhere, is also coming out on the 28th. I've baked through about 95% of the recipes from Dorie's book Baking from My Home to Yours and can't say enough good things about them. I loved participating in Tuesdays with Dorie and can't wait to see this newest book. Her recipes are easy to follow and have taught me skills to apply in other recipes that have been invaluable. The photographs are always stunning in her books, as well.
Now I'm kind of torn because I don't know which to ask for for my anniversary. Are you ordering these? What cookbooks are you loving these days? I do get a lot of my recipes online but for my real favorites there's nothing like the physical cookbook and I can't wait to get these on my shelves.
For the other Ina fans out there, have you read this interview? I loved hearing more about how she really eats and cooks (oatmeal every day! Seriously!)
September 7, 2013
Barefoot Contessa + Tyler Florence (and Winter Slaw)
Then they went to Ina's favorite place to buy chicken for Jeffery's dinner every Friday. My kids loved seeing the chickens and I love Tyler quipping about how proud he was to hear Ina's secrets.

For lunch, he made Fried chicken and added whole fresh herbs and garlic to the oil to layer the flavors. The seasoned flour looked amazing. He added Sriracha to the buttermilk for even more flavor. I liked his tip to fry only a few pieces at a time to keep the temperature up. I don't fry things often but after I watched him make this recipe I was dying to make some chicken! You can see the recipe here.
Ina made a winter slaw recipe using shredded kale, radicchio, and Brussels sprouts. With a fresh lemon vinaigrette, craisins, and some Parmesan, it looked so light and yummy. I made it for dinner that night and while my husband wasn't sure that it was actually 'Cole slaw' it was great. The veggies were crunchy and fresh with the light dressing and the sweet and salty kicks from the cheese and craisins were perfect. It also only took a few minutes to make so I think it's going into regular side dish rotation (although the kids aren't happy about that, they looked at me like I asked them to cardboard or something!)
The best part of the episode was when Ina boxed up the enormous three layer cake and said "I don't envy you getting this home on the airplane." Haha! I hope you get a chance to watch it because it was a really fun episode full of great recipes as well. I'll let you know how that big cake goes (this is a pretty massive undertaking considering I barely passed Wilton Course 1 Cake decorating at the craft store- the employee was hesitant to give me the participation certificate, no lie!)
PS If you're on Pinterest... Barefoot Contessa is finally! It's kind of fun to follow her. If you're a dork like me. Don't tell my friend Kara I wrote this blog post. She'll die. Hopefully some of you like Ina like I do. And try the slaw. I'd never had Brussels sprouts before (seriously) and it was fun and yummy to try them.
Winter Slaw
from Ina Garten and Tyler Florence (recipe originally here)
6 ounces Brussels sprouts, trimmed, halved, and cored
6 large kale leaves, center rib completely removed (8 to 10 ounces)
1/2 small head radicchio, cored
1/4 cup freshly squeezed lemon juice
1/2 cup good olive oil
1 teaspoon kosher salt
1/2 teaspoon freshly ground black pepper
1 cup dried cranberries
1 (6-ounce) chunk good Parmesan cheese
With a very sharp knife, cut the Brussels sprouts, kale, and radicchio across in thin shreds and put them all in a large bowl.
In a small bowl or measuring cup, whisk together the lemon juice, olive oil, salt, and pepper. Pour enough dressing on the slaw to moisten it well. Add the cranberries.
Shave the Parmesan in big shards with a vegetable peeler, add it to the salad and toss well. Check for seasonings and serve cold or at room temperature.
June 11, 2012
New Barefoot Contessa Book!
September 6, 2011
TWD- Chocolate Peanut Butter Whoopie Pies
Dorie describes these as 'thin and plain' but they turned out much different for me- fluffy, flavorful, and almost cute. I used a small-ish metal cookie scoop to portion out the dough nicely and will use and even smaller one next time to make tiny little whoopie pies. I think you could really use any flavor filling to compliment the chocolate (mint, raspberry, orange, caramel?) but the second I tried one out of the oven of these I had Barefoot Contessa's peanut butter frosting on the brain. It was a delicious combo as long as you didn't think too much about how much rich, delicious stuff heads into that icing! Thanks Spike for getting me out of my comfort zone so I could discover another new favorite.
See this weeks real recipe here. I've included my recipe with the changes below as I omitted the spices, fruit, and worked with what I had. I'm sure any way you make them they would come out great (once again, butter, sugar, flour, chocolate, how bad can that be?)
Whoopie Pies with Peanut Butter Filling
adapted from Dorie Greenspan's wonderful Baking
2 1/4 cups all-purpose flour
2 tablespoons unsweetened cocoa powder
1 teaspoon baking soda
1/2 teaspoon salt
1/2 stick (4 tablespoons) unsalted butter, softened
1 1/4 cups dark brown sugar
1/2 cup sugar
2 large eggs
2 teaspoons pure vanilla extract
2 ounces unsweetened chocolate, melted and cooled (or bittersweet was fine for me- work with what you have!)
1 cup sour cream
Getting Ready: Position the racks to divide the oven into thirds and preheat oven to 375. Line two baking sheets with parchment or silicone mats.
Whisk together the flour, cocoa, baking soda, and salt. Working with a stand mixer, preferably fitted with a paddle attachment, or with a hand mixer in a large bowl, beat the butter on medium speed until it is creamy and smooth. Add the sugars and beat for two minutes or so, then add the eggs one by one. Beat for another minute-the mixture should be smooth and satiny. Reduce the mixer speed to low and mix in the vanilla and melted chocolate. With the mixer still on low speed, add the dry ingredients and the sour cream alternatively, adding the dry ingredients in 3 batches and the sour cream in 2 (begin and end with the dry team). Do not overmix and be gentle!
Drop the batter by heaping teaspoonfuls onto the baking sheets, making certain to leave at least an inch between the spoonfuls. Note- if this is difficult, try chilling the dough for a few minute in the fridge! Bake for 12-15 minutes- the cookies will puff, spread and round themselves out in baking. They’re done when they are set on top but still springy to the touch. Pull the sheets from the oven and let the cookies rest for 1 minute, then, using a wide metal spatula, carefully transfer them to a rack. Cool to room temperature.
Repeat with the remaining batter, making sure to cool the baking sheets between batches.
Storing: Because these are soft, they are best stored loosely stacked in a tin with wax paper between the layers. They can be kept at room temperature for about 4 days or packed airtight and frozen for about 2 months.
Kathleen's Peanut Butter Icing
adapted from the lovely Ina Garten (aka Barefoot Contessa)
1 cup powdered sugar (I added an additional 1/2 cup for a total 1 1/2)
1 cup creamy peanut butter
5 tablespoons unsalted butter, softened
1 1/2 teaspoons pure vanilla extract
1/4 teaspoon kosher salt
1/3 cup heavy cream
April 22, 2011
By the Book Friday- Parmesan Asparagus for Easter
Can you believe Easter weekend is here? It's snuck up on me again. We are going to have our standard menu- ham (Costco style), potatoes, homemade rolls, and Parmesan asparagus or green beans (whichever is on sale, is that awful?) I usually make something fruity for dessert, like Lemon Curd Cheesecake. This week I tried out a Cherry Pineapple Cobbler thanks to Lucky Leaf Pie Filling. I will post that delicious recipe later today (crossing my fingers!)
The recipe that inspired today's By the Book Friday Post comes from Ina Garten's Barefoot Contessa Family Style. It's no secret that I have a big crush on Ina and she really can't do any wrong in my eyes. I'll admit that I didn't follow the recipe exactly, as she roasts the asparagus and my oven was full at the time (oh, to have a double oven!) So instead, I blanched the asparagus by cooking them for two or three minutes in boiling water, then stopping the cooking by covering them with ice water. Then I crisped them up in a hot skillet with a little butter and olive oil and added the rest of the flavors in Ina's recipe- kosher salt, freshly ground pepper, generous Parmesan cheese, and lemon juice. It just takes a couple minutes and the final product is really fragrant and delicious (even my little man ate these up). And like I said, you can use fresh green beans instead- either makes a delicious spring dinner side dish.
Do you have any Easter favorites that you make every year? I hope you have a wonderful Easter weekend!
Parmesan Asparagus with Lemon from Anne Strawberry
{printable recipe here}
adapted from Ina Garten
2 1/2 pounds fresh asparagus (about 30 large)
2 tablespoons good olive oil
1/2 teaspoon kosher salt
1/4 teaspoon freshly ground black pepper
1/2 cup freshly grated Parmesan
2 lemons cut in wedges, for serving
Preheat the oven to 400 degrees F. (note- I blanked them instead, so I boiled a large pan of water to begin).
If the stalks of the asparagus are thick, peel the bottom 1/2 of each. Lay them in a single layer on a sheet pan and drizzle with olive oil. Sprinkle with salt and pepper. Roast for 15 to 20 minutes, until tender. Sprinkle with the Parmesan and return to the oven for another minute. Serve with lemon wedges.
Variation: Instead of roasting in the oven, I blanched the asparagus for three minutes in salted boiling water. Next, submerge the asparagus in ice water to 'shock' it. Transfer to a skillet warmed over medium high with a couple tablespoons of olive oil or butter and brown for just one or two minutes. Then season and garnish as above, with salt, pepper, sliced Parmesan cheese, and the juice of half a lemon. Serve immediately.
April 1, 2011
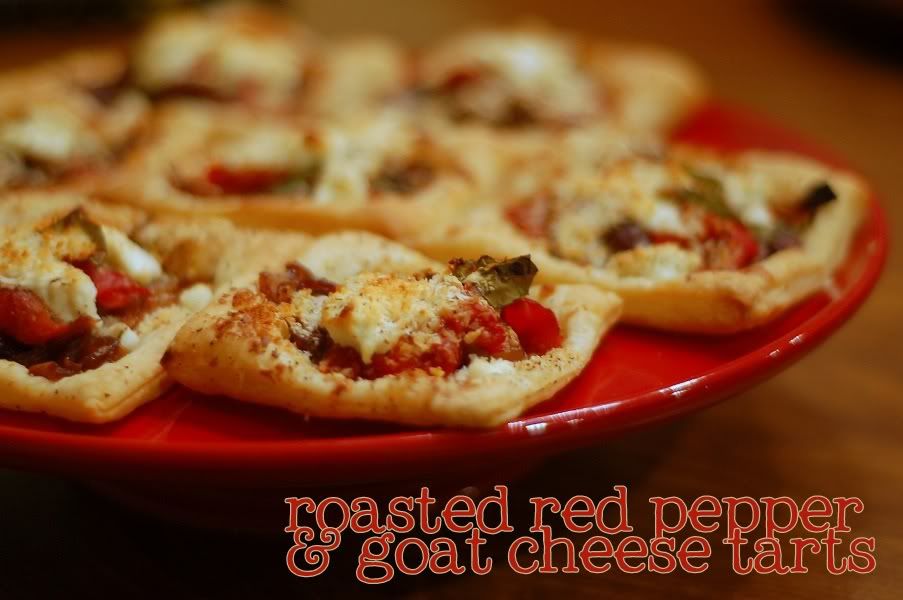
By the Book Friday- Roasted Red Pepper Goat Cheese Tarts

{printable recipe here}
Ina Garten is my favorite so I figured I should start with one of her recipes for my first "By the Book Friday". I really want to focus on trying new things and actually getting through my cookbooks instead of just using them as decorations. I planned to take a nice picture of my cookbooks to show the material I would be working with for this new challenge but my hutch is just too crammed full of books (so next week, maybe?) We had Church recipe group this week and I happened to have a jar of roasted peppers, several boxes of puff pastry I scored at half off, and goat cheese, cheap from Trader Joe's. Everything else required was already in the pantry so I figured this was perfect. These tarts are so great- flavorful, crunchy, creamy, sweet, savory. It takes some time with the caramelized onions but every step is simple and the final product is stunning (even if the older women at recipe night told me the cheese smelled like goats! I think they liked it though!)
A few people asked to join up with By the Book Friday and so I signed up with Mr. Linky to get a widget, but I haven't gotten my sign up info yet so (hopefully) next week we will be good to go! Feel free to leave a link to your post in the comments if you've joined in! And please if you have a better name idea let me know!
Roasted Red Pepper & Goat Cheese Tartsfrom Anne Strawberry
recipe adapted from Ina Garten's Back to Basics
{printable recipe here}
1 package (17.3 ounces/2 sheets) puff pastry, defrosted {I thaw it overnight in the fridge}
Good olive oil
4 cups thinly sliced yellow onions (2 large onions)
3 large garlic cloves, cut into thin slivers
Kosher salt and freshly ground black pepper
3 tablespoons dry white wine {I used a 1/4 cup white grape juice}
2 teaspoons minced fresh thyme leaves
1/2 freshly grated parmesan or romano cheese
4 ounces garlic-and-herb goat cheese {I used regular goat cheese}
1 large tomato, cut into 4 (1/4-inch-thick) slices {note- I used 3/4 cup roasted red peppers or sliced bell peppers in the past}
3 tablespoons julienned basil leaves
Unfold a sheet of puff pastry on a lightly floured surface and roll it lightly to an 12 by 12-inch square. Cut sheet into thirds each way, to yield 9, 3 x 3 squares per sheet (18 total). Place the pastry squares on 2 sheet pans lined with parchment paper and refrigerate until ready to use.
Heat 3 tablespoons of olive oil in a large skillet over medium to low heat and add the onions and garlic. Saute for 15 to 20 minutes, stirring frequently, until the onions are limp and there is almost no moisture remaining in the skillet. Add 1/2 teaspoon salt, 1/4 teaspoon pepper, the wine, and thyme and continue to cook for another 10 minutes, until the onions are lightly browned. Remove from the heat.
Preheat the oven to 425 degrees F.
Using a sharp paring knife, score a 1/4-inch-wide border around each square (being careful to go through only part of the pastry, just use gentle pressure). Prick the pastry inside the score lines with the tines of a fork and sprinkle a tablespoon of grated Parmesan on each tart, staying inside the scored border.
Place a teaspoon of the onion mixture on each circle, again staying within the scored edge. Crumble goat cheese on top of the onions. Place a slice of tomato (or bell peppers or roasted bell peppers) in the center of each tart. Brush the tomato lightly with olive oil (not necessary with the roasted peppers) and sprinkle with basil, salt, and pepper. Finally, scatter 2 or 3 shards of Parmesan on each tart.
Bake for about 20 minutes, until the pastry is golden brown. The bottom sheet pan may need an extra few minutes in the oven. Serve hot or warm.
March 28, 2011
Banana Birthday Cake
This month marks the third year for my cooking blog. The first two recipes I posted were Baked Chicken Cordon Bleu and Cafe Rio Pork Salads (that's still one of my top recipes). From there I was on to a whole lot of baked goods- tons of Dorie Greenspan and Barefoot Contessa recipes. Clearly, not much has changed! I've met so many great people and learned a lot in this crazy process and I really appreciate everyone that stops by, comments, and let's me know how the recipes turn out!
I wanted to make something fun to celebrate and had a bunch of bananas ready to go, so I pulled up all the good sounding banana recipes from my cookbooks and let my facebook peeps guide me. Ina's Banana Cake was the clear winner so I got to work making that. It's simple and delicious, pretty much fool proof and pretty, too. That's why we love the Barefoot Contessa! I also lightened the recipe up a tiny bit with plain yogurt in place of the sour cream. I then un-lightened it by smothering it in cream cheese frosting, what can you do?
Old Fashioned Banana Cake
{printable recipe here}
Adapted by Anne Strawberry from Ina Garten's "How Easy Is That"
3/4 cup sugar
1/2 cup brown sugar (I prefer dark but whatever you have on hand is fine)
grated zest of one orange
3 very ripe bananas, mashed (I make my little man help me with this)
1/2 cup vegetable oil
2 eggs
1/2 cup plain, nonfat yogurt (Ina called for sour cream but yogurt worked great here, either is great)
1 teaspoon vanilla
2 cups flour
1 teaspoon baking soda
1/2 teaspoon salt (I always use kosher but it's up to you)
1/2 cup coarsely chopped nuts (option- I omitted these for baby Strawberry's sake, but I would recommend pecans here)
cream cheese frosting (recipe below)
Preheat the oven to 350. Grease and flour a 9 x 2 inch round cake pan (note- a small casserole pan would work great too, or cupcakes- I'd guess you'd get about 18-20- just lower the cooking time to about 20-25 minutes).
In the bowl of your stand mixer, combine both sugars and the orange zest. Rub together until fragrant. Put on the paddle attachment and mix in the bananas until combined. Still on low, add the oil, eggs, yogurt, and vanilla and mix until smooth.
If you're feeling patient (not likely over here) sift together the dry team- flour, soda salt. Carefully add to the mixer on low speed, until just combined (you don't want to over do this and cause the cake to be tough). Stir in the nuts if desired (or chocolate chips!) Pour the batter into the prepared pan and bake for 45-50 minutes, until a toothpick inserted into the center comes out clean. Cool in the pan for 15 minutes then turn out onto a rack, flip it over again, and cool completely. Frost with cream cheese frosting, garnish with nuts, and enjoy!
Anne's Cream Cheese Frosting
8 ounces neufchatel (reduced fat cream cheese), very soft- that's one box
1 stick (1/2 cup) butter, also softened
1 teaspoon vanilla
1 pound powdered sugar (half a standard bag- about 4 cups)
Cream the cream cheese can butter until smooth and perfectly incorporated on low speed, being careful not to go too long or too fast to avoid excess air in the frosting. Add the vanilla and powdered sugar and mix until smooth and delicious. We use the extra to make coveted "graham cracker sandwiches", just spread a few tablespoons between graham crackers and freeze. Yum.
July 14, 2010
Bastille Day

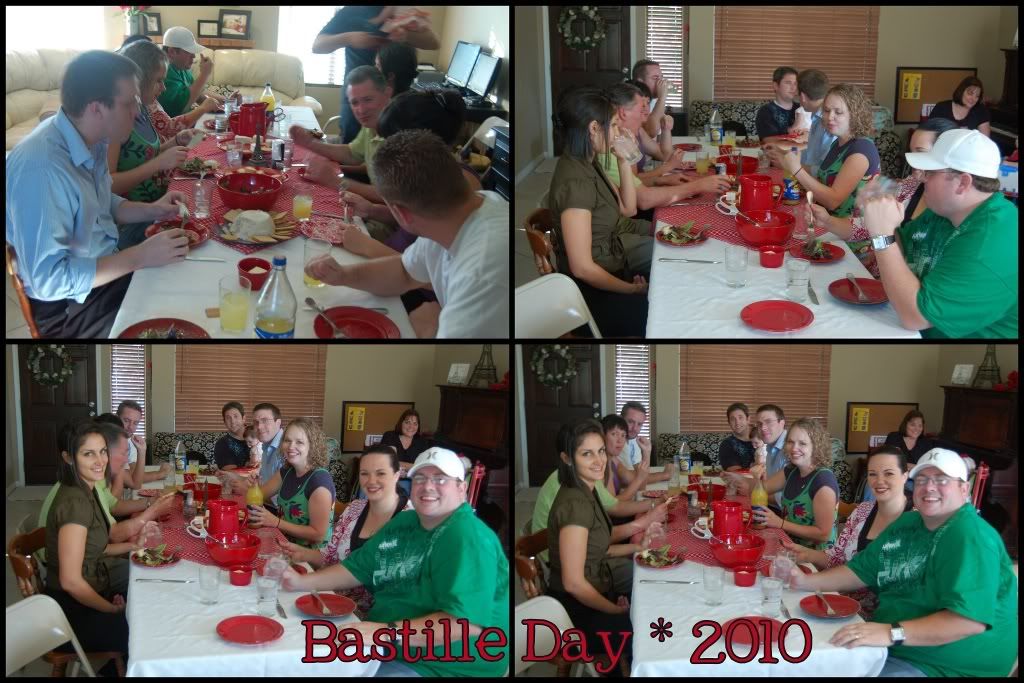
Did you know today is Bastille Day? I love the French language, the country, the art, and French food of course (my car allegiance lies with Germany, though, I'll be honest). So, we celebrate French independence day every year. My husband used to laugh but after a few years he figured out I'm serious about this tradition so now he just enjoys the food and helps me clean the kitchen. Most of the recipes came from my beloved Ina (the Barefoot Contessa). I invited my "Frenchie" friends (only people that lived in France/speak French/etc- there's just not room in my house for everyone unfortunately) and they were so nice to bring appetizers, drinks (Orangina!), and more. I realized that I only have 12 sets of silverware and not enough serving spoons. Live and learn. Last year we had kids running around every where so we had a "sans enfants" policy (except for the little tiny ones). It was much smoother this year and I think that will be a permanent rule for Bastille Day!
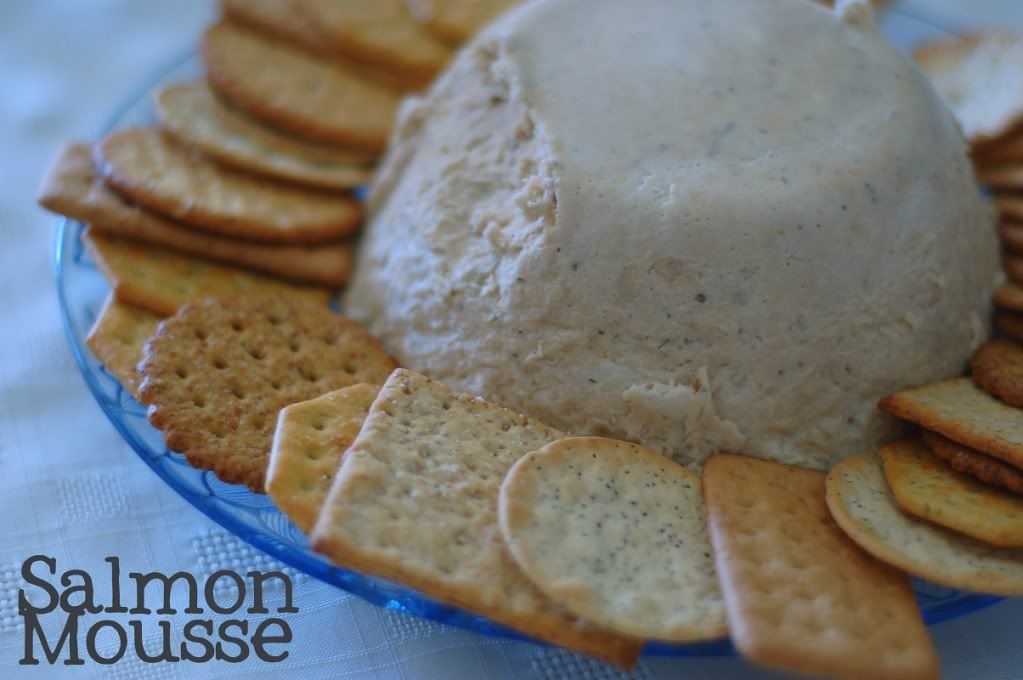
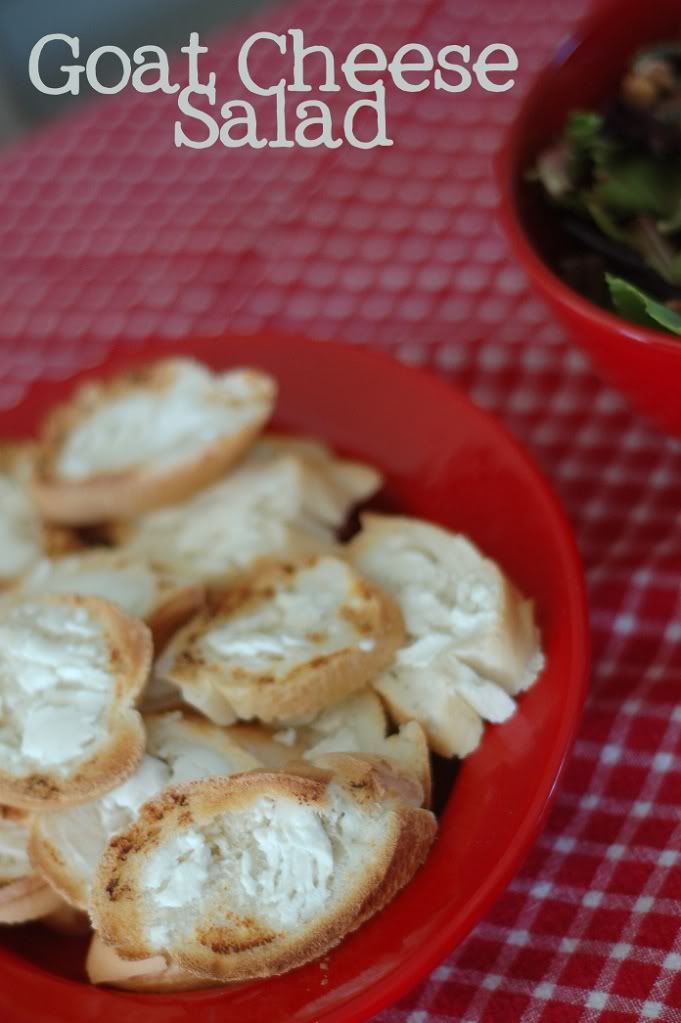
First we had delicious Salmon Mousse made by my beautiful friend Naomi (she's the one in the front left on the pictures below) and Brie and crackers. Yum.Next was a spring mixed salad with a traditional vinaigrette, beets, walnuts, and goat cheese topped baguette. I love goat cheese anything. Quinton touched up the dressing with some thyme and it was delicious. He even made the croutons and did all the work for me while I ran around the kitchen like a crazy person trying to get everything ready.
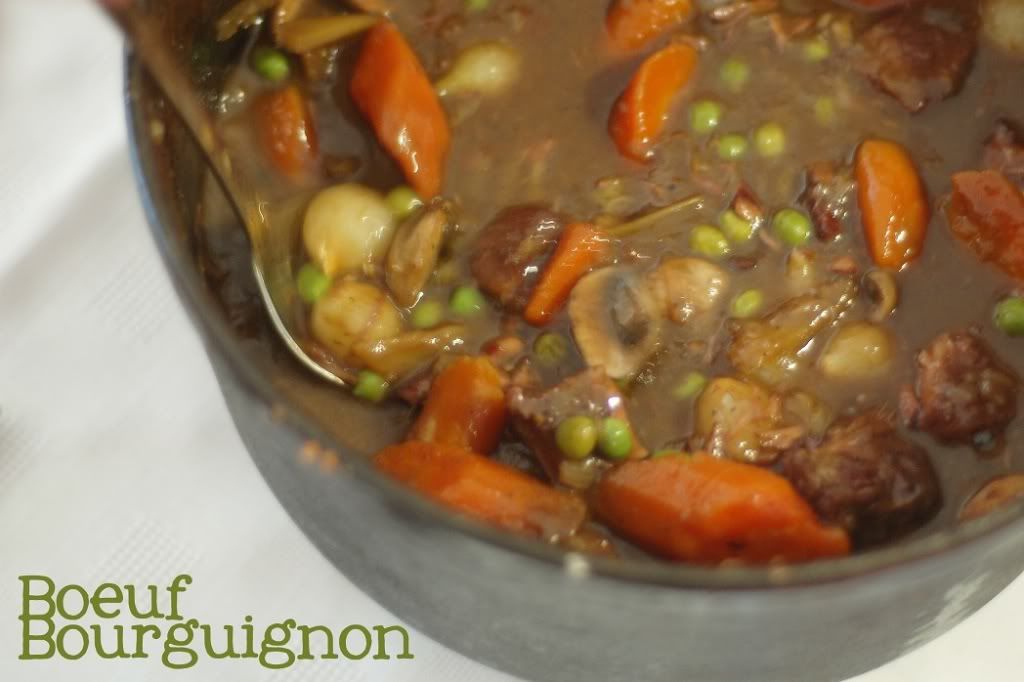
For our main course I made (with much help from my mom, in the chopping, shopping, and baby sitting areas particularly) Boeuf Bourguignon using Ina's recipe. It was touch and go for a while and I was very grateful it turned out. We ate it over French bread and I wish I had more for leftovers tomorrow.
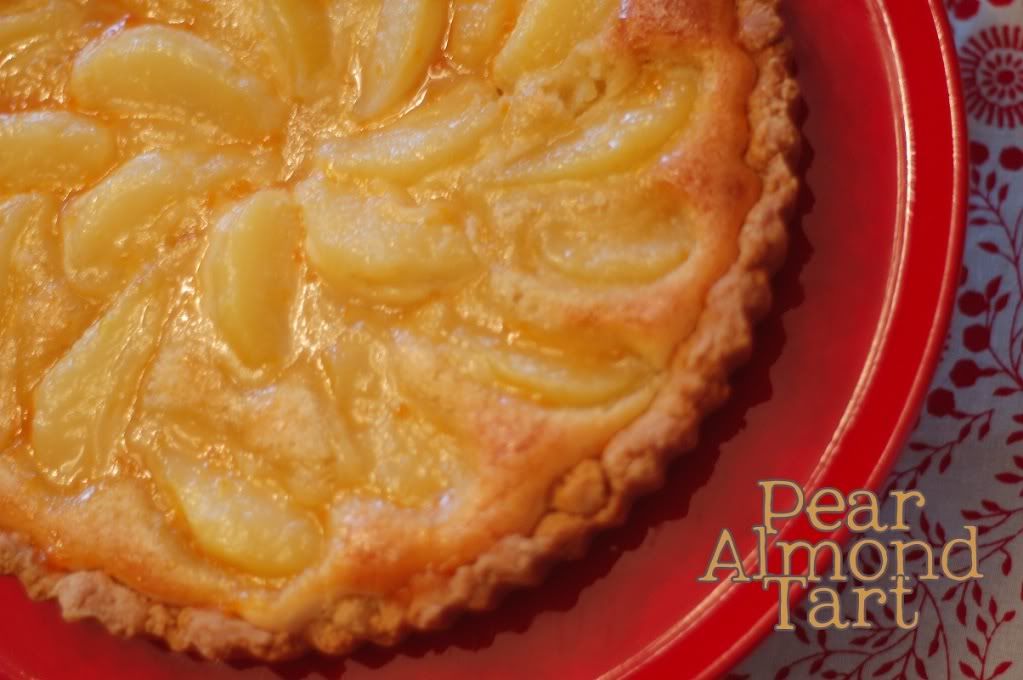
I planned to make a berry tart, one of my very favorite desserts, but when I flipped through looking for the pastry cream recipe I caught my eye on this tart. I loved it last time and it didn't let me down tonight, either. I even used 1/2 white whole wheat flour in the crust and you couldn't tell the difference.
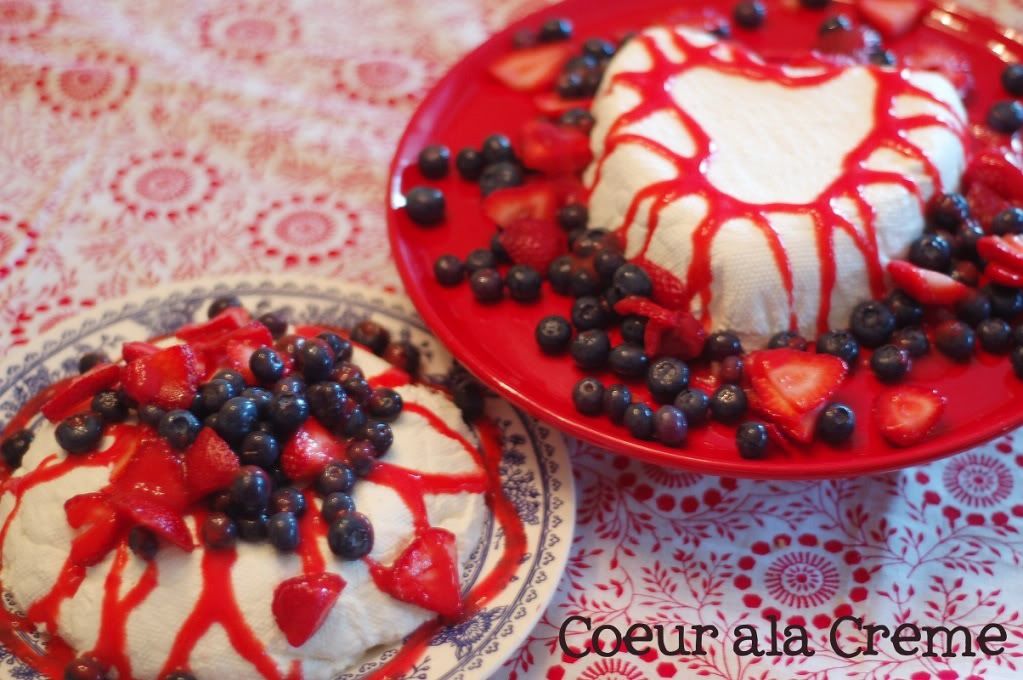
Since I'd already bought berries, I served those with my Coeur a la Creme. I made some strawberry coulis and oh wow, I remembered how much I love that stuff! I used Ina's recipe for the coeur and it made enough to fill my mold and make another, so I just used my collander. It sets over night and tastes like the freshest, more delicious dairy you've ever had. It reminds me of no bake cheesecake, ice cream, and whipped cream all tangled up for a great treat. You buy a mold on Amazon
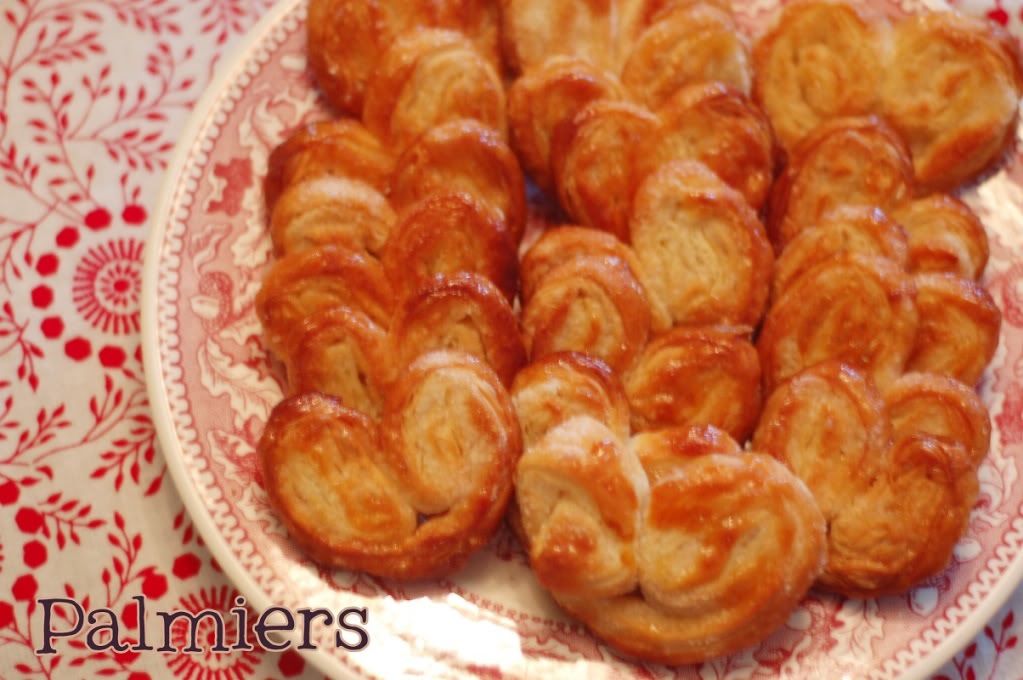
I also made crunchy Palmiers to balance out the creamy Coeur- just sugar and puff pastry. The only downside is that they require a very hot oven in my already hot house! They do make my husband very happy, though, so I am going to try to remember to make these more often.
Everyone is too busy eating to properly look at the camera. I even outsourced lots of the picture taking to Kristi when I remembered at all. We were busy and I'm pretty sure everyone ate. I guess that makes this Bastille Day a success!Anne's New Favorite French Vinaigrette
inspired by Emeril's
2 teaspoons dijon mustard
2 teaspoons whole grain mustard
1/4 cup red wine vinegar
1/4 onion, grated
1/2 teaspoon thyme
1/3 cup extra virgin olive oil
1/2 teaspoon kosher salt
1/2 teaspoon freshly ground black pepper
Combine all ingredients in a screw top jar and shake to combine. Serve over spring mix or other greens and enjoy! This dressing will keep in the fridge for a few weeks.
June 13, 2010
Vegetable Tian (or how to use all that zucchini)
When I saw Ina make this, I knew I would love it (not uncommon while watching Barefoot Contessa, I'll admit). I like every single vegetable in there. Add some seasonings and roast- how bad can that be? Ina delivered as usual. And since you don't have to peel any of these veggies, all you have to do is chop chop and line them up. It looks pretty impressive but is actually super simple. With all the delicious, summer veggies overflowing, this dish is cheap, delicious, and healthy. Go go.
What do you like to make with all the summer produce? I can't live on just zucchini bread (although I might like to, it really hardly qualifies as bread, don't you think?)
Vegetable Tian
from Anne Strawberry
{printable recipe here}
recipe from Ina Garten
Good olive oil
2 large yellow onions, cut in half and sliced
2 garlic cloves, minced
1 pound medium round potatoes, unpeeled
3/4 pound zucchini
1 1/4 pounds medium tomatoes
1 teaspoon kosher salt
1/2 teaspoon freshly ground black pepper
1 tablespoon fresh thyme leaves, plus extra sprigs
2 ounces Gruyere cheese, grated (I subbed Parmesan- I'll only eat that stinky Gruyere in Croque Monsieur, Macaroni, or Fondue!)
Preheat the oven to 375 degrees F. Brush a 9 by 13 by 2-inch baking dish with olive oil. In a medium saute pan, heat 2 tablespoons of olive oil and cook the onions over medium-low heat for 8 to 10 minutes, until translucent. Add the garlic and cook for another minute. Spread the onion mixture on the bottom of the baking dish.
Slice the potatoes, zucchini, and tomatoes in 1/4-inch thick slices. Layer them alternately in the dish on top of the onions, fitting them tightly, making only 1 layer. Sprinkle with salt, pepper, thyme leaves, and thyme sprigs and drizzle with 1 more tablespoon of olive oil. Cover the dish with aluminum foil and bake for 35 to 40 minutes, until the potatoes are tender. Uncover the dish, remove the thyme sprigs, sprinkle the cheese on top, and bake for another 30 minutes until browned. Serve warm.
August 27, 2009
Ina's Greek Panzanella

The first time I made Panzanella, I thought, "Where has this been all my life?" My mom tried it and said, "This is like all the best parts of the salad without any of the boring lettuce!" While lettuce has it's place, I'll admit I'm still extra fond of panzanella. So when I watched Ina make a Greek version, it took all self control to refrain from running to the store and making it right then, in the middle of nap time. I held off until Monday so we could put in our Greek dinner for my brother's birthday. It was simple and delicious and even all those boys gobbled it down. I made a huge recipe and there wasn't a piece left over. With peppers and tomatoes on sale all over right now, I'm sure I'll be making it again soon.
A few tips that will make this salad extra special:
*Use English cucumbers so you don't have to peel them- the color will look better too (wish I had had these, but they were three times the cost so I just had to deal with the regulars!)
*Use two plastic lids (from deli or tupperware containers) to cut the cherry tomatoes- just fill one to the rim with tomatoes, invert the second lid and set on top of the other, and use a serrated knife to saw through them while applying a little pressure on top. Takes all of 30 seconds to cut a whole pint.
*Good feta is vital! Yes feta has a unique taste, but it shouldn't taste rotten (like the cheap kind usually does to me). Try Trader Joe's for a Greek made feta stored in brine. It tastes like the real deal.
*Watch the bread closely. Don't go check your email while it's toasting. It's a good thing I'd bought two loaves since I had to completely start over and didn't quite get the burnt smell out before the party... oops!
Greek Panzanella
from Ina Garten
Good olive oil
1 small French bread or boule, cut into 1-inch cubes (6 cups)
Kosher salt
1 hothouse cucumber, unpeeled, seeded, and sliced 1/4-inch thick
1 red bell pepper, large diced
1 yellow bell pepper, large diced
1 pint cherry or grape tomatoes, halved
1/2 red onion, sliced in half rounds
1/2 pound feta cheese, cut in 1/2-inch cubes
1/2 cup kalamata olives, pitted
For the vinaigrette:
2 cloves garlic, minced
1 teaspoon dried oregano
1/2 teaspoon Dijon mustard
1/4 cup good red wine vinegar
1 teaspoon kosher salt
1/2 teaspoon freshly ground black pepper
1/2 cup good olive oil
Directions
Heat 3 tablespoons olive oil in a large saute pan. Add the bread cubes and sprinkle with salt; cook over low to medium heat, tossing frequently, for 5 to 10 minutes, until nicely browned. Add more olive oil as needed.
Place the cucumber, red pepper, yellow pepper, tomatoes and red onion in a large bowl.
For the vinaigrette, whisk together the garlic, oregano, mustard, vinegar, 1 teaspoon salt and the pepper in a small bowl. While still whisking, add the olive oil and make an emulsion. Pour the vinaigrette over the vegetables. Add the feta, olives and bread cubes and mix together lightly. Set aside for 30 minutes for the flavors to blend. Serve at room temperature.
August 6, 2009
Palmiers, TriColore French Tart (and the giveaway winner!)
I'm slowly getting around to posting my Bastille Day recipes and hope some of you will give them a shot. French food is delicious and doesn't have to be tricky. In fact, these palmiers are the easiest dessert I've made in a long time. And probably one of the most popular, too (I love when that works out!). Palmiers are a crunchy cookie that you can buy from any little bakery in Paris. They come in all sizes and are so simple to make. All you do is roll a sheet of thawed puff pastry in sugar (I added cinnamon for the health benefits, haha) and then roll it up into a log, slice, and bake. It's simple and delicious. I followed Ina's recipe and it worked out great.If you are only baking for a few, you could just make one sheet's worth and make cheese straws with the rest (or apple turnovers, or tomato and goat cheese tarts, there's a lot of options with this stuff!) I also served them with a fruit tart that is easy to modify and so delicious. The rich pastry cream and fresh fruit really complimented the crunchy cookies. If you happen to have any leftover (not really going to happen in my house, but maybe your family has more self control) don't store them in an airtight container as they will soften. I'd recommend just baking off the amount you need and freezing the rest like I've seen Ina do. Then just keep them in the freezer for a last minute treat.
Yesterday I forgot to announce the winner of last weeks giveaway- Leslie M! Thanks everyone for the wonderful suggestions for summer dinners and ice cream flavors. I have work to do now!
Cinnamon Sugar Palmiersadapted from Ina Garten
2 cups granulated sugar (I used less so there was less waste, but you could certainly use the remainder for cinnamon sugar on toast)
1/2 teaspoon ground cinnamon
1/8 teaspoon kosher salt
2 sheets puff pastry, defrosted (just thaw it overnight in the fridge)
Preheat the oven to 450 degrees F.
Combine the sugar, cinnamon, and kosher salt. Pour 1 cup of the sugar/salt mixture on a flat surface such as wooden board or marble. Unfold each sheet of puff pastry onto the sugar and pour 1/2 cup of the sugar mixture on top, spreading it evenly on the puff pastry. This is not about sprinkling, it's about an even covering of sugar.
With a rolling pin, roll the dough until it's 13 by 13-inches square and the sugar is pressed into the puff pastry on top and bottom. Fold the sides of the square towards the center so they go halfway to the middle. Fold them again so the two folds meet exactly at the middle of the dough. Then fold 1 half over the other half as though closing a book. You will have 6 layers. Slice the dough into 3/8-inch slices and place the slices, cut side up, on baking sheets lined with parchment paper. Place the second sheet of pastry on the sugared board, sprinkle with the remaining 1/2 cup of sugar mixture, and continue as above. (There will be quite a bit of sugar left over on the board.) Slice and arrange on baking sheets lined with parchment.
Bake the cookies for 6 minutes until caramelized and brown on the bottom, then turn with a spatula and bake another 3 to 5 minutes, until caramelized on the other side. Transfer to a baking rack to cool.
Serve with ice cream for a delicious and simple dessert!
TriColore French Tart recipe here.
August 1, 2009
Cheese Straws
Today I rolled out of bed, late (7:10, haha!) since my son is "speddin da nite" at his Grandma and Grandpa's. My tall man and I had a hot date last night watching the new Harry Potter and capped it off with a good slow morning (for me anyways, he's out mowing the lawn- maybe I should make him some waffles?). I checked my email, without insistent tugs on my leg for a glass of milk, some cereal, or to come play outside in the heat, and found a new header in my inbox from my wonderful and talented cousin (who I pretend is actually my sister in law). Well needless to say I was excited, because let's be honest, I haven't worked on my blog layout in a while and even when I do work on it, I don't have any idea what I'm doing. I should ask my legit brother in laws for help, because they're actually programmers, but it just hasn't panned out. Hopefully the layout will get more attention soon, but until then, at least there's good food around here. And good food for trade for some programmers help.I can, however, upload a new header, so I did that and sang Kristi's praises in my quiet little house. And since I can't post again without a recipe, I thought now was the time to post Ina's cheese straws I made for Bastille day a few weeks ago (because it was Kristi, brilliant Kristi, who requested them). This simple appetizer requires only a sheet of puff pastry, an egg, some cheese, and some herbs. It only takes a few minutes in the oven and leaves a big impression- I'll just say that even the toddlers wolfed these down. These make a fun appetizer and everyone was more than willing to munch away, but I think you could even turn these into dinner with a nice salad or soup. I know I'll make them again.
PS Don't forget to check out Kristi's photography and design site here... She also does amazing invitations and announcements.
Cheese Straws
from Ina Garten
2 sheets (1 box) frozen puff pastry (such as Pepperidge Farm), defrosted overnight in the refrigerator
Flour, for dusting
1 egg
1 tablespoon water
1/2 cup freshly grated Parmesan
1 cup finely grated Gruyère cheese (or Swiss)
1 teaspoon minced fresh thyme leaves (Italian seasoning would work here too)
1 teaspoon kosher salt
Freshly ground black pepper
Preheat the oven to 375 degrees F.
Roll out each sheet of puff pastry on a lightly floured board until it is 10- by 12-inches. Beat the egg with 1 tablespoon of water and brush the surface of the pastry. Sprinkle each sheet evenly with 1⁄4 cup of the Parmesan, 1⁄2 cup of the Gruyère, 1⁄2 teaspoon of the thyme, 1⁄2 teaspoon of the salt, and some pepper. With the rolling pin, lightly press the flavorings into the puff pastry. Cut each sheet crosswise with a floured knife or pizza wheel into 11 or 12 strips. Twist each strip and lay on baking sheets lined with parchment paper.
Bake for 10 to 15 minutes, or until lightly browned and puffed. Turn each straw and bake for another 2 minutes. Don't over bake or the cheese will burn. Cool and serve at room temperature.
July 23, 2009
Ina's Peach, Blueberry, Cherry Crumble
I love fruit desserts. I love Ina. I can't wait for peach season to come and when it does you can bet I'll be pining for the days when I lived in Utah and could walk one block to Allred Orchards stand and pick one of 10 gorgeous varieties. For now, the "fruit lady" hooks up all my Mesa, AZ peeps with delicious Utah fruit all summer and fall long. Email me (top right) for her info if you're looking for some exceptional peaches, starting in mid August, for Crumbles, Crisps, Cobblers, Waffles, Ice Cream, Smoothies... I don't know, just about everything. And make this Ina recipe (it's another good one, surprise!)
Peach, Cherry, and Blueberry Crumble
loosely adapted from Ina Garten's Barefoot Contessa at Home
For the fruit
2 lbs firm, ripe peaches (6-8 peaches)
2 tsp grated lemon zest
2 tbsp freshly squeezed lemon juice
1/2 cup granulated sugar
1/4 cup all-purpose flour
1 pint fresh blueberries
3/4 cup pitted cherries
For the Crumble
1 1/2 cups all-purpose flour (sub some whole wheat- I bet no one will notice)
1 cup granulated sugar
1/2 cup dark brown sugar, lightly packed
1/2 tsp kosher salt
1 tsp ground cinnamon
1/4 lb (1 stick) cold unsalted butter, diced
2/3 cup chopped pecans
Preheat the oven to 350 degrees.
Immerse the peaches in boiling water for 30 seconds to 1 minute, until their skins peel off easily. Place them immediately in cold water. Peel the peaches, slice them into thick wedges, and place them in a large bowl. Add the lemon zest, lemon juice, granulated sugar, and flour. Toss well. Gently mix in the blueberries and cherries. Allow the mixture to sit for 5 minutes. Spoon the mixture into large baking dish (I used my standard 9 x 13).
For the topping, combine the flour, granulated sugar, brown sugar, salt, cinnamon, and the butter in the bowl of an electric mixer fitted with a paddle attachment. Mix on low speed until the butter is the size of peas. Dump in the pecans. Rub the mixture with your fingertips until it’s in big crumbles, then sprinkle evenly over the fruit. Place the baking dish on a sheet pan lined with a silicone mat and back for 40 to 45 minutes, until the top is browned and crisp and the juices are bubbly. Serve warm or at room temperature. If you want to make these early, store the unbaked crumble in the refrigerator and bake before dinner. Serve with whipped cream or vanilla ice cream (highly recommended!)
May 31, 2009
Bruschetta with Sauteed Sweet Peppers and Goat Cheese
I adapted the recipe for the ingredients I had (goat cheese and mini bell peppers from Costco) but it's plenty flexible- use your favorite cheese or veggie for endless variations. See the other Barefoot Bloggers for more ideas. And next time I'll try these on the grill to keep the flavor in and the heat out- especially important as the temperature rises!
Bruschetta with Sauteed Sweet Peppers and Goat Cheese
adapted from Ina Garten
Good olive oil
1 red bell pepper, seeded and sliced into thin strips
1 yellow bell pepper, seeded and sliced into thin strips
1/2 teaspoon sugar
1 tablespoon capers, drained
2 tablespoons julienned fresh basil leaves
Kosher salt
Freshly ground black pepper
Baguette
3 ounces creamy Gorgonzola or other blue cheese, at room temperature
Preheat the oven to 375 degrees F.
Heat 2 tablespoons of olive oil in a medium saute pan over medium-high heat. Add the peppers and cook until soft, about 12 to 15 minutes. Sprinkle with the sugar and continue cooking for 2 more minutes. Stir in the capers and basil, and season, to taste, with salt and pepper. Set aside.
Slice the baguette crosswise into 18 thin round slices. Brush the bread rounds lightly with olive oil on 1 side. Arrange them in rows, oil side up, on a sheet pan lined with parchment paper and toast in the oven until lightly browned, about 7 to 10 minutes.
Top each toast round with a teaspoonful of the pepper mixture. Place 2 small pieces of Gorgonzola on top. Return the toast to the oven for 1 to 2 minutes and warm through. Serve immediately.
May 28, 2009
Ina's Outrageous Brownies
Sometimes things are understated- words like "KitchenAid". To the unsuspecting eye, you might think of a nice little helper to wipe the counters behind you, not the kitchen appliance that will change the way you cook and make the kitchen your favorite room (what, that's just me?) Some things, though, are a serious understatement. Like any baked good that Ina Garten describes as "outrageous". Well we all love to laugh at the amount of butter in the beloved Contessa's recipes (and I'll stick up for Ina and say she's not nearly as bad as Paula Deen), even Ina admits a certain fondness for butter. So with that said, you know when Ina calls it outrageous, that you'd better watch out. And of course, she delivers. These brownies really were ridiculously delicious. I took the liberty of halving the recipe since I didn't feel right about actually using a pound of butter in a single dessert (except for my beloved Brioche Snails or Pecan Honey Sticky Buns). I omitted the coffee as usual and used my slacker large (not extra large) eggs. I baked them in a small, rectangular Pyrex and think any smaller dish would do (like an 8 by 8- it will just change the thickness a little, which is a matter of personal preference anyways). I did under bake them in my attempts not to over bake them per Ina's dire warning at the end of the recipe. Nonetheless, these tasted as good gooey as I imagine they do fully cooked. And next time I'll serve them with a little ice cream. Even Paula Deen would admit that's outrageous.
Outrageous Brownies
adapted from Ina Garten
2 sticks (1 cup) unsalted butter
14 ounces semisweet chocolate chips, divided
3 ounces unsweetened chocolate
3 large eggs
2 tablespoons real vanilla extract
1 cup sugar plus 2 tablespoons (1 1/8 cups)
1/2 cup all-purpose flour (plus 2 tablespoons for the chips and nuts)
1 ½ teaspoons baking powder
1/2 teaspoon kosher salt
1 cup diced walnut pieces
Preheat oven to 350 degrees F. Grease and flour an 8 by 8 inch pan.
Melt together the butter, 8 ounces chocolate chips, and unsweetened chocolate on top of a double boiler. Cool slightly. Stir together the eggs, vanilla and sugar. Stir in the warm chocolate mixture and cool to room temperature.
Stir together 1/2 cup of the flour, baking powder and salt. Add to cooled chocolate mixture. Toss the walnuts and remaining 6 ounces of chocolate chips with 2 tablespoons of flour to coat. Then add to the chocolate batter. Pour into prepared pan.
Bake for about 30 minutes, or until tester just comes out clean. Halfway through the baking, rap the pan against the oven shelf to allow air to escape from between the pan and the brownie dough. Do not over-bake! Cool thoroughly, refrigerate well and cut into squares.
Don't forget to check out the rest of the Barefoot Bloggers' Outrageous Brownies. It'll have you busting out your double boiler (and our of your jeans, likely) in no time.
April 26, 2009
Ina's Savory Coeur a la Creme
Savory Coeur a la Creme
from Ina Garten
Ingredients
12 ounces cream cheese, at room temperature (I subbed neufchatel and added a little Ultra Gel)
1 cup heavy cream
1 lemon, zested
1 tablespoon freshly squeezed lemon juice
1 teaspoon kosher salt
1/2 teaspoon freshly ground black pepper
1 bottle chutney (recommended: Cross and Blackwell Major Grey's)
Crackers, for serving
Directions
Place the cream cheese in the bowl of an electric mixer fitted with the whisk attachment and whip until it is firm like whipped cream. With the mixer on low speed, slowly add the cream, lemon zest, lemon juice, salt and pepper. Beat on high speed until the mixture is very thick.
Line a 6-inch coeur a la creme mold or 6-inch sieve with a few layers of cheesecloth, allowing the excess to drape over the sides. Pour the cream mixture into the cheesecloth and smooth the top with a rubber spatula. Fold the excess cheesecloth over the top of the cream. Place the mold on a plate or suspend the sieve over a small bowl. Cover with plastic wrap, and refrigerate overnight.
When ready to serve, unmold the creme upside down onto a plate and pour the chutney over the top, allowing it to drip down the sides. Serve chilled with crackers.
April 23, 2009
Croque Monsieur
If I had to list my mom's favorite foods, or maybe foods that remind me most of her, grilled cheese might be number three or four. She makes hers with Colby Jack (pepper jack if the fridge is well stocked) and Roman Meal bread, generously slathered with butter. You see, my mom is a dairy man's daughter. While she might be afraid of too many carbs or million-ounce fountain drinks from QT, she's never shied away from butter. Or cheese. Or milk. Maybe all that Calcium and those vitamins are hiding secrets, though, because my mom looks at least 10 years younger than she is.Anyways, when I saw the Croque Monsieur was this week's Barefoot Blogger's recipe, I knew I had to make it for my mom, not for my thinks-he's-lactose-intolerant-but-probably-just-loves-meat-and-carbs-most husband. And it was a hit. I went to Sprouts for some yummy, dense Italian bread dotted with chunks of roasted garlic and gruyere (I found Jarlsberg). Of course I spent 50 bucks, but don't worry, there's going to be some good green salsa and sweet pork burritos posted soon. And as for all this dairy? I'll admit it makes me a little nervous, besides the beneficial calcium. Nonetheless, this amazing sandwich is totally worth it. I felt French eating it, and even forgot I hate Swiss Cheese. Yes, Ina Garten has super powers. Kind of like my mom.
I wish I could feed you some right now, since I need to ask forgiveness for the "purse camera photos" (my mom hates when I refer to her camera that way, especially since she bought me my "real camera" and covets it) and for forgetting to post my own choice for Barefoot Bloggers. Yikes. It's scheduled to come up this weekend. I know you're dying in anticipation.
from Ina Garten
Ingredients
2 tablespoons unsalted butter
3 tablespoons all-purpose flour
2 cups hot milk
1 teaspoon kosher salt
1/2 teaspoon freshly ground black pepper
Pinch nutmeg
12 ounces Gruyere, grated (5 cups)
1/2 cup freshly grated Parmesan
16 slices white sandwich bread, crusts removed
Dijon mustard
8 ounces baked Virginia ham, sliced but not paper thin
Directions
Preheat the oven to 400 degrees F.
Melt the butter over low heat in a small saucepan and add the flour all at once, stirring with a wooden spoon for 2 minutes. Slowly pour the hot milk into the butter–flour mixture and cook, whisking constantly, until the sauce is thickened. Off the heat add the salt, pepper, nutmeg, 1/2 cup grated Gruyere, and the Parmesan and set aside.
To toast the bread, place the slices on 2 baking sheets and bake for 5 minutes. Turn each slice and bake for another 2 minutes, until toasted.
Lightly brush half the toasted breads with mustard, add a slice of ham to each, and sprinkle with half the remaining Gruyere. Top with another piece of toasted bread.
Slather the tops with the cheese sauce, sprinkle with the remaining Gruyere, and bake the sandwiches for 5 minutes. Turn on the broiler and broil for 3 to 5 minutes, or until the topping is bubbly and lightly browned. Serve hot.
April 9, 2009
Ina's Chinese Chicken Salad
I just got back from a quick trip to Utah and while winter is in full force up there, today was almost ninety back home in Arizona! I do love it here and loved this week's Barefoot Blogger's recipe- perfect for a light spring or summer dinner. This recipe is also open to changes and substitutions- great for whatever veggies you have on hand. You could also sub rotisserie chicken for more convenience and speed, though I couldn't resist the $1.77 a pound skinless chicken breasts. I added peas, eliminated the salt from the dressing, and reduced the peanut butter. Then I served it over a bed of lettuce (or with bread for Mr. Carbohydrate aka My Tall Man). With a squeeze of lime on top, this salad was light and refreshing- perfect! I didn't even feel the need to reduce the butter in this Barefoot recipe, since there wasn't any! :) Don't forget to stop by McKenzie's blog, this week's host, to see her take on the recipe, as well as what all the other Barefooters did.
Chinese Chicken Salad
adapted from Ina Garten
3 chicken breasts
Good olive oil
Kosher salt
Freshly ground black pepper
1/2 pound asparagus, ends removed, and cut in thirds diagonally
1 red bell pepper, cored and seeded
3 scallions (white and green parts), sliced diagonally
1 cup of snow peas or snap peas
1 tablespoon white sesame seeds, toasted
For the dressing:
1/2 cup canola oil
1/4 cup good apple cider vinegar
3 tablespoons low sodium soy sauce
1 1/2 tablespoons dark sesame oil
1 tablespoon honey
1 clove garlic, minced
1/2 teaspoon peeled, grated fresh ginger
1/2 tablespoon sesame seeds, toasted
1/8 cup smooth peanut butter
1 teaspoon freshly ground black pepper
Directions
Preheat the oven to 350 degrees F.
Place the chicken breasts on a sheet pan and rub with the skin with olive oil. Sprinkle liberally with salt and pepper. Roast for 20 to 25 minutes, until the chicken is just cooked. Set aside until cool enough to handle. Cut the chicken into large bite-sized pieces.
Blanch the asparagus in a pot of boiling salted water for 3 to 5 minutes until crisp-tender. Plunge into ice water to stop the cooking. Drain. Cut the peppers in strips about the size of the asparagus pieces. Combine the cut chicken, asparagus, peas, and peppers in a large bowl.
Whisk together all of the ingredients for the dressing and pour over the chicken and vegetables. Add the scallions and sesame seeds and season to taste. Serve cold or at room temperature.
March 26, 2009
Bell Pepper and Goat Cheese Tarts
It's Barefoot Thursday again and I'll spare you another love letter to Ina, although it's certainly in order. Needless to say, these were a hit. I made a few changes- using chicken stock instead of wine, bell peppers instead of tomatoes, and making the tarts smaller to get a few more per sheet. I actually used the cover to a stack of CD's to cut the tarts- like a big cookie cutter. It worked great. You can bet I'll make these again soon. What can I say, I love goat cheese and I LOVE Ina's recipes! I hope everyone liked this one too.Bell Pepper and Goat Cheese Tarts
Adapted from Ina Garten- 1 package (17.3 ounces/2 sheets) puff pastry, defrosted
- Good olive oil
- 4 cups thinly sliced yellow onions (2 large onions)
- 3 large garlic cloves, cut into thin slivers
- Kosher salt and freshly ground black pepper
- 3 tablespoons dry white wine (I used chicken stock)
- 2 teaspoons minced fresh thyme leaves
- 4 tablespoons freshly grated Parmesan, plus 2 ounces shaved with a vegetable peeler
- 4 ounces garlic-and-herb goat cheese
- 1 large tomato, cut into 4 (1/4-inch-thick) slices (I used two bell peppers)
- 3 tablespoons julienned basil leaves
Directions
Unfold a sheet of puff pastry on a lightly floured surface and roll it lightly to an 11 by 11-inch square. Using a 6-inch wide saucer or other round object as a guide, cut 2 circles from the sheet of puff pastry, discarding the scraps. Repeat with the second pastry sheet to make 4 circles in all. Place the pastry circles on 2 sheet pans lined with parchment paper and refrigerate until ready to use.
Preheat the oven to 425 degrees F.
Heat 3 tablespoons of olive oil in a large skillet over medium to low heat and add the onions and garlic. Saute for 15 to 20 minutes, stirring frequently, until the onions are limp and there is almost no moisture remaining in the skillet. Add 1/2 teaspoon salt, 1/4 teaspoon pepper, the wine, and thyme and continue to cook for another 10 minutes, until the onions are lightly browned. Remove from the heat.
Using a sharp paring knife, score a 1/4-inch-wide border around each pastry circle. Prick the pastry inside the score lines with the tines of a fork and sprinkle a tablespoon of grated Parmesan on each round, staying inside the scored border.
Place 1/4 of the onion mixture on each circle, again staying within the scored edge. Crumble 1 ounce of goat cheese on top of the onions. Place a slice of tomato in the center of each tart. Brush the tomato lightly with olive oil and sprinkle with basil, salt, and pepper. Finally, scatter 4 or 5 shards of Parmesan on each tart.
Bake for 20 to 25 minutes, until the pastry is golden brown. The bottom sheet pan may need an extra few minutes in the oven. Serve hot or warm.