Showing posts with label Quick Desserts. Show all posts

March 20, 2012

Pillsbury Bake-Off (and giveaway)

  
Hot pink cupcakes- made my 'red velvet way'- using a white mix, some pink and red gel coloring and a lot of frosting- perfect!

The other day at the park, one of my friends mentioned in passing by that she was up to do/help with/whatever since she isn't busy at all. I was kind of shocked (she does have a family, home and Church responsibilities, lots going on). It made me wonder if her perception of busy is different than mine, if she is just ultra-capable, or if I am just a crazy person and doing too much. I don't know about you but I feel busy. I try to simplify but every so often it just gets to me that I am busy and there isn't a lot to do about it (especially since I am certainly creating my own reality!) Sometimes there isn't a happy shortcut to simplify certain things but when there is... a way to mix quality and efficiency, fun and useful, it makes me happy. 
 
I love experimenting in my kitchen and spending time knocking out big, fun projects (homemade chocolate sweet rolls anyone?) but sometimes I need a showstopper and I need it fast.  When MyBlogSpark contacted me about the Pillsbury Bake-Off I thought it looked like a lot of fun. I love perusing recipes and seeing how creative people can be (and thinking about the $1 Million prize on the line for the best recipe?! Wow!) There are a ton of great recipes to check out- for breakfasts, appetizers, dinner, desserts.

I love recipes like these that feature simple, easy to follow instructions and ingredients and yield infinite different results. It's easy to customize and change things up based on your own preferences. I can't believe how many different things you can do with cresent rolls. Myself, I usually doctor up cake and brownie mixes. Cereal is another tricky one (way more  uses beyond breakfast!) What is your favorite short cut? Something I am missing out on? As for the recipes... I am going to try the Hazelnut French Silk Turtle pie first. Wow.


My favorite lemon cake recipe comes from a box. It's so tender and flavorful (and delicious, even if I am terrible cake decorator!)

Instead of oreos, I use Chocolate Cheerios to make press in crusts for cheesecakes and pies. It sounds kind of weird, but it's crazy delicious and simple too (just some melted butter and whirl in the food processor). Plus, I feel a lot better about eating Chocolate Cheerios than oreos, even if that's fuzzy math.


Peanut butter and cheesecake swirled brownies take less than ten minutes to prepare and taste divine.


These were a beast to name but seriously delicious-
A Golden Graham crust
Topped by a layer of Sugar Cookie Dough
Followed by some apple pie filling
And they layered with a cream cheese filling
And more cookie dough
Then topped with caramel and pecans.
Let's call them Caramel Apple Pecan Cheesecake Sugar Cookie Bars. Or little bars of deliciousness, I think they would answer to that too. They are also easy to customize (store bought cookie dough and pie filling, or homemade, or some of each, whatever you have. It will taste yummy!)

 
I really think anyone can bake delicious food for their families without too much stress. We are all so busy but everyone needs to eat, so why not show your love to your family by making them something special?

MyBlogSpark and Walmart have a prize pack to give away to one lucky reader- a $25 Walmart giftcard to stock your fridge and pantry with yummy food for your families so you can have your own little bake-off. Leave a comment (make sure your profile is linked to your blog or email or leave it for me) by Sunday night, midnight AZ time to be entered. One entry per person. 

And before you shop, check out this site for great General Mill's product coupons- even though I am beyond tired of picking them up off the floor, there's no such thing as too many Cheerio's around here!

Disclosure:  The gift card, information, and giveaway have been provided by Walmart and General Mills, through MyBlogSpark.

March 13, 2012

Thin Mint Blondies

First friends, I would like to apologize for leaving a picture of chips up on my blog for so long. Yummy chips, but chips still. I have actually made a million treats lately between pinewood derby, baby showers, blue and gold banquet (not to mention treats for the meetings to plan all that stuff, don't you think treats make meetings better?) Spring is here and it doesn't usually last too long, so we've spent more time at the park (Little Man broke his foot there jumping seven feet off a piece of playground equipment, working on projects in the garage, and at the doctor's office- see before mention park incident and spring air sharing germs and allergies left and right.

So my apologies again for the slow posts around here. But I have a good one today- courtesy of my original food blog crush, Peabody. If you haven't 'met' her before I'd encourage you to stop by. Her photography is stunning, her recipes are incredible and she's totally hilarious. When I read her blog I don't feel so bad about my baking habits and I also identify with her a lot because she has more than one KitchenAid (for the record, I don't, but I think that would be awesome! Maybe in my fantasy double oven kitchen someday?) These blondies are all kind of deliciousness mixed together- chocolate chip cookie dough, girl scout cookie thin mints, ghirardelli chocolate, mint chips!

If you haven't made blondies before, they are super straightforward- you start with a chocolate chip cookie dough batter, omit the baking soda, and stir in your favorite mix ins. Press into a pan, bake, top with more deliciousness, and enjoy. Thin mints are of course a welcome addition to any dessert and although I had to fight off many kitchen snitchers trying to eat all of mine, it was worth it. Peabody used Andes Chips but I didn't have any of those at my mom's so I chopped up some bittersweet chocolate and some Guittard mint chips. If you haven't tried those before, they are incredible. I used to find them at Maceys in Utah and they have them around the holidays at Safeway here. You can even buy them on Amazon for an arm and a leg, but if you are lucky to have the world's best friend she may randomly drop off two bags for you yesterday (it's like she heard my mixer whirling in the last of my stash into these blondies!)

To see the recipe, please stop by Peabody's. She is incredible and you won't regret it!

Do you have a favorite St. Patrick's Day mint recipe? Are you going to have corned beef next week? Do you have a great source for mint chips? Spill!

February 25, 2011

Jello Popcorn

{printable recipe here}
My friend Lonica's family used to make jello popcorn almost every time we had movie night at her house. I hadn't had it in years but decided on a whim to make it for my little man one weekend. I used strawberry because, well, it's the only flavor of jello I had. Probably because it's the best, really! You can use any color and next time I remember to buy an orange box I'm pretty sure my son will flip out. After I made it I thought, why don't I make this all the time? Well, probably because it's SO healthy- but it's also SO good and definitely worth the splurge. As for the popcorn you start with, be sure to follow Lonica's tip- "The microwave kind doesn't really work, it needs to be plain corn without any butter." If you don't have a popper, though, you can do it on the stove in a big pan.

Lonica's Jello Popcorn
from Anne Strawberry
{printable recipe here}
*notes- I didn't have enough Karo so I took some tips from this recipe from the Kraft website and used a little less and added a bit of butter. You can also bake the popcorn at 350 for 10 minutes after you mix it up if you like it crunchy (but yeah, not so around here!)

2/3 cup popcorn, popped (in an air popper or in a heavy pan on the stove top- see AB's instructions here)- one huge bowl popped
1/2 cup light Karo syrup (Lonica called for twice as much but that's what I had on hand)
1 cup Sugar
1 small box of Jello (any flavor, of course I prefer strawberry)
2 tablespoons Butter (optional- that's my addition but it worked out great)

In a sauce pan over medium heat, combine corn syrup, sugar, and jello. Stir until everything is dissolved and bubbly (a couple of minutes). Stir in the butter, if desired. Pour over the popped corn and stir quickly to combine. Enjoy! Spread on a baking sheet and bake for 10 minutes at 350 if you'd like it crunchy.

December 11, 2010

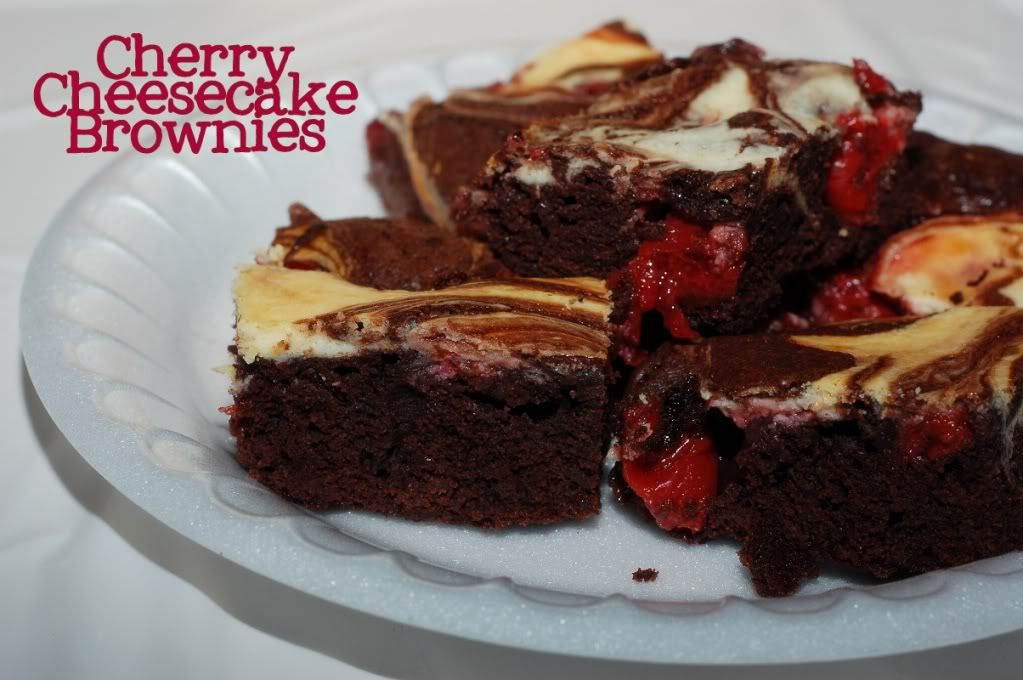
Cherry Cheesecake Brownies

Cherry Cheesecake Brownies 
Did you know Christmas is almost here? I'm sure that, unlike me, you're on the ball and all ready. I actually made these brownies for a Halloween trunk or treat party (as evidenced by the styrofoam plate and hastily shot picture) and haven't had a chance to post yet. My little chickens keep getting sick and like nice children they are sharing their germs with their parents, so we've all been a little crazy! Today I finally got the lights on the tree and my little man is excited to cover it (or the lower half anyway) with ornaments. We made some homemade cinnamon ornaments that were quick and fun- I can't wait to share them with you next week. My house smells wonderful. I love Christmas time even though it's plenty busy!

It feels like we have some get together every spare minute in December. These brownies are the perfect accompaniment because they come together in a flash (five or ten minutes, really, and you can taste the brownie batter along the way so you won't mind the time, or is that just me?) I swirl in some softened cream cheese and a can of Lucky Leaf cherry pie filling and they actually feel fancy, are super easy, and taste SO good. I didn't used to like cherry pie filling. I'm not sure what I was thinking there, but now that I'm a "grown up" I've changed my ways. Lucky Leaf is also having a recipe contest that you can read about here. I have a few more cans of their yumminess in my pantry that I'm going to experiment with. Let me know if you enter- and you should, there's a prize and a trip to their bake off!

Cherry Cheesecake Brownies
from Anne Strawberry

1 box of brownie mix, prepared in a 9 x 13 pan lined with parchment or generously greased- I like Betty Crocker
1 can Lucky Leaf Cherry Pie Filling
1 stick (8 ounces) Neufchatel (reduced fat) cream cheese, softened (regular cream cheese works just fine too, use what you have!)
1 egg
1/4 cup sugar
1 teaspoon vanilla

Preheat the oven to 350.

Make the brownies as directed on the box and pour into a pan lined with parchment so you can lift the brownies out later. Spoon the pie filling evenly over the top.

In a mixer or bowl, combine cream cheese, egg, sugar, and vanilla until perfectly smooth. Using a large spoon, divide it over the brownie batter in random piles. Use a butter knife to swirl everything together and bake for about a half an hour or until they reach your desired "doneness".

June 15, 2010

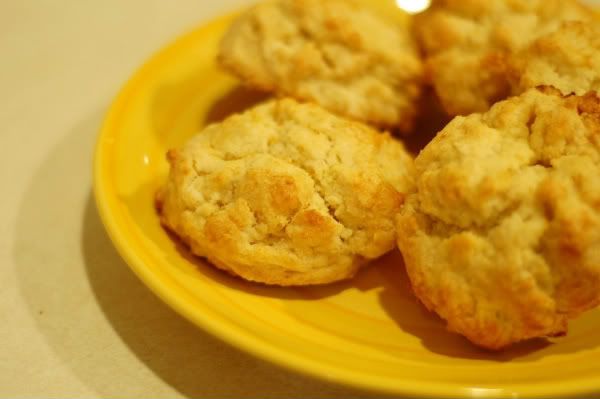
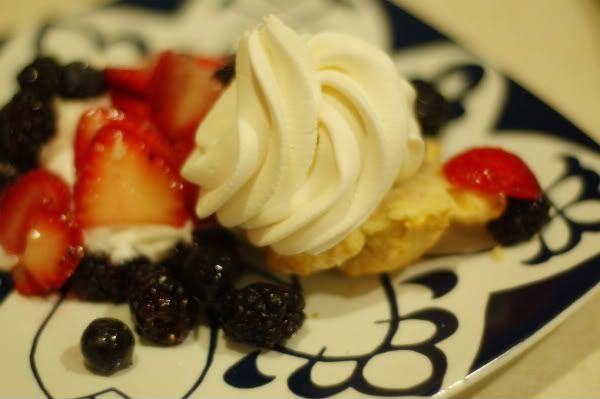
TWD- Tender Shortcakes

Photobucket
If you're thinking I missed the shortcake boat, you're right. I made the wrong recipe for this week on accident! Never fear, though, since any Dorie treat is guaranteed to be delicious. These Shortcakes were no exception.

Photobucket
I only made half a batch because I almost passed out when I read the recipe and did a quick "butter per serving" approximation. Before you go calling me Ellie Krieger, I do bake out of Dorie's lovely book often enough that a little butter doesn't scare me- I know you're all SO surprised. Even so, lots of butter, with lots of cream (so essentially more butter) and not that many servings left me a little nervous! I'm not sure why I kept avoiding this recipe for these reasons, especially since I've openly confessed  my love for pastry cream which is much more deadly, nutrionally speaking! So, back to my faulty logic, I halved the recipe and used a cookie scoop to make smaller shortcakes. Piled mile high with berries, no one noticed. Then I topped them with lots and lots cream, because apparently I don't count the calories in the garnish in my crazy reasonings! I have to say, this recipe is simple and easy and a good use of cream if your container is about to go bad (I'm told some people don't bake often?) It came together in a hurry, only required a few minutes in the oven, and was extremely versatile. And these tasted great, butter, cream, whipped cream and all. A definite make again!

Photobucket

Find the recipe here- Cathy is one of my favorite TWD bakers (thanks for the great choice!) And if you don't have all your weeks mixed up like I do, you can see the beautiful Raisin Swirl Bread from the rest of the TWD group. Hopefully I'll sneak that one in later this week!

April 30, 2010

Fresh Strawberry Pie

{printable recipe here}
Sometimes it takes longer to photograph and write up a recipe than it does to make it! This is one of those recipes- a quick graham crust (you could even buy it, though it wouldn't taste as great), sliced berries covered in a quick sauce (with a hint of lemon zest to surprise), and sweet whipped cream. It took only a few minutes to put together before I had to run to a Church meeting, and then this luscious, red pie sat in my fridge waiting. I was impatient. I'd made a yummy dinner but I couldn't stop thinking about this pie.

By the time everyone was ready to eat it there was no time for photos! I took a couple and we dug in. The pie was gone faster than it was made. I ran these pictures through this fun site and love the old look to them. This is a simple, classic dessert. I don't know a soul who would turn it down. Thank goodness strawberries are in season, because I must to make this again. Thanks Romaine for the new family favorite.

Fresh Strawberry Pie
{printable recipe here}
from Anne Strawberry
adapted from the wonderful Romaine

For the crust:

1 sleeve of graham crackers (or 1 3/4 cups graham cracker crumbs)
3 tablespoons sugar
Pinch of salt
1/2 stick (4 tablespoons) unsalted butter, melted

Center a rack in the oven, preheat the oven to 350°F. Butter a 9-inch springform pan. Pulse the graham crackers in a food processor with the sugar and salt. After they are smooth, turn the machine on and pour the melted butter through the tube until just combine. Gently press into the springform pan (or pie or tart pan) and smooth over bottom and sides, as desired (I usually make mine pretty rough edged, it doesn't have to be perfect!) Place the pan on a baking sheet and bake for 10 minutes. Set the crust aside to cool on a rack while you make the filling.

For the filling:

2 pounds of strawberries, washed and sliced
2/3 cup cold water
2 tablespoons corn starch
3 tablespoons powdered strawberry jello (1/2 a small, 4 ounce box)
3/4 cup corn syrup
zest of one lemon

Whisk water and cornstarch in a medium saucepan. Beat in cornstarch, jello, and syrup and bring to a boil over medium high heat. Stir constantly until mixture thickens and starts to bubble. Remove from heat, stir in lemon zest, and mix in the sliced strawberries. Stir gently and pour over crust. Refrigerate at least two hours before serving with whipped cream or ice cream.


Have a great day!

February 9, 2010

Super Peanut Butter Cheesecake Swirl Brownies

{printable recipe here}
This week's Tuesdays with Dorie recipe is a simple, rich brownie. I love love love brownies. Of all the desserts I made they are probably my favorite (that and cheesecake) but I couldn't squeeze this recipe in. However, last minute my parents had a Super Bowl party and last minute (as in during the actual game) we decided we needed something sweet so I made my go-to brownies. I swirled in reduced fat cream cheese and broken Dove candies filled with Peanut butter for an extra surprise. They are kind of (I REALLY hate to say it) semi-homemade but when you're in a real hurry and the kids are crying semi is better than not at all. Maybe I'll eat my words on that later and maybe some of you will "unfriend" me or whatever but these brownies were eaten quicker than they were made. Which is saying something.

I like to line my pan with two pieces of aluminum foil- the first "hot dog style" folded to the width of the pan, the second "hamburger style" over the first. Then grease, then pour, then bake, then lift out beautiful brownies. Plus, if you're like me and have your husband take the brownies out, he'll ensure they aren't overly gooey like mine usually are. Ah, perfection is a close as a hastily lined brownie pan. Really, though, don't the scraped out and mangled brownies kind of ruin it for you? Try this next time or just let me know if I'm the only one who cares about such things.

Don't forget to enter my giveaway for a $50 giftcard to the Safeway family of stores here and see the rest of the real "brownies for Julia" at the TWD Blogroll.


Peanut Butter Cheesecake Brownies
from Anne Strawberry

{printable recipe here}

1 package Betty Crocker Deluxe brownie mix (I like the one with the chocolate chunks, not the fudge), prepared as instructed on the box
1 package Neufchatel (reduced fat) Cream Cheese (softened- on the counter or in the microwave on low power for one minute)
1 Egg
1/3 Cup Sugar
1 teaspoon Vanilla
10 Dove chocolates filled with peanut butter, broken into quarters (or your favorite candy bar, nut, etc)

Preheat the oven to 350. Prepare brownies as directed on the box and pour into prepared 9 x 13 baking dish.

In a small bowl, whip the cream cheese until soft and smooth (about one minute). Add the egg, sugar, and vanilla and mix until well combined. Dollop spoonfuls evenly over the brownies, drop on the candy, and use a butter knife to carefully swirl the pattern by pulling it through the batter until desired look is achieved.

Bake for about 30 minutes until they are done as you like them (gooey for me, just set for my Tall Man).

December 22, 2009

TWD- Puff Pastry Pecan Pie (my 200th post)

{printable recipe here}

Christmas is here. We are overloaded with goodies, enjoying the perfect Arizona "winter", and loving the excitement our little man has for "Chissmas tine" (as he says it!) This week's Tuesdays with Dorie recipe sounded delicious, especially since I tried pecan pie for the first time last week and loved it (you can find the original recipe at Beth's blog). That's right, I'd never tried it before. Sometime I decided I didn't like it and so I've never eaten it, heading instead for the apple or berry pies. But Pecan Pie has been redeemed for my palate, not unlike guacamole which was a smash hit when I finally tried it when I was about 18.

With all the Christmas craziness, though, I didn't have time to make a pie crust. So I rolled out a piece of puff pastry, trimmed the edges, glued the strips on to make a little wall, and crisped it in the oven for a few. Meanwhile, I prepped half the filling, added a little flour, and cooked it until it boiled on the stove. Then I stirred in the egg and vanilla, poured the sauce into the shell, and sprinkled it with nuts. The good news is that the whole thing only takes a few minutes to make, even with two crazy kids in the kitchen. ANYONE can make this, really! And while this isn't exactly a traditional pecan pie, you can't really go wrong with butter, nuts, and brown sugar. Then go ahead and top it with whipped cream. Like Ina would say, "How bad can that be?" And while I'm glad to know I actually love pecan pie, I guess my "skinny jeans goals" should just be grateful it took me a while to figure that out!

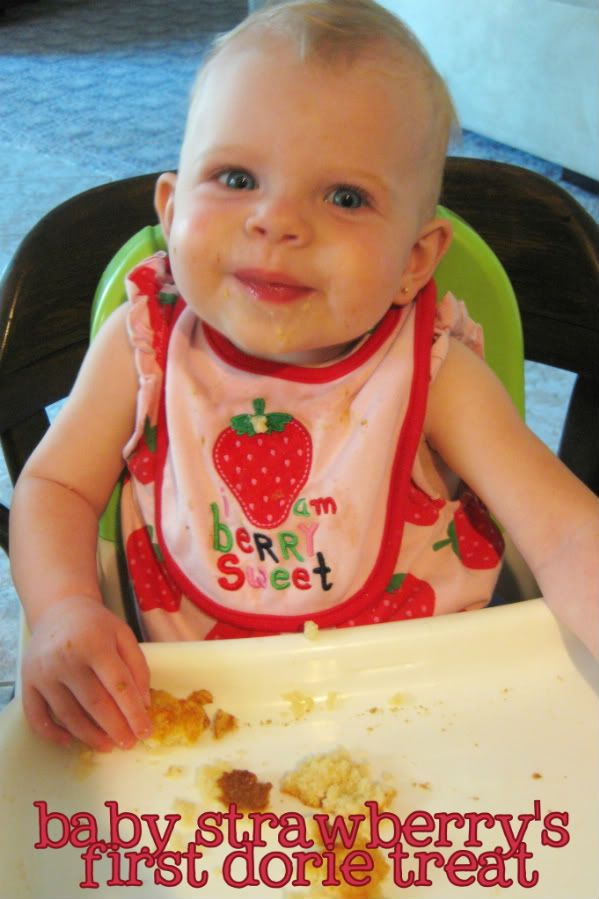
PS This is indeed my 200th post (so you get a picture of my little man and baby strawberry!). I guess the picture is pretty fitting since she's the most delicious thing I've made since I started this blog. You can click here to see some of my favorite recipes so far- and admist many buttery, delicious treats there are even a few salads (promise!). Thanks for reading along and have a very Merry Christmas!

Puff Pastry Pecan Pie
{printable recipe here}
from Anne Strawberry
adapted from Baking by Dorie Greenspan

1 sheet puff pastry, thawed
3/8 cup light corn syrup
1/4 cup dark brown sugar
1 tablespoons unsalted butter, softened
1/4 teaspoon salt
2 teaspoons flour
2 large eggs
1 teaspoon pure vanilla extract
1 cup pecan halves or pieces

Preheat the oven to 350.

Flour a board and roll out the puff pastry to about 11 by 11. Trim a 1 inch strip off each side. Place large sheet on a lined baking sheet.

Whip one egg with 1 teaspoon of water. Using a pastry brush, apply the egg wash to the borders of the puff pastry and gently place the strips on top to adhere them (forming a frame). Dock the center of the pastry with a fork, using the tines to prick all over the dough every 1/4 inch or so. Brush the top of the edges with the egg wash to promote browning. Place in the oven and bake for 10 minutes.

In a medium saucepan, combine the syrup, brown sugar, butter, flour, and salt. Whisk over medium heat until the mixture boils then set aside for a few minutes. Then, while whisking, slowly pour in the egg wash and the other egg. Whisk in the vanilla until everything is thoroughly combined. Carefully spoon sauce over the pastry shell, filling the created cavity. Sprinkle with nuts and bake for 10 more minutes, or until the pastry is browned and the filling it set.

Cut and serve with whipped cream or ice cream.

August 25, 2009

TWD- Creamy Lime Pie

I LOVE lime. I love it so much that the lime tree was the first we planted at our new house. I'll take my lime squeezed over buttered and powdered sugar french toast, on top of a shrimp taco, in my water, and my goodness, in dessert? Even better! So I was pumped to see the Creamiest Lime Cream Meringue Pie chosen for this week's Tuesdays with Dorie recipe.
I spent all day in the kitchen Monday making Greek food (I'll post the Greek Panzanella soon) for my brother's birthday, though, and by the time I went to make the pie I realized I didn't have the four hours necessary for fridge time. I hated to make gloppy, not-quite-set pie (though let's be honest, I would have been more than happy just to drink the lime cream- it looks so good), so I just opted for my version of the Florida Pie. It's quick, it's easy (so easy I feel almost like Sandra Lee, /gag), and it's a crowd-pleaser.

Of course it helps when the crowd is all starving 21 and 22 year old boys (and my little man- he insisted on sitting with "da boys"). While they'll eat anything and everything (they did, too, there's not one scrap of leftovers for tomorrow) this really is a delicious pie. Topped with whipped cream and with all the refreshing lime flavor, this pie's a winner.

Summer Key Lime Pie
Adapted from Baking by Dorie Greenspan

Note- I used a regular pie crust this time, but a graham comes together in much less time and tastes great too- either way you can't go wrong!


For the crust:
1 3/4 cups graham cracker crumbs (about one sleeve)
3 tablespoons sugar
1/2 stick (4 tablespoons) unsalted butter, melted

For the filling:
4 large egg yolks
1 14-ounce can sweetened condensed milk
1/2 C. Fresh Key (or regular) lime juice (from about 5 regular limes)
1 teaspoon Lime Zest

To make the crust:

Butter a 9-inch springform pan (or pie plate or tart pan). Stir the crumbs and sugar together in a medium bowl. Pour over the melted butter and stir until all of the dry ingredients are uniformly moist. Turn the ingredients into the buttered springform pan and use your fingers to pat an even layer of crumbs along the bottom of the pan and about halfway up the sides. Don't worry if the sides are not perfectly even or if the crumbs reach above or below the midway mark on the sides—this doesn't have to be a precision job. Put the pan in the freezer while you preheat the oven.

Center a rack in the oven, preheat the oven to 350°F and place the springform on a baking sheet. Bake for 10 minutes. Set the crust aside to cool on a rack while you make the filling.

Center a rack in the oven and preheat the oven to 350 degrees F. Put the pie plate on a baking sheet lined with parchment of a silicone mat.

Working with a stand mixer, preferably fitted with a paddle attachment, or with a hand mixer in a large bowl beat the egg yolks and lime zest at high speed until thick and pale. Reduce the mixer speed to low and beat in the condensed milk. Still on low, add half of the lime juice. When it is incorporated, add the remaining juice, again mixing until it is blended. Bake the pie for 12 minutes. Transfer the pie to a cooling rack and cool for 15 minutes, then freeze the pie for at least 1 hour. Serve with whipped cream and garnish with lime zest or lime wedges.

August 17, 2009

Peach Blueberry Pie with Cream Cheese Filling

I'm vastly relieved to report that peach season has started at last. While peaches are one of my favorite fruits, the real reason I'm rejoicing their coming is their meaning to my palate- the heralding of fall. While it's still over a hundred here and too hot to bake much (my apologies for skipping Tuesdays with Dorie's apple bars), peaches mean that fall is coming. Soon it will cool down, I'll have my baby (35 days to go!), and I won't be so hot all day long!

A slice of this pie will also go a long way toward cooling you down. The crust only takes a few minutes to bake (and you could even buy one if you're inclined, though making and baking this takes less time than it does for me to go to the store and back with my toddler in tow). With the cool, creamy filling it's worth every minute it takes to make (a whole 20 from start to finish, yay!)

Peach Blueberry Pie with Cream Cheese Filling

For the crust:
1 3/4 cups graham cracker crumbs (about one sleeve)
3 tablespoons sugar
1/2 stick (4 tablespoons) unsalted butter, meltedTo make the crust:

Butter a 9-inch springform pan (or pie plate or tart pan). Stir the crumbs and sugar together in a medium bowl. Pour over the melted butter and stir until all of the dry ingredients are uniformly moist. Turn the ingredients into the buttered springform pan and use your fingers to pat an even layer of crumbs along the bottom of the pan and about halfway up the sides. Don't worry if the sides are not perfectly even or if the crumbs reach above or below the midway mark on the sides—this doesn't have to be a precision job. Put the pan in the freezer while you preheat the oven.

Center a rack in the oven, preheat the oven to 350°F and place the springform on a baking sheet. Bake for 10 minutes. Set the crust aside to cool on a rack while you make the filling.

For the Filling:
1 block Reduced Fat (Neufchatel) Cream Cheese, softened
1/4 cup Sugar
1 teaspoon vanilla
1/2 cup cold cream

Whip Cream and set aside. In the same bowl, mix the cream cheese, sugar, and vanilla until light and fluffy. Remove bowl from stand mixer and gently fold in the whipped cream.

For the Fruit Topping:
4 ripe peaches
2 teaspoons lemon or lime juice
1 pint blueberries
2-4 tablespoons sugar (to taste)

Peel and slice peaches. Place in large bowl with citrus juice and gently toss peaches to cover (this will prevent browning). Add blueberries in carefully then add sugar to taste (depending on ripeness of fruit). Set aside.

To assemble pie:

Spread cream cheese mixture in cooled crust. Spoon fruit on top carefully and refrigerate until ready to serve.

August 6, 2009

Palmiers, TriColore French Tart (and the giveaway winner!)

I'm slowly getting around to posting my Bastille Day recipes and hope some of you will give them a shot. French food is delicious and doesn't have to be tricky. In fact, these palmiers are the easiest dessert I've made in a long time. And probably one of the most popular, too (I love when that works out!). Palmiers are a crunchy cookie that you can buy from any little bakery in Paris. They come in all sizes and are so simple to make. All you do is roll a sheet of thawed puff pastry in sugar (I added cinnamon for the health benefits, haha) and then roll it up into a log, slice, and bake. It's simple and delicious. I followed Ina's recipe and it worked out great.

If you are only baking for a few, you could just make one sheet's worth and make cheese straws with the rest (or apple turnovers, or tomato and goat cheese tarts, there's a lot of options with this stuff!) I also served them with a fruit tart that is easy to modify and so delicious. The rich pastry cream and fresh fruit really complimented the crunchy cookies. If you happen to have any leftover (not really going to happen in my house, but maybe your family has more self control) don't store them in an airtight container as they will soften. I'd recommend just baking off the amount you need and freezing the rest like I've seen Ina do. Then just keep them in the freezer for a last minute treat.

Yesterday I forgot to announce the winner of last weeks giveaway- Leslie M! Thanks everyone for the wonderful suggestions for summer dinners and ice cream flavors. I have work to do now!

Cinnamon Sugar Palmiers
adapted from Ina Garten

2 cups granulated sugar (I used less so there was less waste, but you could certainly use the remainder for cinnamon sugar on toast)
1/2 teaspoon ground cinnamon
1/8 teaspoon kosher salt
2 sheets puff pastry, defrosted (just thaw it overnight in the fridge)

Preheat the oven to 450 degrees F.

Combine the sugar, cinnamon, and kosher salt. Pour 1 cup of the sugar/salt mixture on a flat surface such as wooden board or marble. Unfold each sheet of puff pastry onto the sugar and pour 1/2 cup of the sugar mixture on top, spreading it evenly on the puff pastry. This is not about sprinkling, it's about an even covering of sugar.

With a rolling pin, roll the dough until it's 13 by 13-inches square and the sugar is pressed into the puff pastry on top and bottom. Fold the sides of the square towards the center so they go halfway to the middle. Fold them again so the two folds meet exactly at the middle of the dough. Then fold 1 half over the other half as though closing a book. You will have 6 layers. Slice the dough into 3/8-inch slices and place the slices, cut side up, on baking sheets lined with parchment paper. Place the second sheet of pastry on the sugared board, sprinkle with the remaining 1/2 cup of sugar mixture, and continue as above. (There will be quite a bit of sugar left over on the board.) Slice and arrange on baking sheets lined with parchment.

Bake the cookies for 6 minutes until caramelized and brown on the bottom, then turn with a spatula and bake another 3 to 5 minutes, until caramelized on the other side. Transfer to a baking rack to cool.

Serve with ice cream for a delicious and simple dessert!

TriColore French Tart recipe here.

June 22, 2009

Snickerdoodle Blondies

For Father's Day, I needed a good and quick dessert to feed my in laws (and husband). It couldn't include chocolate because of my tall man, so I remembered Peabody's Snickerdoodle Blondies and knew they would be just right. I think with a healthy serving of ice cream my husband didn't miss brownies at all. And I know that the light cinnamon flavor is, to me at least, a refreshing break from all that heavy, delicious chocolate. I did up the decadence by stirring in a some cinnamon chips that my cousin smuggled down from Utah (I'm not sure why we don't have them in Arizona, I know they'd be well appreciated!) These come together just like cookie dough and bake in about a half an hour. Line the pan with foil for easy clean up and serving. We served ours with ice cream and strawberries (but you know me, I'd serve strawberries with just about anything.)

Snickerdoodle Blondies
from Culinary Concoctions by Peabody
8 ounces (two sticks) unsalted butter, at room temperature
1 cup granulated sugar
1 cup loosely packed light brown sugar
3 ounces Mascarpone cheese (I subbed cream cheese or sour cream)
2 eggs
1 tsp vanilla extract
½ tsp baking powder
1 tsp baking soda
pinch of salt
¾ tsp cream of tarter
¼ tsp freshly grated nutmeg
2 cups all-purpose flour
3/4 cup cinnamon chips (optional)

Cinnamon Sugar for coating (about 1/3 cup)

Preheat oven to 350F. Butter a 9 by 13-inch pan. Sprinkle cinnamon sugar and move pan around to make sure that the bottom and sides are coated. Set aside.

In a medium bowl, sift together the flour, baking powder, baking soda, salt, nutmeg, and cream of tarter.

Using an stand mixer, cream together the butter and sugars. Beat for three minutes. Scrape down the bowl. Add the Mascarpone cheese and beat until fully incorporated.

Add eggs, one at a time, scraping down the bowl after each addition. Add the vanilla and beat for another 30 seconds.

On low speed add the sifted flour mixture. Mix until fully incorporated. Add optional cinnamon chips if desired.

Spread mixture evenly into prepared pan. Sprinkle more cinnamon sugar on top of the batter. Bake for 20-25 minutes. Remove from oven and let cool on a wire rack for 5 minutes. Cut into squares and serve.

June 16, 2009

Cinnamon Honey Greek Yogurt Dip

Last fall I went to Greece and enjoyed amazing food and beautiful scenery (not to mention the company of my favorite people!) So when the nice people at Stonyfield asked if I'd like to try some Greek yogurt, I knew everyone at my house would be happy. My brother says the Greeks use yogurt like crazy and even serve it with beans (he didn't want me to recreate that one, though). We tried several different recipes, subbing in the thick, strained yogurt for sour cream and to add richness to other dishes. Seriously, people didn't believe that it was fat free. And good for you (and you don't even have to go to Greece to get some? Though I'd still recommend the trip...) This cinnamon dip is sweet and tangy and perfectly compliments all the fresh fruit overflowing right now. And since it comes together in one bowl in as many minutes, it'll make everyone happy.

Cinnamon Honey Yogurt Dip
1 (7 oz.) container Greek yogurt
1/4 cup honey (to taste)
Ground cinnamon (also to taste)

Directions:
Combine the yogurt and honey in a small bowl. Mix thoroughly until smooth and well combined. Add a very small amount of cinnamon, taste, and adjust accordingly. Cover and refrigerate. Serve with fresh fruit.

from Annie's Eats

June 9, 2009

TWD- Easy Parisian Apple Tartlets

I never ate a bad pastry in France. Even when buying from the biggest hole in the wall or (something I would never do in America) from a bakery in the metro station, they taste great. The French just know food. And with high quality butter, delicious produce, and simple flavors, you can't go wrong. So I was excited to try this Parisian tart. Unlike the apple pie I made last week that took tons of time chilling, rolling, cutting, etc (with a fabulous end result), the assembly of this dessert took about five or ten minutes (also with a fabulous end result). A brief stint in the oven and out comes a flaky, buttery, and tender dessert. With different fruit options, there's really no limit to this recipe.

Atop La Tour Eiffel
And with all the time you've saved making this wonderful French treat, why not watch a romantic movie with your honey. Or the Lakers game, in our case.

Parisian Apple Tartlets
Adapted from Baking by Dorie Greenspan

1 sheet cold puff pastry
3 apples, peeled and cored
1/3 cup brown sugar
3 teaspoons cold butter, cut into bits

Center a rack in the oven and preheat the oven to 400 degrees F. Line a baking sheet with parchment paper or a silicone mat.

Lightly flour a surface and roll the puff pastry out to about an 11 inch square. Using a fluted cookie cutter between 3 and 4 inches wide, cut pastry into about 8 pieces.
(Reserve the scraps, sprinkle with cinnamon sugar, and bake for a few minutes for a treat for your hungry husband who can’t stand to wait during the photos!)
Cut the apple half into 4 or 5 slices (depending on size) and place three slices on the pastry circle. Sprinkle the apple with 1 or 2 teaspoons brown sugar-depending on how much sweetness you want-and a couple bits of butter.

Bake the tartlet for about 20 minutes (the time will vary depending on how your apple bakes), until the pastry is deeply browned and puffed up around the apple and the apple can be easily pierced with the tip of a knife. If it looks like the tartlets need more sugar on top, sprinkle on a bit more toward the end of the baking time.

Transfer the baking sheet to a rack and let the tartlet cool-it's great just a little warm and equally good at room temperature. Serve with ice cream if desired.

May 21, 2009

Phyllo Apple Pies

Since my brother got back from Greece, he's been begging me to make something with Phyllo dough. Anything. Well, anything except Spanakopita. You should hear him say it- it sounds like a curse. So when I found boxes of Phyllo dough for only a buck at Safeway, I knew it was time. I thawed the beast Alton Brown style (one minute in the microwave, thank you) and went to work. I'll admit there were a few casualties, but I'm not sure that it was the thawing or my total inexperience.

I melted some butter, greased up the mini pie pans, and layered quarter sheets of phyllo (that I cut with kitchen shears for ultra precision, ahem) around the circle with a little bit of butter in between. Meanwhile, I used my sweet apple corer/peeler/slicer to make quick work of four apples. I threw them in a glass bowl, added a bit of water and cinnamon, covered with saran wrap, and nuked for five minutes. When they came out all soft and delicious, I added a bit of sugar and stirred. I dumped some apples into the little shells, pulled all the phyllo pieces to the middle for a quick topping, and drizzled a bit of extra butter on top. I figured I might as well not throw it away. After a few in the oven, these babies came out beautiful and tempting. And I was only 30 minutes in (counting the baking!)

While the final product isn't exactly Greek (sorry Bro) the taste of apples and butter is definitely one of my favorites. I know there's butter in the pastry, but there's hardly any added to the dish, and it just tasted SO good. I'm thinking of making a big version of these cute little minis. It's tender, flavorful, and doesn't even require ice cream on the side. Though I'm sure not even the Greeks would mind a little scoop of vanilla.

Phyllo Apple Pies
from Anne Strawberry
makes six mini pies

4 Medium Apples (I like something a little tart, like Fujis)
1 teaspoon Cinnamon
1 tablespoon Water
1/4 Cup Sugar

6 Sheets of Phyllo dough, thawed
2 tablespoons butter, melted (plus or minus)

Preheat the oven to 375.

Peel, core, and slice the apples as you would for apple pie. Place in glass bowl with cinnamon and water, cover with saran wrap, and microwave for five minutes. Carefully remove plastic and stir in sugar. Set aside.

Cut phyllo sheets into quarters and brush pie pans with a little butter. Layer one piece of pastry at a time, then brush on a bit of butter, and put in another piece at a slight angle, repeating until you've made it around the circle (about four pieces per dish- more if you'd like the crust thicker).

Place 1/4 cup of apple mixture inside each prepared pie dish. Pull the pastry sheets together toward the center, pinching and tucking until it looks about right. Drizzle a tiny bit of butter on top. Place on baking sheet and bake until golden brown, about 20 minutes. Serve sprinkled with powdered sugar or with ice cream.

March 19, 2009

Ina's Brownie Pudding... my new favorite dessert

Dear Ina,

I've been a fan for a long time. I watch your show faithfully, love your house, envy your kitchen, laugh at your jokes, and think you and Jeffrey are adorable. I've made probably 30 or 40 of your recipes in the past year alone and can't think of one I haven't liked.

However, this brownie pudding rocks. I expect awesome things from you but this was beyond delicious. Even reducing the butter by a quarter, I fell right in love with this dessert. It was so good I couldn't be bothered taking great pictures but had to dig in. The Butterfinger ice cream melting on top was too much to resist.

Thanks for everything. Please come to Phoenix for a book signing someday. I feel like we're old friends, but now we're best friends.

Love,

Anne Strawberry

What are you waiting for? Go make it now! And wish me luck- I really shouldn't eat this for breakfast today, but it's going to be hard to resist. (Don't forget to enter the giveaway below if you haven't already!)

Freaking Delicious Brownie Pudding
adapted from Ina Garten, my best friend I've never met

6 tablespoons unsalted butter, plus extra for buttering the dish (that is the reduced amount- the original calls for 1 stick for the half recipe)
2 eggs, at room temperature
1 cup sugar
3/8 cup good cocoa powder
1/4 cup all-purpose flour
1 teaspoon vanilla extract
Vanilla ice cream, for serving

Preheat the oven to 300 degrees F. Lightly butter 6 ramekins or mini pie tins. Melt the butter and set aside to cool.

In the bowl of an electric mixer fitted with the paddle attachment, beat the eggs and sugar on medium-high speed for 5 to 10 minutes, until very thick and light yellow. Meanwhile, sift the cocoa powder and flour together and set aside.

When the egg and sugar mixture is ready, reduce the speed to low and add the vanilla and the cocoa powder and flour mixture. Mix only until combined. With mixer still on low, slowly pour in the cooled butter and mix again just until combined.

Pour the brownie mixture into the prepared dish and place it in a larger baking pan. Place pan in oven. Add enough of the hottest tap water to the pan to come halfway up the side of the dish and bake for about 30 minutes- until the edges look done but the center is still a little soft. A cake tester inserted 2 inches from the side will come out 3/4 clean. The center will appear very under-baked; this dessert is between a brownie and a pudding.

Allow to cool and serve with vanilla ice cream.

March 3, 2009

Girl Scout Cookie Thin Mint Mini-Cheesecakes

We're totally cake-less this week, although I'm sure my Tuesdays with Dorie friends have baked up some amazing treats this week. For excuses I'll just say strep throat and 103 fever kept me away from the oven. However, these little Girl Scout Cookie treats are quick and delicious. I've been saving these photos to post for a while and with those little girls outside the supermarket testing the most devout among the new years resolutioners, it's time.

I literally had to fight my brother in laws off with a spatula to keep them from devouring these before the girls had a chance. You'll love them. And forgive me for skipping this week's cake- I'll be back soon, I promise! With good news too!

PS I didn't hear back on my last address so I have a new third winner for the giveaway... email me your address asap and I'll get all of those sent out! :)

1freshstart said...
Ha! We make protein shakes every morning... frozen strawberries,1% milk and soy protein, couldn't do it without our blender!
Oatmeal can be pretty scary- just don't buy the microwave packets... TOTALLY different texture. If you get the traditional cook stuff - it's kinda nutty and good.
~Cat
February 17, 2009 9:05 AM


Girl Scout Thin Mint Cookie Cheesecake Cups
adapted from Picky Palate
1 sleeve Thin Mint Cookies, ground in food processor or blender (or Mint Oreos)
3 Tablespoons melted butter
8 oz softened cream cheese (Neufchatel reduced fat works great)
1/2 Cup sugar
1 egg
2 Tablespoons Sour Cream or Butter Milk
5 Thin mint cookies coarsely crumbled

1/4 Cup Chocolate, chopped
3 Tablespoons heavy cream
6 Thin mint cookies, crumbled (for top of cups)

Preheat oven to 300 degrees F. Combine ground cookies and butter in a medium bowl. Drop about 1 Tablespoon of cookie mixture into 24 mini cupcake tins prepared with liners. Press crust into cups with back of a spoon.

In an electric or stand mixer cream the cream cheese and sugar until well combined. Add egg and sour cream until well combined as well. Stir in crumbled cookies. Pour cheesecake mixture into cupcake tins filled almost to the very top. Bake for 25-28 minutes or until cooked through. Remove and cool for 15 minutes. Melt chocolate in microwave on very low heat, stirring occasionally, until smooth. Stir in heavy cream until smooth and shiny. Spoon over each cheesecake cup and sprinkle with additional crumbled cookies.

January 22, 2009

Barefoot Bloggers- Puff Pastry Sticky Buns

One of the recipes I tried first out of the Barefoot Contessa book was these sticky buns. I did hear they were a little hard to remove from the muffin cups so I baked them on a sheet pan. Of course, I cut out most of the butter and just made these like a regular cinnamon roll. They had a different texture with the puff pastry and seemed a bit like an appetizer- crunchy, easy finger food. I know my husband loved them but I still prefer my cinnamon rolls gooey and creamy. Either way, these will satisfy for your sweet tooth in a hurry! Thanks Melissa for the great choice and make sure to see all the other Barefoot Blogger's takes on this fun recipe.

Puff Pastry Sticky Buns
adapted from Ina Garten
1 package (17.3 ounces/2 sheets) frozen puff pastry, defrosted
4 tablespoons butter, softened
2/3 cup light brown sugar, lightly packed
3 teaspoons ground cinnamon
1 cup chopped pecans
1 cup powdered sugar
1 teaspoon vanilla
1 tablespoon milk

Preheat the oven to 400 degrees. Line a sheet pan with parchment paper or a silicone mat and set aside.

Lightly flour a wooden board or stone surface. Unfold one sheet of puff pastry with the folds going left to right. Brush each sheet with two tablespoons softened butter. Leaving a 1-inch border on the puff pastry, sprinkle each sheet with 1/3 cup of the brown sugar, 1 1/2 teaspoons of the cinnamon, and 1/2 cup of the chopped nuts. Starting with the end nearest you, roll the pastry up snugly like a jelly roll around the filling, finishing the roll with the seam side down.

Trim the ends of the roll about 1/2 inch and discard. Slice the roll in 6 equal pieces, each about 1 1/2 inches wide. Place each piece, spiral side up, on the prepared sheet. Repeat with the second sheet of puff pastry to make 12 sticky buns.

Bake for 20 minutes, until the sticky buns are golden to dark brown on top and firm to the touch. Allow to cool a few minutes before glazing. To make glaze, combine powdered sugar, milk, and vanilla and stir until smooth.

September 12, 2008

Simply Wonderful Apple Crisp

A few weeks ago I went to lunch at my cousin Kristi's house and she served the most wonderful apple crisp. She raved about how simple and easy it was to make and we raved about how delicious it was, too. Naturally I asked her for the recipe when I realized that I had bought about four times as many apples as I needed for the Barefoot Blogger's Apple Turnovers. This came together in a flash one afternoon earlier this week, thanks mostly to my handy apple peeler and corer. If you don't have one, peel the apples with a paring knife or vegetable peeler, cut into quarters, and chop into 1 inch pieces. I made a few "Anne" modifications- a little lemon, a little extra cinnamon, and not quite as much nutmeg. I also reduced the topping by half since I figured with a little less "crisp", this is nearly a healthy dessert. Well fine, my judgment in that area has been more than impaired by Tuesdays with Dorie. I do think, however, that this quick and inexpensive dessert is practically healthy, and totally delicious. Plus, calcium has been shown to help with weight loss, so don't forget to include some whipped cream or ice cream on top.

Kristi's Apple Crisp
Adapted from Kristi Ellingson

Filling:
6 Cups Tart Apples, Sliced
1 Teaspoon Lemon Juice
1/2 Cup Sugar
1 Teaspoon Cinnamon
1/4 Teaspoon Nutmeg

Combine all ingredients in a large bowl and toss gently. Pour into a medium baking dish (9 x 9 or 9 x 11 for example).

Topping:
3/4 Cup Sugar
3/4 Cup Rolled Oats
3/4 Cup Flour
1/2 Cup (1 Stick) Butter, cold and cut into small pieces

Combine all ingredients with a pastry cutter or two forks (even your fingers will do in a pinch) until the butter is incorporated in small pieces.

Pour topping over the apples and bake from 35-45 minutes at 350. Serve warm with whipped cream or vanilla ice cream.

August 25, 2008

Pineapple Sorbet

A few weeks ago I mentioned my new ice cream maker. Since I got it, I've made several recipes and had several flops. I don't normally have such problems when I'm trying something new so I've been determined to get it right. A couple of times I didn't freeze the bowl long enough so I ended up with soup (the case of the Blueberry Sour Cream Ice Cream and the Banana Sorbet I attempted this weekend). Then, I made Peach Frozen Yogurt from the recipe in the manual and no one liked it (too sour- I think we all love Golden Spoon!). I also made Dorie's Vanilla Ice Cream but in the course of cooking the custard and chasing the baby I ended up cooking it to about 15 degrees higher than recommended. Needless to say, when it froze it tasted pretty crazy (though the cooked version reminded me a bit of pastry cream, which I love!).

So anyways, last night I was determined to do something right with this sweet new appliance. I froze the bowl over night and decided to try Pineapple sorbet. I used frozen pineapple from Trader Joe's so it was nice and cold before going into the mixer even. I'm sure canned pineapple (or fresh) would work too but would take longer to freeze. The resulting sorbet was flavorful, fresh, and so pretty. Finally. You can see my assistant couldn't hardly keep his hands off it for the photos. Let's just say, I'm going to try and clear a spot in the freezer and I'll be making this again. And please let me know if you have some amazing ice cream recipes!

Frozen Pineapple Sorbet
by Anne Strawberry

1 lb Frozen Pineapple Chunks
1/2 Cup Sugar
1/2 Cup Light Corn Syrup
6 Tablespoons Fresh Lemon Juice
1/3 Cup Water

Combine all ingredients in food processor with metal blade and pulse until smooth. Pour into freezer bowl of ice cream maker and churn until thick. Eat immediately or allow two hours in the freezer to harden sorbet.