It's finally my turn to choose this week's Tuesdays with Dorie recipe and I was shocked how hard it was to decide! First, I felt I could not choose a chocolate recipe for the sake of my husband, which narrowed down the field. Then, I wanted something wonderful and worthy of the holidays.
When I flipped the page to the Tall and Creamy Cheesecake I knew I'd found my selection. Dorie posted about this cheesecake back in April and I've been pining over it ever since. Highly customizable, this cheesecake is flavorful, beautiful, and not too heavy. I'm dying to see everyone's variations and will post my own (Peppermint Bark) below Dorie's recipe. Inspired by a recent visit to The Cheesecake Factory, I divided the batter into thirds and flavored one-third with white chocolate and the other two-thirds with peppermint extract. I swirled in Andes Mint peppermint chips after marbling the two batters together. I also added a few tablespoons of cocoa powder to the crust for color (haha). I figured my husband could eat around that!
Cute baby Marcus was the star of the show on Saturday but didn't get to try any! I served this cheesecake at a baby shower for my old friend Alyson and it was delicious (though it would have been better blue than pink!) My favorite thing about it is the great flavor without the heavy heavy texture. While prepping for the party, I realized that I'd left my camera at home. Pardon the purse camera pictures, but thanks to my mom for letting me borrow her cute little point and shoot (which happens to be the same color as the cheesecake!)
We moved into our house on Christmas Eve (like crazy people) and are without internet. More importantly, we are without kitchen! The cabinets missed the train by one day and with the holidays that meant an extra two weeks. My husband was too anxious to finally live in his Christmas present, the biggest of his life, so we are sans internet, sans kitchen, and even sans kitchen sink! Thankfully our parents are close by so I'll be stealing computer and oven time around there until we are all set up. Have a happy new year and I'll be back with York Peppermint Patty Chocolate cookies (you can see them peaking in from one of the corners of the demolished cheesecake picture).
I've taken the recipe from Serious Eats where you can hear more about it.
Tall and Creamy Cheesecake: A Basic
makes 16 servings
From Baking From My Home to Yours, by Dorie Greenspan
Ingredients
For the crust:
1 3/4 cups graham cracker crumbs
3 tablespoons sugar
Pinch of salt
1/2 stick (4 tablespoons) unsalted butter, melted
For the cheesecake:
2 pounds (four 8-ounce boxes) cream cheese, at room temperature
1 1/3 cups sugar
1/2 teaspoon salt
2 teaspoons pure vanilla extract
4 large eggs, at room temperature
1 1/3 cups sour cream or heavy cream, or a combination of the two
Procedure
To make the crust:
Butter a 9-inch springform pan—choose one that has sides that are 2 3/4 inches high (if the sides are lower, you will have cheesecake batter leftover)—and wrap the bottom of the pan in a double layer of aluminum foil; put the pan on a baking sheet.
Stir the crumbs, sugar and salt together in a medium bowl. Pour over the melted butter and stir until all of the dry ingredients are uniformly moist. (I do this with my fingers.) Turn the ingredients into the buttered springform pan and use your fingers to pat an even layer of crumbs along the bottom of the pan and about halfway up the sides. Don't worry if the sides are not perfectly even or if the crumbs reach above or below the midway mark on the sides—this doesn't have to be a precision job. Put the pan in the freezer while you preheat the oven.
Center a rack in the oven, preheat the oven to 350°F and place the springform on a baking sheet. Bake for 10 minutes. Set the crust aside to cool on a rack while you make the cheesecake.
Reduce the oven temperature to 325°F.
To make the cheesecake:
Put a kettle of water on to boil.
Working in a stand mixer, preferably fitted with a paddle attachment, or with a hand mixer in a large bowl, beat the cream cheese at medium speed until it is soft and lives up to the creamy part of its name, about 4 minutes. With the mixer running, add the sugar and salt and continue to beat another 4 minutes or so, until the cream cheese is light. Beat in the vanilla. Add the eggs one by one, beating for a full minute after each addition—you want a well-aerated batter. Reduce the mixer speed to low and stir in the sour cream and/or heavy cream.
Put the foil-wrapped springform pan in the roaster pan.
Give the batter a few stirs with a rubber spatula, just to make sure that nothing has been left unmixed at the bottom of the bowl, and scrape the batter into the springform pan. The batter will reach the brim of the pan. (If you have a pan with lower sides and have leftover batter, you can bake the batter in a buttered ramekin or small soufflé mold.) Put the roasting pan in the oven and pour enough boiling water into the roaster to come halfway up the sides of the springform pan.
Bake the cheesecake for 1 hour and 30 minutes, at which point the top will be browned (and perhaps cracked) and may have risen just a little above the rim of the pan. Turn off the oven's heat and prop the oven door open with a wooden spoon. Allow the cheesecake to luxuriate in its water bath for another hour.
After 1 hour, carefully pull the setup out of the oven, lift the springform pan out of the roaster—be careful, there may be some hot water in the aluminum foil—remove the foil. Let the cheesecake come to room temperature on a cooling rack.
When the cake is cool, cover the top lightly and chill the cake for at least 4 hours, although overnight would be better.
Serving:
Remove the sides of the springform pan— I use a hairdryer to do this (use the dryer to warm the sides of the pan and ever so slightly melt the edges of the cake)—and set the cake, still on the pan's base, on a serving platter. The easiest way to cut cheesecake is to use a long, thin knife that has been run under hot water and lightly wiped. Keep warming the knife as you cut slices of the cake.
Storing:
Wrapped well, the cake will keep for up to 1 week in the refrigerator or for up to 2 months in the freezer. It's best to defrost the still-wrapped cheesecake overnight in the refrigerator.
Peppermint Bark Cheesecake
from Anne Strawberry
3 tablespoons cocoa powder
2 teaspoons peppermint extract
5 drops red food coloring
3 ounces white chocolate, melted and cooled
1/4 cup Andes Peppermint chips
4 ounces Peppermint Bark, broken into large pieces
Prepare crust as directed and stir in cocoa powder. Bake as directed.
Prepare cheesecake batter as above and divide into thirds. Into one third, stir in white chocolate. Set aside.
In other two thirds, stir in peppermint extract (to taste) and add food coloring to achieve desired color.
Pour in pink batter, spoon over white batter, sprinkle with peppermint chips, and swirl together to form a marble pattern.
Bake and cool as directed and top with whipped cream, chocolate syrup, and peppermint bark. Enjoy!
December 30, 2008
December 23, 2008
Red Velvet Cupcakes
Everyone has their thing. I, for one, will never buy frosting. It tastes awful and I can't handle store bought flavor. I will also only buy Heinz ketchup. It's probably petty and certainly ridiculous but even when the budget is tight, I'd rather buy half as much ketchup and wait until a sale than stare at a "western family catsup" bottle every time I open the fridge and dip into something not quite right.
However, with cupcakes... I'm not so die hard. I've had some delicious home made cupcakes and some too-dry-for-all-the-effort homemade cupcakes. So, I know some people will click this window shut when they see a cake mix, and some will say, "finally, something I'll actually make." I guess you can't please everyone, but I promise these cupcakes do. I found this recipe about six years ago in the Arizona Republic. They take me right back to my wedding and the most beautiful cake I ever saw. These are fast, moist, and delicious. I've made them using yellow, lemon, chocolate, and other cake mixes. With the hustle of the holidays, I don't think you'll miss all the measuring and sifting. And I'll be back to crazy, 100 percent homemade desserts once I have a real kitchen again (moving is sure tricky!)
Note: I decorated these with Wilton's Jumbo Nonpareil sprinkles, generously donated by Auburn. I'm crazy enough that I just picked out the green ones. Good thing my husband wasn't home, he would have seriously doubted me there.
Red Velvet Cupcakes
1 cup sour cream (reduced fat is fine)
1/2 cup water
1/2 cup canola oil
3 eggs
1 tablespoon vanilla
1 ounce red food coloring (one small bottle)
1 box German chocolate cake mix
Preheat the oven to 350.
Combine all ingredients in stand mixer and beat for two minutes until combined. Using a 2-tablespoon scoop, scoop into 24 paper-cup lined muffin tins.
Bake for 21-24 minutes or until cupcakes spring back slightly when touched and a tooth pick inserted into the middle comes out clean. Cool on racks and frost once completely cooled.
Cream Cheese Frosting
1 package of cream cheese, softened (I like to use Neufchatel, less fat and I don't notice much difference)
1/2 cup butter, softened (one stick)
2 Tablespoons milk
2 teaspoon pure vanilla extract or the seeds of one vanilla pod, scraped
dash of salt
6 cups of powdered sugar (more or less to achieve desired consistency, this is a baseline)
1 Tablespoon meringue powder
In a mixer with the whisk attachment, combine the cream cheese and butter until light and fluffy. Add in the milk, vanilla, and salt, and blend.
Next, add the powdered sugar and meringue powder, cover the bowl of the mixer with a dish towel, and turn it on low until everything is combined. Then increase the speed for a minute or so until the frosting is light, fluffy, and delicious. The meringue powder will help set the frosting after it dries so it holds its shape.
Variation:
Add 1 T. Lemon or orange zest and substitute juice for the milk to make a tangy citrus frosting
December 22, 2008
Christmas Sugar Cookies
Merry Christmas everyone! I've been neglecting my blog and will spare you any excuses. However, I have been baking a lot (big surprise) for the holidays. We like to decorate sugar cookies with our families every Christmas and had a nice time together last night. I made Dorie's sugar cookies again but this time I added more vanilla, rolled them a little thicker, and baked them a little less. My husband said he liked the crunchier ones, and I much preferred this batch. Funny how we are all different. Either way, these were easy and delicious. The dough is irresistable, too. That's my definition of a good cookie, even if rolling the dough and cutting the shapes is less than fun for me. I do love the end results, though.
Every year we have some fun cookies. Last year we had some weird fall themed snowmen after I got out some fall sprinkles on accident (never again!) My mom made these cute little guys. I love that they have collared shirts, haha.
I'm making 100 red velvet cupcakes for the family Christmas party tomorrow (my mom has a really big family...) and can't wait to decorate them with my enormous new frosting tips (I even sprang for the 16 inch bag, wow!) Kristi and I are going to try to decorate them together tomorrow while the kiddies play. Wish us luck!
Soft Sugar Cookies
adapted from Baking by Dorie Greenspan
2 cups flour
1/2 teaspoon salt
1/2 teaspoon baking powder
1 stick plus 2 tablespoons (10 tablespooons) softened butter
1 cup sugar
1 large egg
1 large egg yolk
2 teaspoons vanilla extract
Whisk together flour, salt, and baking powder.
Cream butter and sugar until light and fluffy. Add eggs and vanilla and beat for a minute. Reduce speed to low and add flour slowly, being careful not to over-beat. Divide the dough into half and shape into two disks. Wrap in plastic and refrigerate at least two hours.
Preheat the over to 350. Line two baking sheets with silicone mats or parchment. Roll out dough onto lightly floured surface to about 3/8 or 1/2 inch thickness and cut cookies out with cutters. Bake for 8 minutes for soft cookies, 10 for crisp. Remove from oven, place onto cooling racks, and frost after cooled.
LaNell's Icing
My mom is always a little more generous with the butter than I am. She made the frosting this year and it was delicious as usual.
1 stick softened butter
1 bag powdered sugar
1 teaspoon vanilla
3-4 tablespoons milk
Beat butter in mixer until soft. Add about 1 cup of powdered sugar at a time until encorporated. Add vanilla and milk until desired consistency is reached.
December 10, 2008
Peanut Butter Candy Bar Cookies and three winners!
Look at those innocent little cookies, hiding a sweet and salty treat. It all started when my husband reminded me that he had volunteered to bring a treat to work today. Sure, I said. After all, I bake a lot (ahem) and I didn't think it would be a big deal. Well, Tuesday was a crazy day and we ended up with Suns tickets from my dad, last minute. Before we could go, I had to borrow my uncles enormous truck and trailer, drive my kitchen table and chairs from my in laws basement where they've been waiting for us to finally get our house, so the electrician can place the chandelier, unload (thanks to my brother for the help), and try and fail to move the piano we got on Craigslist. We made it to the game in the middle of the first quarter which I considered quite a success. We had sweet seats and I'm so glad we got to go- especially since I just heard that Raja and Diaw were both traded away! Diaw is my best friend Kara's favorite eye candy (he's French, after all) and Raja used to be a model before he joined the NBA. That's all I'll say about that, since my dutiful husband reads my blog. My dad has actually met Raja a few times at work (Raja drives a BMW) and he says he's also quite nice.
Some how, though, the treats were forgotten, and I found myself listening to the whirl of the KitchenAid at 5:45 this morning as I made the requested peanut butter cookies. After I sent my tall man off with some criss-crossed peanut butter cookies, I decided to try wrapping some of the dough around Milky Way bars like Kara's mother in law does. Just scoop out a regular cookies worth of dough, flatten it in your palm, place about 1 inch of candy bar in the center (chop a big one, buy funsize, whatever works for you), and roll it around in your hand. Bake as usual. I don't think you'll be going back to the plain old peanut butter cookie. I know I won't (and I know I'll be looking at the Snickers, Milky Ways, and Three Musketeers differently from now on!)
Congratulations to Chocolate Chic, Megan from My Baking Adventures, and Allergy Mom who had the luck of the random number generator! Email me your address and we'll get your prize right out. Thanks everyone for the entries. I had an awesome time reading the great comments and hope it do it again soon. Now seriously... you probably have some left over candy bars in the pantry from Halloween. Go make these cookies!
Peanut Butter Candy Bar Cookies
by Anne Strawberry
1 cup softened butter
1 cup white sugar
1 cup brown sugar
2 eggs
1 teaspoon vanilla
1 cup smooth peanut butter
2 2/3 cups flour
1 1/2 teaspoons soda
1/4 teaspoon salt
1 bag bite size candy bars (or 4 full size bars) - Snickers, Milky Way, Three Musketeers, etc
Preheat oven to 375. Cut candy bars into 1 inch pieces and set aside.
Cream butter and sugar. Add eggs and vanilla and beat until well combined. Mix in peanut butter. Slowly add dry ingredients and mix until just combined.
Scoop dough out, flatten slightly in your palm. Place one piece of candy into the middle and roll in your hand to wrap the chocolate into the middle of the dough. Please on baking sheet, spacing apart generously, and bake from 9-12 minutes until dough has set but before cookies take on too much color. Remove from sheet and allow to cool. Enjoy warm!
December 9, 2008
TWD- Sugar Cookies
Sugar cookies! Nothing says Christmas more than these, especially to my husband. His family used to make these every year for Christmas and at some point (I'm presuming during their teenage years) they decided it just wasn't worth it. I've tried my best to reincarnate this holiday tradition and every Christmas since we got married, even when we were stuck in Utah two years ago since I was too pregnant to travel home, we've made them. Even better, this recipe is easy to make, has DELICIOUS dough, and rolls out like a dream. I made a double batch and put 50 straight into the freezer to take to scouts on Thursday. I'm sure the boys will end up with some interesting designs- it should be a lot of fun for everyone!
Thanks to Ulrike for this fun choice. Find the recipe there and whip some up tonight. With a quick dough, good freezability, and perfect rolling texture, I think these are just right. Next time I'll roll them a little thicker since I prefer a chewy sugar cookie (well, I prefer all my cookies to be chewier) but these crisp, easy to ice cookies are perfect. Don't miss all the other beautiful sugar cookies from the talented Tuesdays with Dorie bakers.
Lemon Glaze
1 tablespoon freshly squeezed lemon juice
1 cup powdered sugar
1 tablespoon meringue powder
Combine all ingredients and stir until smooth. Dip cookies to ice and allow frosting to harden.
December 8, 2008
Cupcake pops, moving, and more
Part of the perks of living near family (two big families- our parents come from families of 7 kids) is getting together a lot. Part of the problem is getting together a lot! Really though, we love it here... and we'd better, since we just bought and house and my husband isn't looking forward to taking the bar exam anywhere else! So... we're abundantly blessed but really busy this time of year. Unfortunately, my blogs have been very neglected. I also haven't checked my regular reads and I've really just been in survival mode. I know you all think we have three course Barefoot Contessa meals for dinner every night followed by some exotic dessert (cough cough) but I'll admit we've eaten a lot of soups, salads, and sandwiches... not to mention leftovers and crockpot dishes! We are also working on remodel for our house and I can't wait to have a kitchen of my own again, soon.
This is our old kitchen in Utah. My husband really wanted to try a new color so I flipped through the colors in the paint store and tried to keep an open mind. I don't think I was that successful, since it went about like this.
So I went back to the paint store and chose a random green, bought a trial, and slapped it on the walls. He came over and said, "Looks just like the old green. But if it makes you happy..." So there you have it... this color green seems to be my soul mate. In my defense, it is a little less grey and a little more "apple". Either way, it's going to be pretty. We spent last weekend ripping out flooring, painting, and begging our relatives to babysit. We hope to move this weekend and have the kitchen operating in about two weeks. The blue is the color for the master bath (approximately) and the rest of the house will be the tan, with white doors and trim. The flooring is coming in this week and I'll have pictures soon.
So... I allowed myself a little blogging time this morning and went over to Bakerella's site. Along with a million cute Christmas ideas, I saw my cupcake pops I made last summer! They aren't quite as cute as the last batch I made with Auburn, but I think I've figured them out now and can make them pretty easily. If you try them, give yourself plenty of time, counter and fridge space, and cute decorations. I would also recommend using the scalloped cookie cutter instead of the trays (and a big one- the less scallops the easier they'll be to see after all that dipping!)
And finally... don't forget that today is the last chance to enter the giveaway! Tomorrow I'll be back with Dorie's ridiculously delicious sugar cookies.
This is our old kitchen in Utah. My husband really wanted to try a new color so I flipped through the colors in the paint store and tried to keep an open mind. I don't think I was that successful, since it went about like this.
Red (no, all my accessories are red). Orange (nope, never have liked it). Yellow (maybe... maybe.) Green (I'd love green!). Blue (could be too Americana with all the red). Purple (never have been much for purple for myself). Pink (I'd love a soft soft baby pink, my husband would die). Brown (the rest of the house is tan, I'd like some color).And there you go. It left yellow (his choice) and green (my choice). I was prepared for yellow but last minute I told my husband, "I just can't do it! It's not me! I want green for the room I'm always working in!" He caved and said as long as it was something different Green was fine.
So I went back to the paint store and chose a random green, bought a trial, and slapped it on the walls. He came over and said, "Looks just like the old green. But if it makes you happy..." So there you have it... this color green seems to be my soul mate. In my defense, it is a little less grey and a little more "apple". Either way, it's going to be pretty. We spent last weekend ripping out flooring, painting, and begging our relatives to babysit. We hope to move this weekend and have the kitchen operating in about two weeks. The blue is the color for the master bath (approximately) and the rest of the house will be the tan, with white doors and trim. The flooring is coming in this week and I'll have pictures soon.
So... I allowed myself a little blogging time this morning and went over to Bakerella's site. Along with a million cute Christmas ideas, I saw my cupcake pops I made last summer! They aren't quite as cute as the last batch I made with Auburn, but I think I've figured them out now and can make them pretty easily. If you try them, give yourself plenty of time, counter and fridge space, and cute decorations. I would also recommend using the scalloped cookie cutter instead of the trays (and a big one- the less scallops the easier they'll be to see after all that dipping!)
And finally... don't forget that today is the last chance to enter the giveaway! Tomorrow I'll be back with Dorie's ridiculously delicious sugar cookies.
December 3, 2008
Reese's "Jingle Bell Rock"-y Road Pie
Thanksgiving has come and gone and Christmas music is all over the radio! I finally feel ready for the holidays and this month's Pies With That theme- Holiday Songs. I had a ton of fun picking a theme but in all the mayhem I nearly missed making my own pie! It came to me, though, while I was driving one day- those chocolate bells could totally make a "Jingle Bell Rock" pie.
From there, I decided on Reese's chocolate bells and a rendition of my Aunt's wonderful peanut butter pie. For the rocky road portion, I mixed in toasted walnuts, marshmallows, and chopped chocolate (I opened my last bar of Greek chocolate I smuggled in my suitcase!). I also had to fight every urge to drizzle the whole thing with caramel or chocolate. It would have been beautiful but there was already PLENTY going on here without adding any more sugar!
I intended to make a regular graham cracker crust but happened to run out of grahams before I got enough, so I threw some pretzels into the food processor to make up the difference. The crust ended up pleasantly salty and complimented the rest of the pie. I did make it in the spring form pan to hold more pie since I had a big crew eating it. Thankfully, this is one rich pie- so one 9 inch spring form covered about 16 people (plus toddlers- we don't usually count them for food but with desserts, they are starting to eat their share!). The end result reminded me a bit of Dorie's Peanut Butter Torte, but I liked it a bit more without the chocolate crust. But honestly... with peanut butter, chocolate, and more, "how bad can that be?!" Don't forget to enter the giveaway here if you haven't yet!
Previous Pie's With That entries:
Nie's Vintage Cherry Apple Pie and Galette
Emma Hearts Knightley Pie
Reese's "Jingle Bell Rock"-y Road Pie
from Anne Strawberry
Pretzel Graham Cracker Crust:
1 cup graham cracker crumbs
1 cup pretzel crumbs
3/4 stick melted butter
3 Tablespoons sugar
Preheat the oven to 375.
Combine all ingredients with a fork and press into butter, 9 inch spring form pan. Bake for 10 minutes and set aside to cool.
Peanut Butter Rocky Road Filling:
2 packages of Neufchatel cheese (or cream cheese), softened
1 1/2 cups powdered sugar (sifted if necessary)
1/2 cup milk
1 teaspoon pure vanilla extract
3 ounces chopped chocolate (not too fine)
1/2 cup toasted walnuts, chopped
1/2 cup mini marshmallows
1 bag Reese's peanut butter cup Christmas bells
In the bowl of a stand mixer fitted with the paddle attachment (or a hand mixer), combine cream cheese, powdered sugar, milk, and vanilla. Beat until smooth. Gently fold in chocolate, walnuts, and marshmallows. Dump into cooled pie crust and smooth.
Using a thin serrated nice, slice the Reese's bells in half and position in a pattern on top of the pie.
Refrigerate until firm (at least 4 hours) and serve. Top with chocolate sauce or caramel (if you can handle it!)
December 2, 2008
TWD- Linzer Sables and a Giveaway!
Cookies again-yes! This week's Tuesdays with Dorie selection comes from Noskos. I've never made or heard of these cookies so I was happy to try something new. The dough came together easily and offered lots of varieties with the nuts, filling, and spices. I decided to use macadamia nuts and chocolate ganache, like those candies people bring back from Hawaii... I've always liked those. I used only the tiniest bit of cloves and cinnamon to spice the dough since I wasn't sure about the flavors altogether. I also rolled the dough a little thinner than recommended (and was sure to under bake them slightly) so they ended up quite delicate.
I also sandwiched a few cookies with raspberry jam for my non-chocolate eating husband. I wasn't sure which flavor I would be prefer but in the end I liked the cookies that had both jam and ganache (particularly since my ganache was so dark and didn't seem quite sweet enough). I still have a little dough left in the fridge and I'm excited to experiment with it and see what I can come up with. Don't forget to snag the recipe here and try some of your own delicious little cookies.
Now (to catch up for last week's TWD...) here is my thanksgiving two-fer pie. I've never actually made Pecan or Pumpkin pie so it was fun to try them together. This was one pretty pie! I followed the advice concerning the crust and did not blind bake it. I also saved some of the pumpkin filling to make into a mini pie and was glad I did- it was plenty full!
I'm still not a huge pumpkin fan but this was yummy- even if my edges almost burned and the bottom of the pastry wasn't quite cooked (the soggy part was delicious to me, don't tell!) I think this is a recipe that needs some perfecting for me to get it just right but is totally worth the wait. You can find the recipe on Vibi's blog.
Now for the giveaway... three lucky readers (randomly selected of course) will receive a Pillsbury gift basket. The basket includes a coupon for Pillsbury refrigerated crescent rolls, a magnetic coupon holder, a house-shaped mouse pad, pot holders, a cookie sheet (you can never have enough of those), a bread basket and a Pillsbury Doughboy figurine (haha!). Pillsbury is also donating to American foodbanks for each person that checks out their website here.
In order to enter the contest, just leave a comment here and let me know what your favorite part of family meals is. My favorite part has to be making them with my family and sitting around and talking afterward. In my pre-mommy life I studied families and know how important it is to spend time sharing meals together. The holiday season is the perfect time to spend together in the kitchen and I'm looking forward to it! (Contest will end next Monday night, at midnight, AZ time).
Don't forget to stop by later this week to see my entry for December's holiday music themed "You Want Pies With That?"- it's more than over the top and delicious too!
November 30, 2008
Barefoot Bloggers- Mexican Chicken Tortilla Soup
Soup weather has finally arrived around here and we've been enjoying soup for dinner at least once or twice a week. This delicious Barefoot Bloggers recipe, chosen by Judy, made a particularly delicious meal. I modified the recipe to our tastes (more tomatoes, other chiles, etc) and loved every bite- especially the leftovers. I took a hint from Ellie Krieger and made baked tortilla strips with corn tortillas I sliced, tossed, and sprinkled with salt before baking. They were yummy and a great addition to the soup. We also served up lots of cilantro (I'm sure some of you think it tastes like metal or soap, but growing up in Arizona, I can't get enough!), avocados, and cheese. Next time I'll add black beans and pepper jack cheese (how bad can that be, right Ina?)
I'd also like to thank Peggy for this nice award and her kind words. I so appreciate the wonderful blogging community and love this new hobby. Thanks Peggy!
Mexican Chicken Soup
adapted from Ina Garten
2 chicken breasts, cooked and shredded
Good olive oil
Kosher salt and freshly ground black pepper
2 cups chopped onions (2 onions)
1 cup chopped celery (2 stalks)
2 cups chopped carrots (4 carrots)
5 large cloves garlic, chopped
2 1/2 quarts chicken stock, preferably homemade
2 cans petite diced tomatoes
1 can green chiles
1 jalapeno peppers, seeded and minced
1 teaspoon ground cumin
1 cup frozen corn
1/2 cup chopped fresh cilantro leaves, optional
6 (6-inch) fresh white corn tortillas
For serving: sliced avocado, sour cream, grated Cheddar cheese, and tortilla chips
Heat 3 tablespoons of olive oil in a large pot or Dutch oven. Add the onions, celery, and carrots and cook over medium-low heat for 10 minutes, or until the onions start to brown. Add the garlic and cook for 30 seconds. Add the chicken stock, tomatoes with their juice, jalapenos, green chiles, hot sauce, cumin, and about 1 tablespoon salt (depending on the saltiness of the chicken stock) and 1 teaspoon pepper. Bring the soup to a boil, then lower the heat and simmer for 25 minutes. Add the shredded chicken and season to taste.
Meanwhile, brush tortillas with oil and cut in 1/2, then cut them crosswise into 1/2-inch strips. Bake at 350 in a nice flat layer until crisp (about 10 minutes). Serve the soup hot topped with frozen corn, sliced avocado, a dollop of sour cream, grated Cheddar cheese, and homemade tortilla strips or broken tortilla chips.
November 25, 2008
Easy Homemade Dinner (and Orange) Rolls
I can't believe it, but Thanksgiving is already here. That's not as shocking as the realization that follows- Christmas is coming! With the start of this wonderful season, I'm reminded of one of my favorite things to bake. This roll recipe comes from a family friend and neighbor who happens to be the best preschool teacher in the world. She's infinitely patient but you won't have to be to enjoy these rolls.
I learned this recipe when I was about 10 at a church mother daughter activity. It's so simple I never understood people's fear of yeast (I do now though, don't worry). However, with some easy ingredients that are probably in your pantry, a big bowl, and a fork, you can have delicious rolls in no time (making the batter takes less that 10 minutes!)
Even better, they are easily adapted to my other friend's world famous orange rolls. She did mention several times while she helped me make them that there are no calories in orange rolls. Enjoy and hop on the treadmill the next morning.
Dissolve the yeast. Combine melted butter, sugar, and salt.
Add eggs and beat into mixture.
Stir the yeast mixture into the bowl.
Dump in the flour.
Stir with a fork for a minute or two until combined (this picture shows about half way done, don't worry about kneading or anything. These are easy rolls!)
Put the dough into a bowl with a little oil and cover with a dish towel (don't click on that photo, you'll see flour lumps... don't worry though, they disappear later).
Let rise until doubled. It tastes good too, if you aren't too afraid of salmonella, which obviously isn't a worry at my place.
Divide dough into thirds and roll out. Spread with softened butter (go easy if you'd like, or add cinnamon sugar, herbs, whatever strikes your fancy).
Fold over into thirds, cut into strips, and tie each piece into a little knot. Forget to take pictures (and it's probably not such a bad thing considering how messy my hands were!)
Orange rolls are even better (though admitedly more of an indulgence!)
Easy Homemade Rolls
from Rita Lyon
1 cake or 1 tablespoon yeast
1 cup warm water
1/2 cup plus 1 tablespoon sugar
1/2 cup melted butter
2 eggs, slightly beaten
1/2 teaspoon salt
4 cups flour
oil for rolling dough and greasing pan
Instructions:
Dissolve yeast into warm water (a little warmer than your body, but not too hot to kill the yeast). Sprinkle sugar on top of yeast and set aside.
In a large mixing bowl, combine melted butter, sugar, eggs, and salt. Mix with a fork until combined. Sir in frothy and dissolved yeast mixture. Add flour and mix together well with a fork for a bout one minute (it should be fairly smooth but don't worry about kneading it). Place in a greased bowl and cover with a dish towel. Let rise until doubled.
For dinner rolls:
1 stick of butter, softened
Divide dough into thirds. Pour a little oil onto your hands, pin, and counter (don't use flour). Roll out one piece into a nice rectangle, about 1/4 inch thick. Fold into thirds and slice into pieces about 3/4 inch wide. Tie each piece into a little knot, place on a greased or lined baking sheet, and let rise until doubled. Bake at 375 for 8- 10 minutes, until golden brown.
For sweet orange rolls:
from Peggy Leatham
1 stick of butter, melted
1 1/2 cups sugar
zest of 2 oranges
3 tablespoons fresh squeezed orange juice
Combine all ingredients in a small bowl and stir until a thick paste forms (if too runny, add more sugar). Roll dough into a large rectangle (about 12 x 18) and spread paste over the dough. Roll up (like cinnamon rolls) and slice dough about 3/4 inch thick. Place each piece into a very well greased muffin tin.
Let rise until doubled.
Bake at 375 for 15-20 minutes. Begin checking the rolls around 12 minutes and watch closely, as they will brown quickly (note the difference of color in the two batches in this picture).
Remove the rolls from oven once they are browned and immediately flip onto a cooling rack place atop parchment paper. Let cool and serve inverted. The juice will drip down to make a nice glaze. Serve warm.
November 19, 2008
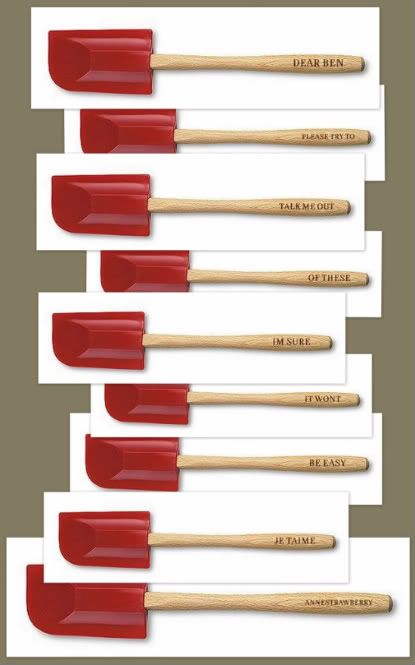
Williams Sonoma Spatulas
I've been devoted to a KitchenAid spatula for exactly four years since I first took my cooking class in college. Each of the kitchens was stocked with two of these perfect scrapers-great for cleaning out the bowl of the KitchenAid, safe for nonstick pans, and awesome for omelets. I looked all over Utah Valley for one of my own and tried 5 or 6 stores. I'm not sure why I didn't just check Amazon but I eventually found them at Robinson's May (haha) and bought two for myself for Christmas. I've probably purchased 10 since then for gifts and for my drawer (one just wasn't enough- and at only five bucks at Marshall's I needed more). However, I just got the Williams Sonoma Catalog and suddenly I'm changing my tune. I'm fighting every urge to order the regular set of three and the minis personalized to say "AnneStrawberry."
Seriously though, can you ever have too many spatulas?
Subscribe to:
Posts (Atom)