Showing posts with label Pastry. Show all posts

October 13, 2011

Ghirardelli Intense Dark Chocolate Sweet Rolls

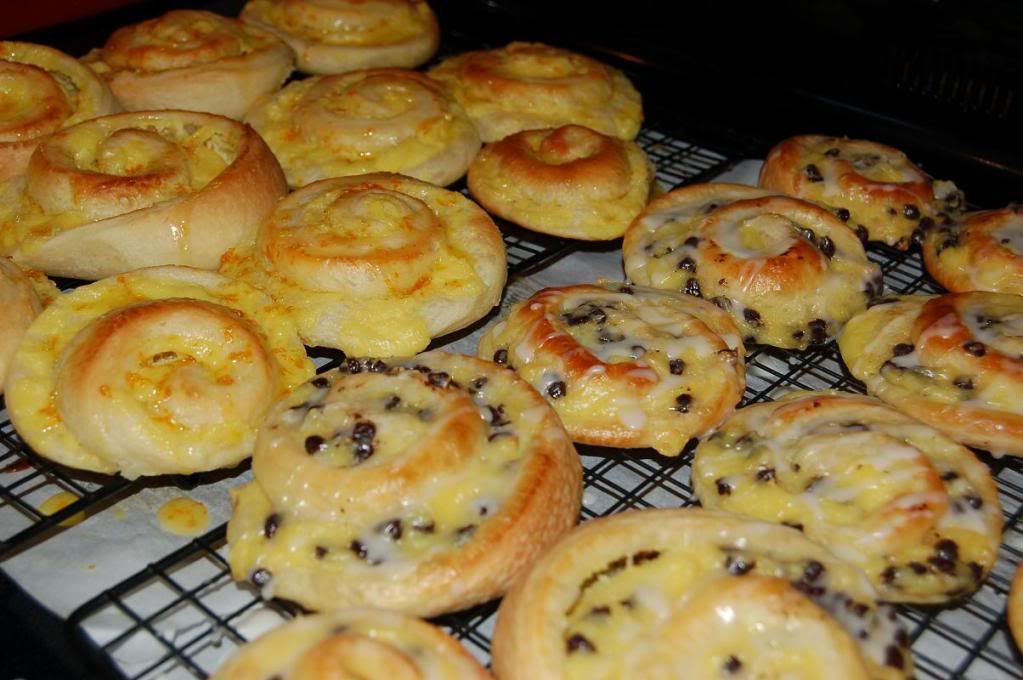
Ghirardelli Chocolate sent me some of their new Intense Dark chocolate to try and ever since my carefully wrapped package arrived I've been dreaming about the perfect recipe to use them for. The bars themselves are beautiful and gold wrapped- seriously tempting. They've got sexy names like "Evening Dream" and "Twilight Delight" to go along with the perfect packaging and high cacoa content. This was a big decision! I finally settled on my favorite ever Tuesdays with Dorie recipe- the Brioche Raisin Snails. Brioche is rich dough made with eggs and butter, rolled up with a homemade vanilla pudding and fancy raisins (or in my case, chocolate). I used my Bosch mixer but a KitchenAid or even a big bowl with a wooden spoon will work just fine.


I love that the recipe is made of several components- it's kind of therapeutic to assemble basic things into something extra special and each piece isn't too much work. The bread dough improves with a little stay in the fridge, so I made it the other night. Last night I made the pastry cream and let it chill until this morning. Each step only takes 15 minutes or so but this morning I whipped up a fabulous French pastry that takes me right back to Paris with each bite. The assembly is just like a regular cinnamon roll but uses different components- roll out the dough, spread the cream, sprinkle with chopped Ghirardelli chocolate (I used the Midnight Reverie 86% Cacao bar) and a little sugar. Roll it up, slice, and try to be patient while they rise. It's not that different than cinnamon rolls, really, but SO much better.


You could easily fake this recipe with a regular dough (or even thawed Rhodes rolls if your that terrified of yeast) and chocolate chips, but the Intense dark chocolate with it's luxurious texture and flavor and the silky pastry cream baked together with the rich brioche makes a treat that's extra special. You can even roll up the logs before you slice them and freeze them for a perfectly decadent treat anytime.


I absolutely loved this recipe before but now that I've had it all fancied up, I'm pretty sure a delicious cinnamon roll is going to pale in comparison. I'm going try my favorite brownies next with some more of the Ghirardelli Intense Dark and I'll be back later in the week to let you know how they turn out. Stop by their website and check out their line-up. Ghiradelli will donate $1 from each package up to $100000 to the National Breast Cancer Foundation when you enter the code found inside your bar. You can even print out a coupon here. Deliciousness and an important cause- this is a win win for me!

PS Don't tell but when my mom had a bite of these she totally moaned. They're that good. There are two left on my counter. Let's see if they make it until dinner time (with Baby Strawberry, sporting her dad's super metabolism and roving the house yelling "Chockit! Chockit!" it doesn't seem likely!)


Ghirardelli Intense Dark Chocolate Sweet Rolls
from Anne Strawberry

6 squares Ghirardelli Intense Dark Chocolate (I used the 86% Cacao Midnight Revelrie), or 3/4 of a package, chopped finely
2 tablespoons Sugar
1/2 recipe for Golden Brioche Loaves (see below), chilled and ready to shape (make the full recipe and cut the dough in half after refrigerating overnight)

1/2 recipe Pastry Cream (see below)
Shiny Sugar Coating (see below)
Powdered Sugar Glaze (see below)

Line one large or two smaller baking sheets with parchment or silicone mats.


On a flour dusted surface, roll the dough into a rectangle about 12 inches wide and 16 inches long, with a short end toward you. Spread the pastry cream across the dough, leaving 1-inch strip bare on the side farthest from you. Scatter the chopped chocolate over the pastry cream and sprinkle the cream with 2 tablespoons of sugar. Starting wit the side nearest you, roll the dough into a cylinder, keeping the roll as tight as you can. (At this point, you can wrap the dough airtight and freeze it up to 2 months.)

Cut the log into rounds a 1 inch thick using a chef's knife, bench cutter, or dental floss. Put the snails on the lined baking sheet(s), leaving some puff space between them (half of the brioche yielded 12 rolls for me so I put them in a 3 x 4 pattern on my baking sheet).

Lightly cover the snails with wax paper and set the baking sheet(s) in a warm place until the snails have doubles in volume--they'll be puffy and soft--about an hour or two depending on the temperature of the kitchen.

When the snails have almost fully risen, preheat the oven: depending on the number of baking sheets you have, either center a rack in the oven or position the racks to divide the oven into thirds and preheat the oven to 375 degrees F.

Remove the wax paper, and bake the snails for about 25 minutes (rotate the sheets if you're using two, from top to bottom and front to back after 15 minutes), or until they are puffed and richly browned. After they've been out of the oven for a minute or two, brush them with the shiny sugar coating. Allow to cool for a couple minutes then drizzle with the optional glaze (recipe below).


Shiny Sugar Coating
Note- This is optional but only takes a minute or two and helps keep your rolls shiny and moist. Ever since I read about it on this wonderful blog I use it for all my cinnamon rolls. I don't think these would last long enough to need it but I wouldn't skip it! Check out her cinnamon twist post for gorgeous pictures on shaping and glazing sweet rolls.

1/2 cup sugar
1/4 cup water
1 tablespoon light corn syrup

Combine all ingredients in a small saucepan.  Bring to a rolling boil, take off heat and set aside to brush the bread when it comes out of the oven.


Powdered Sugar Glaze
1 cup confectioners' sugar, sifted
About 1 teaspoon water
Drop of pure vanilla extract

Put the confectioners' sugar into a small bowl, and stir in a teaspoon of water. Keep adding water drop by drop until you have an icing that falls from the tip of a spoon. Add the vanilla extract, then drizzle the icing over the hot snails.

Golden Brioche Loaves
2 packets active dry yeast (or 5 teaspoons yeast)
2/3 cup just-warm-to-the-touch 2% milk
4 cups all-purpose flour
2 teaspoons salt (or 1 Tablespoon Kosher Salt)
3 large eggs, at room temperature
1/4 cup sugar
3 sticks (12 ounces) unsalted butter, at room temperature but still slightly firm (cut into 1 Tablespoon pieces while cold and let sit on the counter for a few minutes to soften)

To Make The Brioche: Put the yeast, water and milk in the bowl of a stand mixer and, using a wooden spoon, stir until the yeast is dissolved. Add the flour and salt, and fit into the mixer with the dough hook, if you have one. Toss a kitchen towel over the mixer, covering the bowl as completely as you can-- this will help keep you, the counter and your kitchen floor from being showered in flour. Turn the mixer on and off a few short pulses, just to dampen the flour (yes, you can peek to see how you're doing), then remove the towel, increase the mixer speed to medium-low and mix for a minute or two, just until the flour is moistened. At this point, you'll have a fairly dry, shaggy mess.

Scrape the sides and bottom of the bowl with a rubber spatula, set the mixer to low and add the eggs, followed by the sugar. Increase the mixer speed to medium and beat for about 3 minutes, until the dough forms a ball. Reduce the speed to low and add the butter 2 tablespoons at a time, beating until each piece is almost incorporated before adding the next. You'll have a dough that is very soft, almost like batter. Increase the speed to medium-high and continue to beat until the dough pulls away from the sides of the bowl, about 10 minutes.

Transfer the dough to a clean bowl (or wash out the mixer bowl and use it), cover with plastic wrap and leave at room temperature until nearly doubled in size, 40 to 60 minutes, depending upon the warmth of your room.

Deflate the dough by lifting it up around the edges and letting it fall with a slap to the bowl. Cover the bowl with the plastic wrap and put it in the refrigerator. Slap the dough down in the bowl every 30 minutes until it stops rising, about 2 hours, then leave the uncovered dough in the refrigerator to chill overnight.

Pull the dough from the fridge and divide it into 2 equal pieces.

Anne Strawerry's Favorite "Slightly Lighted" Pastry Cream
adapted from Baking by Dorie Greenspan

2 1/2 cups 2% milk
4 large egg yolks
1 egg
1/2 cup sugar
1/3 cup cornstarch, sifted
1 1/2 teaspoons pure vanilla extract
2 tablespoons unsalted butter, cut into bits at room temperature


Bring the milk to a boil in a small saucepan (I usually multitask this step and warm it in my Pyrex liquid measuring cup in the microwave).

Meanwhile, in a medium heavy-bottomed saucepan, whisk the egg yolks and egg together with the sugar and cornstarch until thick and well blended. Still whisking, drizzle in about 1/4 cup of the hot milk-- this will temper, or warm, the yolks so they won't curdle. Whisking all the while, slowly pour in the remainder of the milk. Put the pan over medium heat and, whisking vigorously, constantly and thoroughly (making sure to get the edges of the pot), bring the mixture to a boil. Keep at a boil, still whisking to be sure the bottom doesn't burn, for 1 minute, then remove the pan from the heat.

Whisk in the vanilla extract. Let sit for 5 minutes, then whisk in the bits of butter, stirring until they are full incorporated and the pastry cream is smooth and silky. Scrape the cream into a bowl. Press a piece of plastic wrap against the surface of the cream to create an airtight seal and refrigerate the pastry cream until cold or, if you want to cool it quickly, put the bowl into a larger bowl filled with ice cubes and cold water, and stir the pastry cream occasionally until it is thoroughly chilled, about 20 minutes.

April 26, 2011

TWD- Apple Tart Handpies

{printable recipe here}
Yesterday I went to make the cornmeal shortbread cookies for TWD and realized I had no cornmeal! I still needed to make the tourtley apple tart so I decided that would have to do, so I set about making the pastry (nut free for Baby Strawberry). I pulled out one of my prized jars of homemade applesauce, since Dorie's description of the apple filling sounded so similar. My friend's grandma always made the best applesauce, spiced with cinnamon, mashed only a little to yield a thick, chunky, fragrant treat. I just can't eat any other kind now (though I'll admit I do buy the huge jars of Treetop at Costco for the kids!)

Last summer my thoughtful best friend Kara gave me several bushels of tart apples from her parents' tree. My mom and I made batch after batch of applesauce and apple pie filling to last all year with her steam canner. It's the only thing I've really canned before but it's not that intimidating and so rewarding. I only have a few jars left and can't wait for apple season to come again. If you haven't made applesauce before, I'd encourage you to try it soon. It's really not that time consuming with the apple peeler tool and the end product is so rewarding. Next time you have several apples languishing in the bottom of the fridge give it a try and let me know that I'm not the only person that's high maintenance about something as trivial as applesauce!

When it came time to shape the tart dough, I realized my mini tart pans were at my mom's, so I used my little dumpling press to make these hand pies. I bought a set at Ross several years ago (similar to this one) and they don't take up much room in the pantry and work really well for handpies. My husband loves the crust to filling ratio, too. While I certainly heavily deviated from the intended recipe, the flavors are the same and they are absolutely wonderful.  Even better, it all came together in just a few minutes. Thanks Dorie for the inspiration and Jeannette for the recipe choice!

 
Gram McGrath's Apple Sauce (the only kind Anne Strawberry will eat)
from Anne Strawberry
{printable recipe here}

8 Apples (I prefer the tart/firm varieties, but whatever you have on hand will work)
1 Cup Water
1/2 - 2/3 Cup Sugar, depending on the sweetness of the apples
2/3 Teaspoon Cinnamon

Peel, core, and slice the apples (I use my handy apple peeler/slicer to make quick work of this job, even my little man can do it).

In a large saucepan (or a big stockpot if you're doubling the recipe, I usually do) combine the apples, water, and sugar. Simmer until soft (about 15-20 minutes) and mash with a potato mashed- don't drain! Add cinnamon, stir, and eat warm.

March 14, 2011

Pear Blueberry Pi(e) & a Giveaway

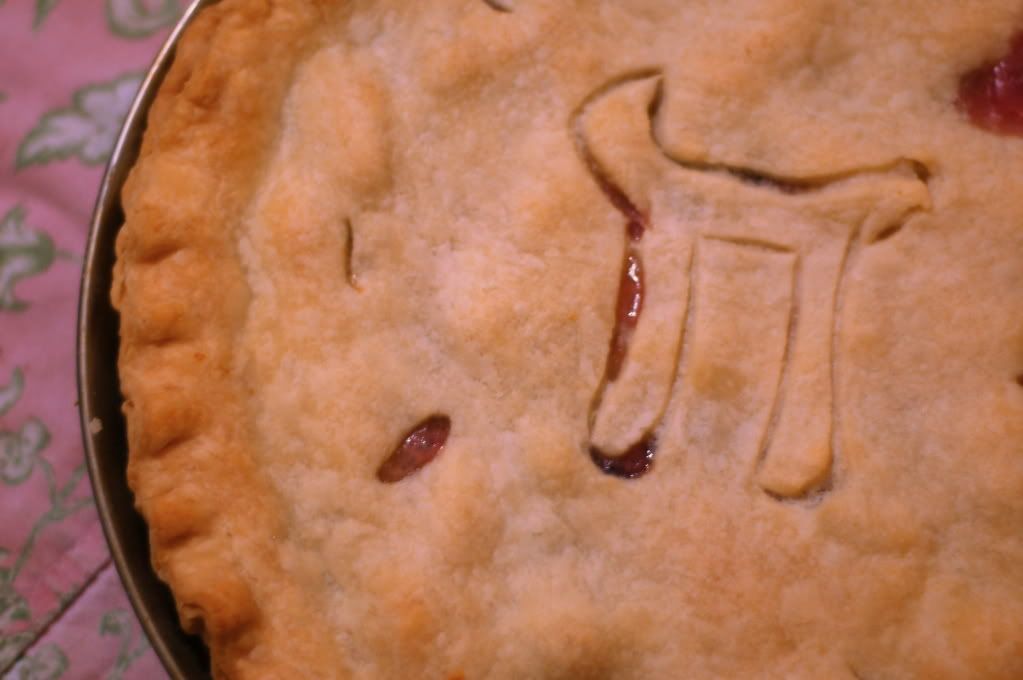
PhotobucketHappy Pi Day! When I was in high school there was this great teacher who always went all out with his students and everyone was jealous that they got extra credit for bringing in pie and having fun (especially those of us with the evil math teacher, Mr. P). They even had a chant to help rattle off the numbers. I guess you could say I'm living out some sort of childhood fantasy by celebrating Pi day but really I'm trying to blog more consistently and figured it was a good excuse to make a pie- one of my favorite things to do. I know a lot of people stress over crust and filling but it's important to remember what the Barefoot Contessa would say- butter, sugar, flour, how bad can that be? Most pies turn out delicious even if they aren't beautiful.

This pie, inspired by the Pear Lattice Pie from a cookbook I picked up at Goodwill recently- the Best of Gourmet- a Year of Celebrations. It's a beautiful book and super cheap on Amazon. I had to buy it since I couldn't stop looking at all the gorgeous photos! This is the first recipe I've tried so far and it was easy and delicious... minus one hiccup. I forgot to mention that I decided last minute to make a pie yesterday- after a long day of Church meetings,  Church, and a screaming Baby Strawberry. Making pie is therapeutic though and I figured it would add a lot to dinner so I made up the pastry quickly in the food processor and stashed it in the freezer to cool as quickly as possible (you can make the crust by hand but it's quick and easy to use the FP, I recommend a Cuisinart like one of these).

Then I set about making the filling- I peeled four nice pears, added a little basket of blueberries for color, the flour, salt, cinnamon, and nutmeg. A squeeze of lemon juice and it still seemed awfully dry to me. So I added some more juice (and zest while I was at it). Still dry. I usually work with apples instead of pears so I figured something just must be different there, so I set it aside and went to work rolling out the crust.

After I baked the pie, everyone was clamoring for a slice so we didn't even let it cool properly. My tall man happily tasted it for me and suddenly I realized what was wrong with the filling- I'd left out the sugar! Oh man, I was so mad that my crazy day had compromised my beautiful pie! Like I said, though, you can't go too wrong (despite my sugarless pie with loads of extra tart lemon juice!) I served the pie with generous dollops of *heavily sugared* whipped cream and it was enjoyed by all. Of course in all the flurry trying to fix my pie I didn't get a picture of a slice with all the pretty fruit filling. Nonetheless, I hope you'll consider making a pie. You can see some of my favorites here. Even if you use store bought crust and just press it together with the tines of a fork, I really feel like pie is the kind of dessert that brings people together and makes them feel loved- even if you forget the sugar. And that's what it's all about!

Today I also have a great giveaway from Yoplait via MyBlogSpark. We aren't big milk drinkers over here so in order to get enough calcium we serve a lot of Yoplait (my favorite is the key lime pie, wow). These parfaits come in all sorts of great dessert flavors like chocolate raspberry and lemon torte. MyBlogSpark sent us a prize pack and my little man LOVED this stuff. I loved that I didn't feel guilty giving it to him! The prize pack includes a coupon to try Yoplait Delights, a Chocolate scented votive candle, insulated tote and aromatherapy eye pillow- all together a nice package to help you relax and enjoy yourself (much needed after a long day and a sugar less pie, right?) You can even print out a coupon here.

I have one prize pack to giveaway- to enter just leave a comment and if you'd like to indulge me, do tell the craziest things you've done in the kitchen so I'll feel better about the pie! You can have an extra entry by becoming a follower and leaving me a separate comment to let me know. I'll leave the giveaway open until Friday at midnight (AZ time). Hopefully I'm not the only one to make silly mistakes in the kitchen!

Pear Blueberry Pi(e)
from Anne Strawberry
adapted from Gourmet

3 tablespoons all-purpose flour
1/4 teaspoon freshly grated nutmeg (I also added the same amount of cinnamon)
1/8 teaspoon salt
2/3 cup plus 1 tablespoon sugar
2 1/2 lb firm-ripe Bartlett or Anjou pears, peeled, each cut into 8 wedges, and cored (about four)
1/2 pint Blueberries, washed and dried
1 tablespoon fresh lemon juice
Pastry dough (see recipe below)
1 tablespoon milk

Put oven rack in middle position and preheat oven to 425°F.

Whisk together flour, nutmeg, salt, and 2/3 cup sugar. Gently toss with pears and lemon juice.

Roll out 1 piece of dough (keep remaining piece chilled) on a lightly floured surface with a lightly floured rolling pin into a 13-inch round, then fit into a 9 1/2-inch glass or metal pie plate. Trim edge, leaving a 1/2-inch overhang. Chill shell while rolling out dough for top crust. Roll out remaining piece of dough on lightly floured surface with lightly floured rolling pin into a roughly 16- by 11-inch rectangle. Cut crosswise into 12 (1-inch-wide) strips with a pastry wheel or a sharp knife. Spoon filling into shell. Weave a lattice pattern over pie with pastry strips. Trim edges of all strips close to edge of pie plate. Fold bottom crust up over edges of lattice and crimp edge. Brush lattice (but not edge) with milk and sprinkle lattice with remaining tablespoon sugar. (Note- I just rolled the second half of the dough out and made a regular crust for the sake of time)

Bake pie on a baking sheet 20 minutes, then reduce oven temperature to 375°F and cover edge of pie with a pie shield or foil. Continue to bake until crust is golden brown and filling is bubbling, 50 to 60 minutes more. Cool pie on a rack to warm or room temperature, at least 2 hours.


Gourmet's Pastry Dough
via Epicurious

2 1/2 cups all-purpose flour
1 1/2 sticks (3/4 cup) cold unsalted butter, cut into 1/2-inch pieces
1/4 cup cold vegetable shortening
1/2 teaspoon salt
5 to 7 tablespoons ice water

Blend together flour, butter, shortening, and salt in a bowl with your fingertips or a pastry blender (or pulse in a food processor) until most of mixture resembles coarse meal with some small (roughly pea-size) butter lumps. Drizzle evenly with 5 tablespoons ice water and gently stir with a fork (or pulse in food processor) until incorporated.

Squeeze a small handful: If it doesn't hold together, add more ice water, 1 tablespoon at a time, stirring (or pulsing) until incorporated, then test again. (Do not overwork mixture, or pastry will be tough.)

Turn mixture out onto a work surface and divide into 8 portions. With heel of your hand, smear each portion once or twice in a forward motion to help distribute fat. Gather dough together with scraper and press into 2 balls, then flatten each into a 5-inch disk. Wrap disks separately in plastic wrap and chill until firm, at least 1 hour.

November 23, 2010

TWD Rewind (my favorite)

Brioche Chocolate Orange Snails
This week's Tuesdays with Dorie recipe is a rewind, a favorite to choose for our Thanksgiving tables. My first (and still favorite) Dorie recipe ever are the Brioche Snails- really just a fancy, buttery, sweet roll. I lined mine with pastry cream and chocolate chips and it's like I'm in Paris eating cheap, delicious Pain Au Chocolat from some hole in the wall bakery. I would definetely be thankful to have these on my table, any day of the year. You can see the recipe here. Have a happy and safe Thanksgiving and with any luck I'll finally post our cute sugar cookies I made with my little man in honor of turkey day.

Did you know you can get a free $3 MP3 credit from Amazon today? Just click over here and type in GET3MP3S. I am totally going to download the Michael Buble Holiday Album (or this 99 Christmas Essentials, shoot, Amazon has too many good choices once again). Either will be great for some holiday baking (I've already started- I love this time of year, especially since it's actually nice to turn on the oven and have things warm up a little, finally!)

November 16, 2010

Cranberry Lime Galette & a Giveaway

Cranberry Lime Galette
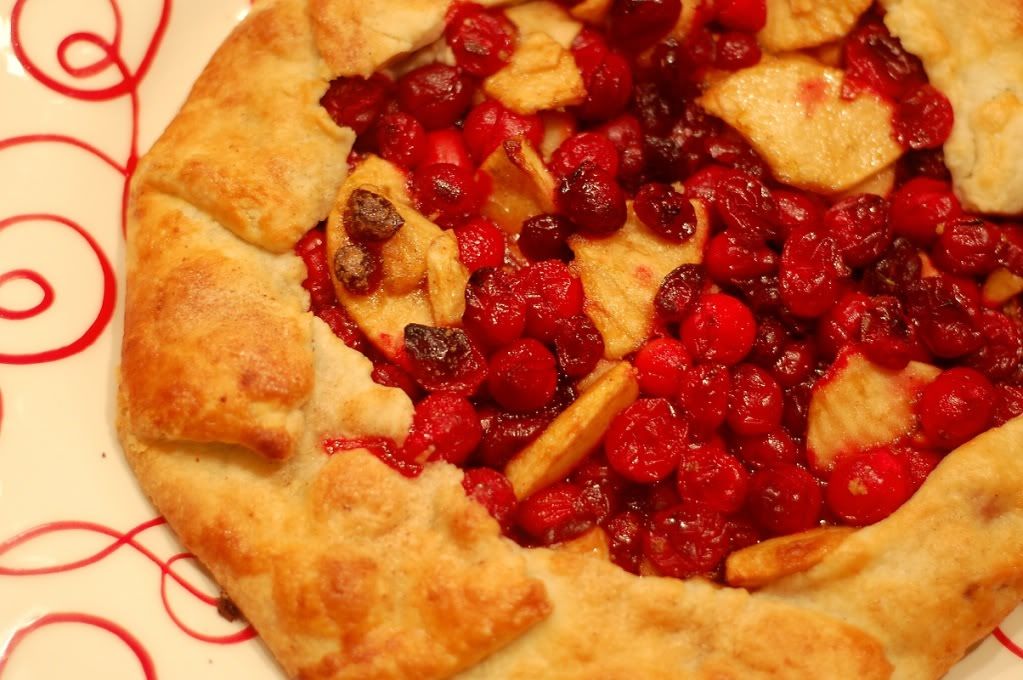
It's Tuesday and today I have a quick and delicious cran-apple galette. I don't think most people know what a galette is, but it's actually just an open-faced pie. I think it might even be easier than a pie because there's no need to put a pretty crust on top or crimp (I know that bugs some people). Just roll out the dough, put the filling in the center, and fold over the edges. Bake and enjoy. Dorie's pie crust is absolutely amazing- buttery, easy, and delicious. This lime and cranberry combo is new to me but it's really fun and tangy- just make sure you use enough sugar to compensate for the tart, fresh cranberries.

Now for the giveaway. I'm sure you've heard about CSN Stores in the blog world before- where you can buy anything from a suitcase to a rice cooker (that's what I just bought from them this weekend- I'll let you know how I like it once it's here!). This time around I have a $75 store credit to CSN Stores (for US or Canada residents only). Just leave a comment and let me know what your favorite type of pie is- I'll leave the giveaway open until Friday at midnight. I love apple pie (so I put extra in this galette of course). Whatever pie you make for thanksgiving, I would try Dorie's amazing dough and her tip to put a little bit of graham or bread crumbs on the bottom to soak up juice- it makes all the difference.

Good for Almost Everything Pie Dough
adapted from Dorie Greenspan

Ingredients
3 cups all-purpose flour
1/4 cup sugar
1 teaspoon salt
2 sticks very cold unsalted butter, cut into tablespoon-size pieces
3/8 cup very cold (frozen is even better) Crisco (plain, not butter flavored), cut into 4 pieces
About 1/2 cup ice water

Put the flour, sugar and salt in a food processor fitted with a metal blade; pulse just to combine the ingredients. Drop in the butter and shortening and pulse only until the butter and shortening are cut into the flour. Don't overdo the mixing—what you're aiming for is to have pieces the size of fat green peas and others the size of barley.

Pulsing the machine on and off, add 3 tablespoons of the water—add a little water and pulse once; add some more water and pulse again; and keep going that way. Then use a few long pulses to get the water into the flour. If after a dozen or so pulses, the dough doesn't look evenly moistened or form soft curds, pulse in as much of the remaining water, or even a few drops more, to get a dough that will stick together when pinched. If you've got big pieces of butter, that's fine. The dough is ready and should be scraped out of the work bowl and on to a smooth work surface. (be careful not too add too much water- if the dough looks dry after adding most of the water, pinch it with your hands to check if it's coming together, and finish combining it by hand)

Shape the dough into a disk and wrap it. Refrigerate the dough at least 1 hour before rolling. The dough can be kept in the refrigerator for up to 5 days or frozen for up to 1 month.

October 26, 2010

Dorie's Apple Pie

Apple Pie
{printable recipe here}
I've made a lot of pies, but the first I learned to make was apple and it's still my favorite- so I was super excited to have the All American Apple Pie chosen as this week's Dorie treat. Dorie's version is exceptional (big shock, right?) and one of my favorite parts is the layer of graham cracker crumbs under the filling. It soaks up the excess juices and leaves the bottom of the pastry crisp (my tall man's favorite part- he loves the buttery, delicious dough). And even though preparing apple pie can seem a daunting task, my surprisingly practical apple peeler and corer came to the rescue once again. From my morning apple cinnamon oatmeal, to apples to snack on for my son, to apple pie- I use this thing all the time. You can even peel potatoes with it!

Grab the recipe from Emily, this week's host, or buy the book here if you haven't already. Mine is tattered and covered in butter and flour- and it's been worth every penny!

PS Guess what- my beloved camera is back! Nikon officially diagnosed the body with "sand damage" (but I think it's more likely flour/powdered sugar damage!) and they repaired it free of charge, even though I'm well out of warranty. Thank you Nikon, I'm yours for life!

{printable recipe here}

October 12, 2010

Fold Over Torte (Apple Berry and Peach Berry)

Photobucket
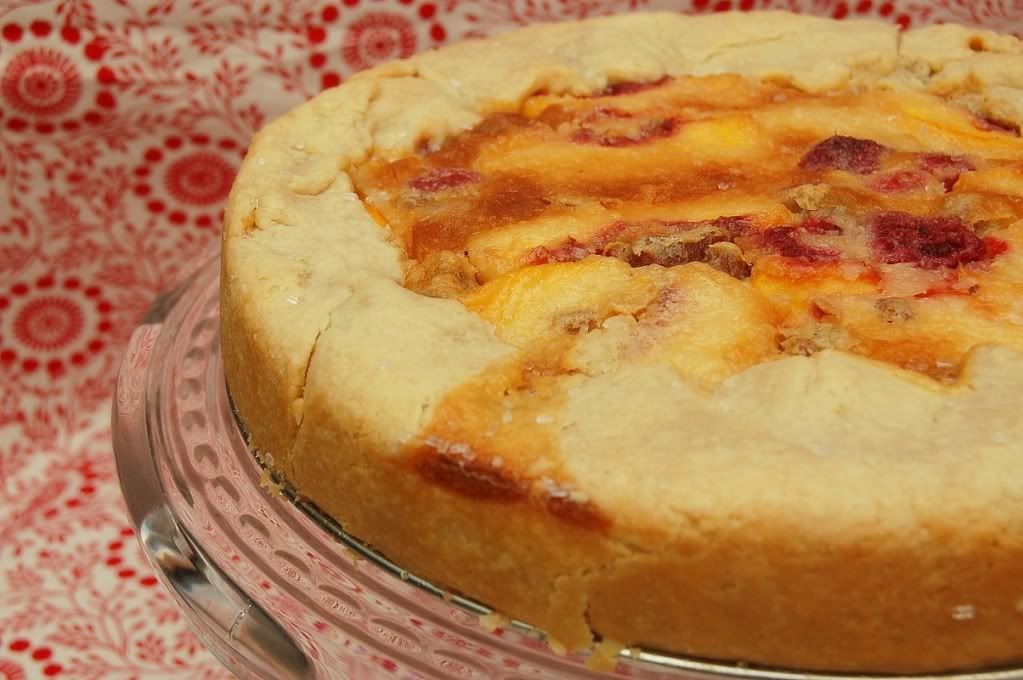
It's Tuesday again, and while I'm shocked at how fast the week has flown, I'm just grateful that I planned ahead and made this delicious Dorie treat a few weeks ago! Although this looks pretty fancy, it's nothing more than a pie crust placed in a springform pan and piled high with fruit and a quick custard. Easy, I promise. Plus, with the pastry, the fruit, the filling- all the amazing ingredients come together to make a real crowd pleaser.

PhotobucketGrab the recipe from Cakelaw or, better, yet, buy the book. This delicious recipe is yet another example of the merits of joining a baking group- I'd never have tried it without the push, but we all loved it!

August 24, 2010

TWD- Easy French Tarts

Photobucket
It's Tuesday again and I found a comforting familiarity making tart shells and pastry cream. This week's recipe, the crunchy custardy peach tart, didn't exactly come to fruition this week. I prepped the shells Saturday (just a quick whirl of the ingredients in my food processor and pressed into the tart pans) and planned to make the real deal for Sunday dinner. Last minute at Church, though, my husband invited some friends for dinner and I found myself in a frenzy! Instead of making the actual recipe (and trying something new, not!) I whipped up a batch of pastry cream and topped half with madarin oranges and the other half with homemade apple pie filling. While it wasn't the real deal, you really can't go wrong with pastry and cream. Thanks to Rachel for the push to make this yummy dessert.


Come back later this week for Greek (it's my brother's birthday and we're going all out!)

"Slightly Lighted" Pastry Cream
adapted from Baking by Dorie Greenspan

2 1/2 cups 2% milk
4 large egg yolks
1 egg
1/2 cup sugar
1/3 cup cornstarch, sifted
1 1/2 teaspoons pure vanilla extract
2 tablespoons unsalted butter, cut into bits at room temperature
Seeds from one vanilla bean (optional)

Bring the milk to a boil in a small saucepan.

Meanwhile, in a medium heavy-bottomed saucepan, whisk the egg yolks together with the sugar and cornstarch until thick and well blended. Still whisking, drizzle in about 1/4 cup of the hot milk-- this will temper, or warm, the yolks so they won't curdle. Whisking all the while, slowly pour in the remainder of the milk. Put the pan over medium heat and, whisking vigorously, constantly and thoroughly (making sure to get the edges of the pot), bring the mixture to a boil. Keep at a boil, still whisking, for 1 to 2 minutes, then remove the pan from the heat.

Whisk in the vanilla extract. Let sit for 5 minutes, then whisk in the bits of butter, stirring until they are full incorporated and the pastry cream is smooth and silky. Scrape the cream into a bowl. You can press a piece of plastic wrap against the surface of the cream to create an airtight seal and refrigerate the pastry cream until cold or, if you want to cool it quickly--as I always do--put the bowl into a larger bowl filled with ice cubes and cold water, and stir the pastry cream occasionally until it is thoroughly chilled, about 20 minutes.

April 5, 2010

Quiche (for your leftover ham)

(old picture, sorry! i'll be cooking again soon i hope!)

I hope everyone enjoyed Easter! We had a ham (from Costco, of course) and all the regular, delicious food. It was fun but I felt pretty guilty since my enormous cast keeps me from chopping or washing pretty much anything. My mom was a good sport though and we had a great weekend and tons of ham leftover, too. My two favorite things to make with the extra ham are quiche and refried beans. I throw a piece of the ham into my crockpot with the pinto beans and they come out SO delicious. Really. I don't even "refry" them. For more info on the quiche and pie crust see the original post here and give the pinto beans a try- they're cheap and easy (even easy enough for one handed me!)


Don't forget today's the last day to enter the Giveaway!


Basic Quiche
by LaNell Strobot
*use whatever meat, cheese, and veggies you like- this is a flexible recipe!*

2 Eggs
1/2 Cup of Mayonnaise (no Miracle Whip)
1/2 Cup of Milk
1 Tbsp Cornstarch

1 Cup Shredded Cheddar Cheese
1/2 Cup Shredded Swiss Cheese
1/3 Cup Sliced Green Onion
1 Cup Cubed Ham (I used sliced deli ham in the photo, whatever you have on hand works)

1 9 inch Pie Crust, blind baked for about 15 minutes

Blend eggs, mayo, milk, and starch with a fork in a medium bowl. Once all ingredients are smooth and combined, add the cheese, onion, and ham. Stir to combine and pour into crust.

Baked at 350 degrees for about 35 minutes until the filling starts to firm and brown a little.

March 26, 2010

Strawberry Lemonade Bars

{printable recipe here}
Auburn called to see if she could test drive my food processor for an awesome new recipe she found. Lemon, strawberries, pastry crust? You bet! These are made with a quick crust pressed into a pan and then the strawberry lemon puree is poured over top. The whole thing took us onto 10 minutes or so, even with five million little children asking for drinks, balls, attention, treats, you know. Don't forget to take the extra 30 seconds to line the pan with foil before starting. After they cool, lift them right out and slice. They'll look better, make less waste, and less mess around the edges of the pan. Not that my husband MINDS cleaning up that mess!

We made these in a big baking dish but decided we'd like them better a little thicker, so I'm including my changes below. You could also make this without a food processor if you don't have one by pureeing the strawberries in a blender. Whichever method you use I would remove the seeds from the strawberry puree with a mesh sieve. The final product will have a much better texture that way.

Come back Monday for a giveaway!

Strawberry Lemonade Bars
from AnneStrawberry
adapted from Baking Bites

for the crust-
1/4 cup sugar
1/2 cup butter, room temperature
1 1/2 cups all purpose flour
1/4 tsp salt

for the filling-
1 cup fresh squeezed lemon juice
3 teaspoons lemon zest
1/2 cup pureed strawberries (about 3/4 cup berries, pureed and seeds removed)
1 1/4 cups sugar
4 large eggs
1/4 cup all purpose flour
1/2 teaspoon baking powder
1/4 teaspoon salt

Preheat oven to 350F. Line a small rectangular pan with foil (a 9 x 13 works for thinner bars, but I like my small rectangular Pyrex- it's bigger than a square dish but not too big).
In a large bowl, cream together sugar and butter till fluffy. Gradually beat in flour and salt until mixture is crumbly. Pour into prepared pan and lightly press into an even layer. Bake for about 17 minutes, until set at the edges.

Meanwhile, prepare the filling. In the bowl of a food processor, combine lemon juice, lemon zest, strawberry puree, sugar and eggs and process until smooth. Add in flour, baking powder and salt, then pulse until smooth.

Gently pour the filling over the hot crust when it has finished baking. Return pan to oven and bake for about 30 minutes. The filling should be a little set. It may have a sugary crust on top- just make sure it's semi solid. It will continue to harden in the fridge.

Cool completely in the fridge then slice with a damp knife, cleaning between cuts to get the best final product. Top with sliced strawberries if desired. Help bars to keep their shape by storing in the fridge.

January 5, 2010

Tarte Tatin for TWD's 2nd Anniversay

I love France. I LOVE French food. I love apples. This special second anniversary Dorie treat was destined to be a winner (or so I thought!) I used a varieties of apples I had on hand (Fuji, Gala, Pink Lady, and Yellow Delicious), quickly peeled them with favorite apple tool (which I highly recommend if you like apple pie, apple sauce, or even apples at all- grab one on Amazon or check out Ross. I got one there for next to nothing last year). I melted the butter, which is probably one of my favorite smells in the world, sprinkled on the sugar, placed the apples on top, and cooked the caramel. Everything was great and so I added the puff pastry on top and placed it in the oven.

When it came out I placed my platter on top and quickly flipped it- only to have a huge rush of caramelly apple juices leak out onto my mom's recently mopped floor (sorry!) Of course my family wasn't derailed by a little mess and we made quick work of the tarte. In retrospect I think I should have cooked the caramel longer and maybe even let the apples sit over a collander (like Alton Brown recommends sometimes) to remove some juice. I'll have to try this method again though, because as Ina would say, Apples, Pastry, Sugar, and Butter- how bad can that be? Speaking of my dearest Ina, I love her quick apple tart. It's a lot like I pictured this recipe turning out and probably one of my top 5 recipes from the last year (not to mention one of the easiest!)

Now in honor of TWD's 2nd Anniversary, I'm linking my favorite ever Dorie treats. Maybe reviewing these links and photos will hold over my sweet tooth... which has absolutely loved TWD. Not likely, though!

Blueberry Pie

White Chocolate and Raspberry Bread Pudding

Split Level Pudding

Apple Pie

French Chocolate Brownies

Florida (Key Lime) Pie

Dimply Peach Cake

La Palette's Strawberry Tart

French Pear Tart

It would appear that I REALLY like pies and tarts (no shock there- I'll take pie over cake any day of the week).

And my very favorite (and first) TWD recipe- Brioche Snails (and again here)- especially the pastry cream inside. Love me some pastry cream. Now just reviewing these recipes has made me feel like I'm long overdue for a marathon or something. See you at the gym!

Last- my Tall Man's favorite ever Dorie treat (still, after a year and a half and many many baked goods later...)- Pecan Honey Sticky Buns

Now I need some advice. For the first time (ever, I think) I'm having a vegetarian over for dinner on Friday and would love some input on your favorite, company worthy meatless dishes. We have our loosely termed "vegetarian night" about once a week but it's usually not more than homemade refried beans and tortillas with fresh salsa. I'd love to hear your knock out vegetarian meals! Besides, with the New Year here, I think more meatless meals are in order! I'd also love to hear your favorite Dorie recipe so far- please let me know!

(Grab the recipe for the Tarte Tatin here! Thanks again Laurie for such a fun group and Dorie for the great recipes!)

December 22, 2009

TWD- Puff Pastry Pecan Pie (my 200th post)

{printable recipe here}

Christmas is here. We are overloaded with goodies, enjoying the perfect Arizona "winter", and loving the excitement our little man has for "Chissmas tine" (as he says it!) This week's Tuesdays with Dorie recipe sounded delicious, especially since I tried pecan pie for the first time last week and loved it (you can find the original recipe at Beth's blog). That's right, I'd never tried it before. Sometime I decided I didn't like it and so I've never eaten it, heading instead for the apple or berry pies. But Pecan Pie has been redeemed for my palate, not unlike guacamole which was a smash hit when I finally tried it when I was about 18.

With all the Christmas craziness, though, I didn't have time to make a pie crust. So I rolled out a piece of puff pastry, trimmed the edges, glued the strips on to make a little wall, and crisped it in the oven for a few. Meanwhile, I prepped half the filling, added a little flour, and cooked it until it boiled on the stove. Then I stirred in the egg and vanilla, poured the sauce into the shell, and sprinkled it with nuts. The good news is that the whole thing only takes a few minutes to make, even with two crazy kids in the kitchen. ANYONE can make this, really! And while this isn't exactly a traditional pecan pie, you can't really go wrong with butter, nuts, and brown sugar. Then go ahead and top it with whipped cream. Like Ina would say, "How bad can that be?" And while I'm glad to know I actually love pecan pie, I guess my "skinny jeans goals" should just be grateful it took me a while to figure that out!

PS This is indeed my 200th post (so you get a picture of my little man and baby strawberry!). I guess the picture is pretty fitting since she's the most delicious thing I've made since I started this blog. You can click here to see some of my favorite recipes so far- and admist many buttery, delicious treats there are even a few salads (promise!). Thanks for reading along and have a very Merry Christmas!

Puff Pastry Pecan Pie
{printable recipe here}
from Anne Strawberry
adapted from Baking by Dorie Greenspan

1 sheet puff pastry, thawed
3/8 cup light corn syrup
1/4 cup dark brown sugar
1 tablespoons unsalted butter, softened
1/4 teaspoon salt
2 teaspoons flour
2 large eggs
1 teaspoon pure vanilla extract
1 cup pecan halves or pieces

Preheat the oven to 350.

Flour a board and roll out the puff pastry to about 11 by 11. Trim a 1 inch strip off each side. Place large sheet on a lined baking sheet.

Whip one egg with 1 teaspoon of water. Using a pastry brush, apply the egg wash to the borders of the puff pastry and gently place the strips on top to adhere them (forming a frame). Dock the center of the pastry with a fork, using the tines to prick all over the dough every 1/4 inch or so. Brush the top of the edges with the egg wash to promote browning. Place in the oven and bake for 10 minutes.

In a medium saucepan, combine the syrup, brown sugar, butter, flour, and salt. Whisk over medium heat until the mixture boils then set aside for a few minutes. Then, while whisking, slowly pour in the egg wash and the other egg. Whisk in the vanilla until everything is thoroughly combined. Carefully spoon sauce over the pastry shell, filling the created cavity. Sprinkle with nuts and bake for 10 more minutes, or until the pastry is browned and the filling it set.

Cut and serve with whipped cream or ice cream.

November 24, 2009

My favorite thanksgiving pie

I keep saying it but it's shocking how fast time has flown since I had my Baby Strawberry. She's getting so big (10 weeks tomorrow and 11 pounds already) and I'm loving every minute. Thanksgiving is here already and that means some serious cooking with the holidays starting. We'll be enjoying a good ham (with some turkey on the side, I'm not the only person who much prefers ham, right?), hot homemade rolls (my assignment), and plenty of pies from the woman who taught me how to crimp a crust- my Aunt CarmaLee. It's going to be wonderful and a holiday I look forward to every year.

If you haven't planned your menu yet, I'd really recommend this beautiful and delicious Apple pie from Dorie Greenspan. I've never been a huge pumpkin fan, except for that sugar and chocolate loaded bread, and will take an apple pie over that any day. Apples are a buck a pound around here right now and you can bet this will be gracing our table. Pile in those apples, don't think about the calories, and enjoy the time of year. There's a lot to be thankful for (especially, for me, the people in my little strawberry patch!)

Don't forget to come back next week for a special giveaway...

All-American All-Delicious Apple Pie
adapted from Dorie Greenspan (and casually typed- buy the book already to enjoy her beautiful writing, photographs, and recipes of course!)

Good for Almost Everything Pie Dough for a double crust, chilled (see instructions below)
4 pounds (about 6 very large) apples - I used a mix of Pink Ladies, Fujis, Granny Smith, and Golden Delicious - whatever looks good and a nice mix of textures and sweetness
3/4 cup sugar
Grated zest of one lemon
2 tablespoons quick-cooking tapioca or 1 tablespoon Ultra Gel
1 teaspoon ground cinnamon
dash of nutmeg
1/4 teaspoon salt
2 tablespoons graham cracker crumbs (or dried bread crumbs, unseasoned)
2 tablespoons cold unsalted butter, cut into bits
milk and sugar for the optional glaze

Assembly Instructions:


Preheat the oven to 425. Peel, core and slice the apples. Put the apples into a large bowl and add the sugar, lemon zest, tapioca (I used Ultra gel), cinnamon, nutmeg, and salt. Toss together and let sit for five minutes.

Remove the pie crust from the fridge and sprinkle the crumbs over the bottom of the crust (to help prevent sogginess) and then turn the apples and the juices into the crust. The apples will heap over the top of the crust. Pat them into an even mound. Dot the apples with the bits of cold butter.

Lightly moisten the rim of the bottom crust with water, place the top crust over the pie, and crimp together after cutting overhang.

Use a sharp knife to cut slits into the top crust. Brush the top crust with a little milk and sprinkle with cinnamon sugar.

Bake the pie for 15 minutes (at 425). Reduce the heat to 375 and bake for another 50 to 60 minutes, or until the crust is browned and the juices are bubbling. Check on the pie after a half an hour or so to make sure it’s not browning too quickly (use a foil tent in that case).
Transfer the pie to a cooling rack and let it rest until just warm. Serve with ice cream.


Good for Almost Everything Pie Dough
adapted from Dorie Greenspan

Ingredients
3 cups all-purpose flour
1/4 cup sugar
1 teaspoon salt
2 sticks very cold unsalted butter, cut into tablespoon-size pieces
3/8 cup very cold (frozen is even better) Crisco (plain, not butter flavored), cut into 4 pieces
About 1/2 cup ice water

Put the flour, sugar and salt in a food processor fitted with a metal blade; pulse just to combine the ingredients. Drop in the butter and shortening and pulse only until the butter and shortening are cut into the flour. Don't overdo the mixing—what you're aiming for is to have pieces the size of fat green peas and others the size of barley.

Pulsing the machine on and off, add 3 tablespoons of the water—add a little water and pulse once; add some more water and pulse again; and keep going that way. Then use a few long pulses to get the water into the flour. If after a dozen or so pulses, the dough doesn't look evenly moistened or form soft curds, pulse in as much of the remaining water, or even a few drops more, to get a dough that will stick together when pinched. If you've got big pieces of butter, that's fine. The dough is ready and should be scraped out of the work bowl and on to a smooth work surface. (be careful not too add too much water- if the dough looks dry after adding most of the water, pinch it with your hands to check if it's coming together, and finish combining it by hand)

Shape the dough into a disk and wrap it. Refrigerate the dough at least 1 hour before rolling. The dough can be kept in the refrigerator for up to 5 days or frozen for up to 1 month.

November 11, 2009

Meeting the Pioneer Woman (and her Chicken Pot Pie)

Last week my mom and I went to see the Pioneer Woman at her Phoenix book signing. I couldn't believe how many people were crammed into the little book store! Fortunately, we found a seat and enjoyed chatting with some great people while we waited. When she came out the room erupted in applause and that kept happening all night! My daughter was pretty scared by the noise but she must have enjoyed Ree, because she didn't cry once and was cute and smiley and even met her sister, Missy.

Ree answered some fun questions. My favorite came from a little girl who asked, "Do you have elephants?" Ree just said, "No Honey, but I think I need them!" Then someone asked if she minded that everyone was in love with husband. She didn't. Someone else asked how she keeps in such great shape with all the butter in her recipes, she just laughed and said she works at it like the rest of us (I thought in my head, portion control, and working a ranch, come on!) She was really funny and down to earth. After she finished answering questions they called up the A group for signing and said those with little kids could come up too so they could get to bed. I booked it to the front and was the third in line. I thought that was really sweet of her. I was in group L on my ticket and there were 30 for each letter!

(pic from PW- see me there, just barely?)

So now I'm sure you're wondering about my really high quality pictures. I didn't want to bring my big camera since I had my baby strawberry to carry and wanted to pack light. So I meant to ask my mom to bring her purse camera but forgot in all the stress (newborns always want to eat at the most inconvenient times) and so all I had was my cell phone. When Ree was signing my book, I asked the girl behind me to take our picture and it didn't work. By the time I realized it was too late and I was so disappointed. My mom told me to go ask Missy, her sister, if she would take another so I did. Missy held my little cutie and it all worked out.

Ree was really sweet while she signed my book. She asked how old my baby was (seven weeks I said, and this is her first big thing- she hasn't even been to Church yet!). Then she asked if she was my first. I told her about my little boy and she said, "Yeah, I can tell from the way you're holding her over your arm, you aren't too nervous." "I have to chase a toddler all day, I need all the hands I can get I told her!" I think she understood that.

So all in all, the signing was a lot of fun. We at great food at Wildflower Bread Co next door (Butternut Squash salad with Gorgonzola and a Cranberry Balsamic Vinaigrette and Potato soup), enjoyed listening to PW, and got some new material for our upcoming meals. I'll post them as we try them.

Check out her book on Amazon. I love having her great recipes at my finger tips and seeing all the photos of her life that seems so different from mine (minus the butter... we both like to use that!)

I thought I'd make dinner out of here for a while and here is the first recipe- Chicken Pot Pie. It came together in a flash and was flaky and filling. Perfect.

For better directions than I'd ever be able to give (people, I have about 15 minutes a day without a child physically attached right now, I can't take all those process photos and get in a shower) visit Ree.

Notes on the Recipe-

I made one batch and was able to make two "Marie Calendar's" size pot pies (I love those tins- the right size and no worries if you lose one- and my husband brings them home from work all the time, since I don't buy pie!)

Instead of adding the peas with the other veggies, I added them after the filling was all cooked. I think that keeps them greener and prettier and I'm kind of vain like that. I also added extra carrots since I LOVE them. Sorry about the crappy action shot. We were hungry and in a hurry to watch Transformers 2 from Netflix. We should have slowed down and enjoyed the pie, it was better than the movie. Really really.

Lastly, I used my favorite "cooking wine" with a dash of white wine vinegar. In honor of PW, I even took a picture (or asked my mom too, she's a budding food photographer I think, don't you like the shot of the pie with the heart on it?)

More PW woman recipes coming soon! And happy Veteran's Day! Today we're arranging the nursery, eating cinnamon swirl french toast, and enjoying my husband's day off. Hope yours is great, too!

August 6, 2009

Palmiers, TriColore French Tart (and the giveaway winner!)

I'm slowly getting around to posting my Bastille Day recipes and hope some of you will give them a shot. French food is delicious and doesn't have to be tricky. In fact, these palmiers are the easiest dessert I've made in a long time. And probably one of the most popular, too (I love when that works out!). Palmiers are a crunchy cookie that you can buy from any little bakery in Paris. They come in all sizes and are so simple to make. All you do is roll a sheet of thawed puff pastry in sugar (I added cinnamon for the health benefits, haha) and then roll it up into a log, slice, and bake. It's simple and delicious. I followed Ina's recipe and it worked out great.

If you are only baking for a few, you could just make one sheet's worth and make cheese straws with the rest (or apple turnovers, or tomato and goat cheese tarts, there's a lot of options with this stuff!) I also served them with a fruit tart that is easy to modify and so delicious. The rich pastry cream and fresh fruit really complimented the crunchy cookies. If you happen to have any leftover (not really going to happen in my house, but maybe your family has more self control) don't store them in an airtight container as they will soften. I'd recommend just baking off the amount you need and freezing the rest like I've seen Ina do. Then just keep them in the freezer for a last minute treat.

Yesterday I forgot to announce the winner of last weeks giveaway- Leslie M! Thanks everyone for the wonderful suggestions for summer dinners and ice cream flavors. I have work to do now!

Cinnamon Sugar Palmiers
adapted from Ina Garten

2 cups granulated sugar (I used less so there was less waste, but you could certainly use the remainder for cinnamon sugar on toast)
1/2 teaspoon ground cinnamon
1/8 teaspoon kosher salt
2 sheets puff pastry, defrosted (just thaw it overnight in the fridge)

Preheat the oven to 450 degrees F.

Combine the sugar, cinnamon, and kosher salt. Pour 1 cup of the sugar/salt mixture on a flat surface such as wooden board or marble. Unfold each sheet of puff pastry onto the sugar and pour 1/2 cup of the sugar mixture on top, spreading it evenly on the puff pastry. This is not about sprinkling, it's about an even covering of sugar.

With a rolling pin, roll the dough until it's 13 by 13-inches square and the sugar is pressed into the puff pastry on top and bottom. Fold the sides of the square towards the center so they go halfway to the middle. Fold them again so the two folds meet exactly at the middle of the dough. Then fold 1 half over the other half as though closing a book. You will have 6 layers. Slice the dough into 3/8-inch slices and place the slices, cut side up, on baking sheets lined with parchment paper. Place the second sheet of pastry on the sugared board, sprinkle with the remaining 1/2 cup of sugar mixture, and continue as above. (There will be quite a bit of sugar left over on the board.) Slice and arrange on baking sheets lined with parchment.

Bake the cookies for 6 minutes until caramelized and brown on the bottom, then turn with a spatula and bake another 3 to 5 minutes, until caramelized on the other side. Transfer to a baking rack to cool.

Serve with ice cream for a delicious and simple dessert!

TriColore French Tart recipe here.

August 1, 2009

Cheese Straws

Today I rolled out of bed, late (7:10, haha!) since my son is "speddin da nite" at his Grandma and Grandpa's. My tall man and I had a hot date last night watching the new Harry Potter and capped it off with a good slow morning (for me anyways, he's out mowing the lawn- maybe I should make him some waffles?). I checked my email, without insistent tugs on my leg for a glass of milk, some cereal, or to come play outside in the heat, and found a new header in my inbox from my wonderful and talented cousin (who I pretend is actually my sister in law). Well needless to say I was excited, because let's be honest, I haven't worked on my blog layout in a while and even when I do work on it, I don't have any idea what I'm doing. I should ask my legit brother in laws for help, because they're actually programmers, but it just hasn't panned out. Hopefully the layout will get more attention soon, but until then, at least there's good food around here. And good food for trade for some programmers help.

I can, however, upload a new header, so I did that and sang Kristi's praises in my quiet little house. And since I can't post again without a recipe, I thought now was the time to post Ina's cheese straws I made for Bastille day a few weeks ago (because it was Kristi, brilliant Kristi, who requested them). This simple appetizer requires only a sheet of puff pastry, an egg, some cheese, and some herbs. It only takes a few minutes in the oven and leaves a big impression- I'll just say that even the toddlers wolfed these down. These make a fun appetizer and everyone was more than willing to munch away, but I think you could even turn these into dinner with a nice salad or soup. I know I'll make them again.

PS Don't forget to check out Kristi's photography and design site here... She also does amazing invitations and announcements.

Cheese Straws

from Ina Garten
2 sheets (1 box) frozen puff pastry (such as Pepperidge Farm), defrosted overnight in the refrigerator
Flour, for dusting
1 egg
1 tablespoon water
1/2 cup freshly grated Parmesan
1 cup finely grated Gruyère cheese (or Swiss)
1 teaspoon minced fresh thyme leaves (Italian seasoning would work here too)
1 teaspoon kosher salt
Freshly ground black pepper

Preheat the oven to 375 degrees F.

Roll out each sheet of puff pastry on a lightly floured board until it is 10- by 12-inches. Beat the egg with 1 tablespoon of water and brush the surface of the pastry. Sprinkle each sheet evenly with 1⁄4 cup of the Parmesan, 1⁄2 cup of the Gruyère, 1⁄2 teaspoon of the thyme, 1⁄2 teaspoon of the salt, and some pepper. With the rolling pin, lightly press the flavorings into the puff pastry. Cut each sheet crosswise with a floured knife or pizza wheel into 11 or 12 strips. Twist each strip and lay on baking sheets lined with parchment paper.

Bake for 10 to 15 minutes, or until lightly browned and puffed. Turn each straw and bake for another 2 minutes. Don't over bake or the cheese will burn. Cool and serve at room temperature.

June 9, 2009

TWD- Easy Parisian Apple Tartlets

I never ate a bad pastry in France. Even when buying from the biggest hole in the wall or (something I would never do in America) from a bakery in the metro station, they taste great. The French just know food. And with high quality butter, delicious produce, and simple flavors, you can't go wrong. So I was excited to try this Parisian tart. Unlike the apple pie I made last week that took tons of time chilling, rolling, cutting, etc (with a fabulous end result), the assembly of this dessert took about five or ten minutes (also with a fabulous end result). A brief stint in the oven and out comes a flaky, buttery, and tender dessert. With different fruit options, there's really no limit to this recipe.

Atop La Tour Eiffel
And with all the time you've saved making this wonderful French treat, why not watch a romantic movie with your honey. Or the Lakers game, in our case.

Parisian Apple Tartlets
Adapted from Baking by Dorie Greenspan

1 sheet cold puff pastry
3 apples, peeled and cored
1/3 cup brown sugar
3 teaspoons cold butter, cut into bits

Center a rack in the oven and preheat the oven to 400 degrees F. Line a baking sheet with parchment paper or a silicone mat.

Lightly flour a surface and roll the puff pastry out to about an 11 inch square. Using a fluted cookie cutter between 3 and 4 inches wide, cut pastry into about 8 pieces.
(Reserve the scraps, sprinkle with cinnamon sugar, and bake for a few minutes for a treat for your hungry husband who can’t stand to wait during the photos!)
Cut the apple half into 4 or 5 slices (depending on size) and place three slices on the pastry circle. Sprinkle the apple with 1 or 2 teaspoons brown sugar-depending on how much sweetness you want-and a couple bits of butter.

Bake the tartlet for about 20 minutes (the time will vary depending on how your apple bakes), until the pastry is deeply browned and puffed up around the apple and the apple can be easily pierced with the tip of a knife. If it looks like the tartlets need more sugar on top, sprinkle on a bit more toward the end of the baking time.

Transfer the baking sheet to a rack and let the tartlet cool-it's great just a little warm and equally good at room temperature. Serve with ice cream if desired.

May 21, 2009

Phyllo Apple Pies

Since my brother got back from Greece, he's been begging me to make something with Phyllo dough. Anything. Well, anything except Spanakopita. You should hear him say it- it sounds like a curse. So when I found boxes of Phyllo dough for only a buck at Safeway, I knew it was time. I thawed the beast Alton Brown style (one minute in the microwave, thank you) and went to work. I'll admit there were a few casualties, but I'm not sure that it was the thawing or my total inexperience.

I melted some butter, greased up the mini pie pans, and layered quarter sheets of phyllo (that I cut with kitchen shears for ultra precision, ahem) around the circle with a little bit of butter in between. Meanwhile, I used my sweet apple corer/peeler/slicer to make quick work of four apples. I threw them in a glass bowl, added a bit of water and cinnamon, covered with saran wrap, and nuked for five minutes. When they came out all soft and delicious, I added a bit of sugar and stirred. I dumped some apples into the little shells, pulled all the phyllo pieces to the middle for a quick topping, and drizzled a bit of extra butter on top. I figured I might as well not throw it away. After a few in the oven, these babies came out beautiful and tempting. And I was only 30 minutes in (counting the baking!)

While the final product isn't exactly Greek (sorry Bro) the taste of apples and butter is definitely one of my favorites. I know there's butter in the pastry, but there's hardly any added to the dish, and it just tasted SO good. I'm thinking of making a big version of these cute little minis. It's tender, flavorful, and doesn't even require ice cream on the side. Though I'm sure not even the Greeks would mind a little scoop of vanilla.

Phyllo Apple Pies
from Anne Strawberry
makes six mini pies

4 Medium Apples (I like something a little tart, like Fujis)
1 teaspoon Cinnamon
1 tablespoon Water
1/4 Cup Sugar

6 Sheets of Phyllo dough, thawed
2 tablespoons butter, melted (plus or minus)

Preheat the oven to 375.

Peel, core, and slice the apples as you would for apple pie. Place in glass bowl with cinnamon and water, cover with saran wrap, and microwave for five minutes. Carefully remove plastic and stir in sugar. Set aside.

Cut phyllo sheets into quarters and brush pie pans with a little butter. Layer one piece of pastry at a time, then brush on a bit of butter, and put in another piece at a slight angle, repeating until you've made it around the circle (about four pieces per dish- more if you'd like the crust thicker).

Place 1/4 cup of apple mixture inside each prepared pie dish. Pull the pastry sheets together toward the center, pinching and tucking until it looks about right. Drizzle a tiny bit of butter on top. Place on baking sheet and bake until golden brown, about 20 minutes. Serve sprinkled with powdered sugar or with ice cream.