As I write, the window is open, the kids are running in and out of the house, and we've eaten pumpkin cookies all morning. It started on the blogosphere ages ago but Fall has finally come to Arizona. This is my favorite time of year and I look forward to baking and cooking without worrying about heating up my already hot kitchen! When I opened up my Baking book for this week's Tuesdays with Dorie recipe, my little man immediately said "This looks pretty Mommy!" It was gorgeous but I didn't have figs or cornmeal or the will to take both of my little monkies to the grocery store during the witching hour. So instead, I'm sharing (a little late, don't mind me) a previous TWD recipe I didn't post because it screams fall to me and is one truly worth sharing.
The recipe is called the "Upside Down Plum Cake" and after I baked it, I realized it tasted exactly like a perfect homemade peach cobbler. Before I became a crazy baker, I used to dump fruit in a baking dish, top it with a yellow cake mix, and dot the top with butter. The end result was delicious and our typical peach cobbler. This recipe is a little different. You melt the butter in the pan (while the oven is preheating, genius!), pour in the batter, and top it with the fruit. The fruit ends up on the bottom and the tender cake on top. It's simple and delicious, totally flexible and a keeper. I know peaches are about done but I'm going to try this again with apples and berries and whatever else I can get my hands on (and I think you should too!) You can see the recipe here at Becky's blog as well as the rest of the TWD crew here. Please forgive my quick pictures but the entire family was dying to eat this.
Do you have any favorite fall desserts? This one is bound to become a tradition for us!

Showing posts with label Cake. Show all posts
Showing posts with label Cake. Show all posts
October 25, 2011


May 10, 2011
TWD- Apple Cherry Brown Sugar Bundt Cake


May 3, 2011
TWD- Chocolate and Peppermint Marbled Loaf Cake
This week's Tuesdays with Dorie treat was a real winner at our house. I used a smaller loaf pan so I made a mini loaf as well and left one with my parents and took the other home. By the time I had it cut and took a couple of pictures, my kids had each swiped a piece or two. It never made it from cutting board to plate but everyone loved it. After naps, my little man walked out and asked for a piece of "chocolate bread" and was very upset to hear we'd given the last piece away. That was my biggest problem with this recipe- it was eaten far too fast and was deceptively guiltless (hence the "chocolate bread" nickname). There's way too much butter to count this as decent breakfast fare but I'll admit it was a lovely breakfast. We loved the peppermint version (made by dividing the batter and adding melted white chocolate to one portion and melted chocolate and peppermint extract to the other). Dorie suggests several wonderful variations and I can't wait to try a raspberry key lime cake next time. See the recipe here and try the batter (it might have been even better than the amazing cake!)


April 8, 2011
By the Book Friday- Sheet Cakes
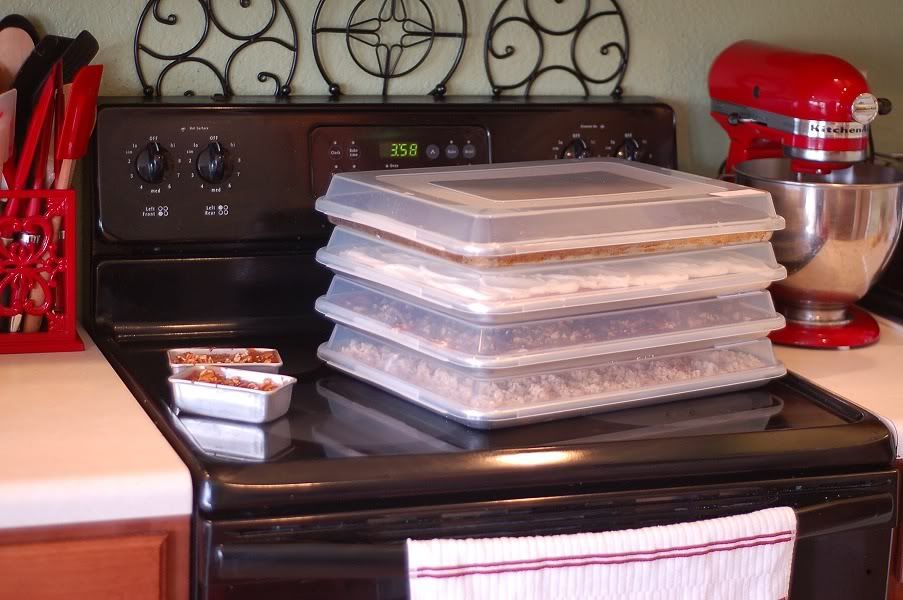
I kind of hate sheet cake. Not really, I mean, it's easy to make, transport, and serve- but there's no way to try a bit just to make sure things are okay before you send them off! Or to snitch a bit of the tempting mint brownies! I've been hoping to get some great new recipe tried this week for today's post but when it came down to it, I needed to make dessert for 80 guys tonight I didn't really want to make something new and fancy when I needed quantity and dependability, so I stuck with trusty old favorites. They don't technically meet my own 'by the book Friday' parameters but if there was an Anne Strawberry Cookbook (At Home with Anne Strawberry? See Anne Strawberry Burn through a Ton of Butter and Flour? All the Stuff Anne Strawberry Tries to Fatten Her Friends and Family with?) these would each be in there. Well, minus the Rice Krispie treats. Those are just not my style but my tall man will jump through hoops for them so I included a batch. I bet they will get eaten quickly even if I don't like them! And the chocolate, well, I couldn't decide between the mint brownies and the Texas sheet cake as I mentally tried a piece. Fortunately for me, I thought the sheet cake looked a little full before I baked it (ahem, that's a lie) so I reserved a tiny bit of batter for two mini cakes for the ladies tonight. They look so great in their tiny little pans, covered with pretty chocolate icing and pecans. Yum. I hope the men appreciate the chocolate (do they really?)
I read this poem today on Clover Lane and had to share. It's very sweet and I think I need to print it up for my house. Loving BMWs, pretty furniture, and expensive chocolate is easy enough. I need to focus on finding the beautiful in the everyday (even Rice Krispie treats?)
Learn to like what doesn't cost much.
Learn to like reading, conversation, music.
Learn to like plain food, plain service, plain cooking.
Learn to like fields, trees, brooks, hiking, rowing, climbing hills.
Learn to like people,
even though some of them may be different...
different from you.
Learn to like to work and enjoy the satisfaction of doing your job as well as it can be done.
Learn to like the songs of birds, the companionship of dogs.
Learn to like gardening, puttering around
the house and fixing things.
Learn to like the sunrise and sunset, the beating of the rain
on the roof and windows,
and the gentle fall of snow on a winter's day.
Learn to keep your wants simple and
refuse to be controlled by the likes and dislikes of others.
Lowell Bennion
Learn to like reading, conversation, music.
Learn to like plain food, plain service, plain cooking.
Learn to like fields, trees, brooks, hiking, rowing, climbing hills.
Learn to like people,
even though some of them may be different...
different from you.
Learn to like to work and enjoy the satisfaction of doing your job as well as it can be done.
Learn to like the songs of birds, the companionship of dogs.
Learn to like gardening, puttering around
the house and fixing things.
Learn to like the sunrise and sunset, the beating of the rain
on the roof and windows,
and the gentle fall of snow on a winter's day.
Learn to keep your wants simple and
refuse to be controlled by the likes and dislikes of others.
Lowell Bennion
Now if you'll excuse me, I'm off to enjoy some girl time with Baby Strawberry. We're going to try painting her toe nails again (and hopefully we'll have better results this time!) And cross your fingers that all my well loved, carefully labeled (if not shined) sheet pans and lids make it home. I'm not going to lie, I'm a little nervous...
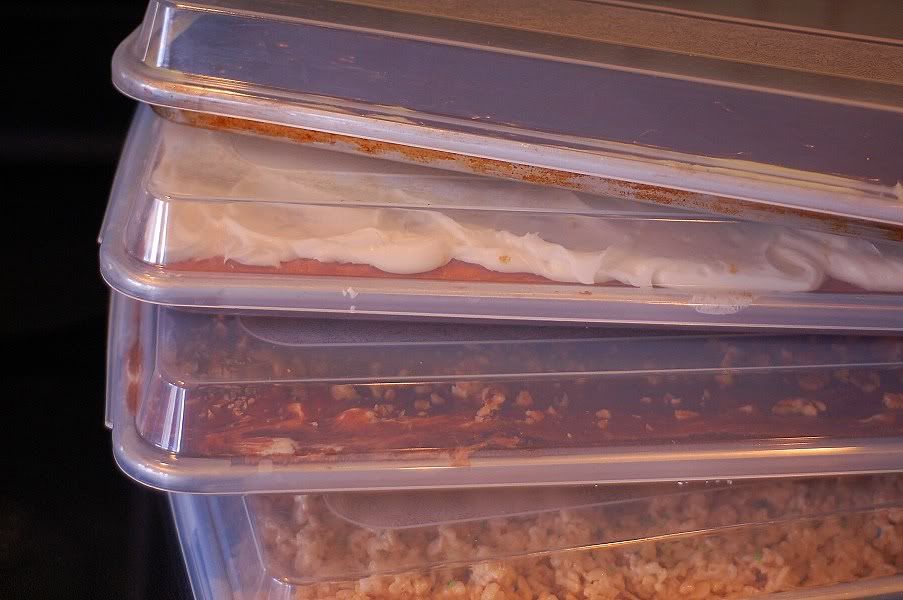 Top to bottom:
Mint Brownies (aka BYU Brownies)
Lemon Cake (this time I used a lemon cream cheese icing instead of the citrus glaze since I was out of juice)
Texas Sheet Cake
Rice Krispie Treats (from the box, plus some sprinkles to jazz them up!)
March 28, 2011
Banana Birthday Cake

This month marks the third year for my cooking blog. The first two recipes I posted were Baked Chicken Cordon Bleu and Cafe Rio Pork Salads (that's still one of my top recipes). From there I was on to a whole lot of baked goods- tons of Dorie Greenspan and Barefoot Contessa recipes. Clearly, not much has changed! I've met so many great people and learned a lot in this crazy process and I really appreciate everyone that stops by, comments, and let's me know how the recipes turn out!


Old Fashioned Banana Cake
{printable recipe here}
Adapted by Anne Strawberry from Ina Garten's "How Easy Is That"
3/4 cup sugar
1/2 cup brown sugar (I prefer dark but whatever you have on hand is fine)
grated zest of one orange
3 very ripe bananas, mashed (I make my little man help me with this)
1/2 cup vegetable oil
2 eggs
1/2 cup plain, nonfat yogurt (Ina called for sour cream but yogurt worked great here, either is great)
1 teaspoon vanilla
2 cups flour
1 teaspoon baking soda
1/2 teaspoon salt (I always use kosher but it's up to you)
1/2 cup coarsely chopped nuts (option- I omitted these for baby Strawberry's sake, but I would recommend pecans here)
cream cheese frosting (recipe below)
Preheat the oven to 350. Grease and flour a 9 x 2 inch round cake pan (note- a small casserole pan would work great too, or cupcakes- I'd guess you'd get about 18-20- just lower the cooking time to about 20-25 minutes).
In the bowl of your stand mixer, combine both sugars and the orange zest. Rub together until fragrant. Put on the paddle attachment and mix in the bananas until combined. Still on low, add the oil, eggs, yogurt, and vanilla and mix until smooth.
If you're feeling patient (not likely over here) sift together the dry team- flour, soda salt. Carefully add to the mixer on low speed, until just combined (you don't want to over do this and cause the cake to be tough). Stir in the nuts if desired (or chocolate chips!) Pour the batter into the prepared pan and bake for 45-50 minutes, until a toothpick inserted into the center comes out clean. Cool in the pan for 15 minutes then turn out onto a rack, flip it over again, and cool completely. Frost with cream cheese frosting, garnish with nuts, and enjoy!
Anne's Cream Cheese Frosting
8 ounces neufchatel (reduced fat cream cheese), very soft- that's one box
1 stick (1/2 cup) butter, also softened
1 teaspoon vanilla
1 pound powdered sugar (half a standard bag- about 4 cups)
Cream the cream cheese can butter until smooth and perfectly incorporated on low speed, being careful not to go too long or too fast to avoid excess air in the frosting. Add the vanilla and powdered sugar and mix until smooth and delicious. We use the extra to make coveted "graham cracker sandwiches", just spread a few tablespoons between graham crackers and freeze. Yum.
March 7, 2011
Marshmallow Fondant Pirate Cupcakes
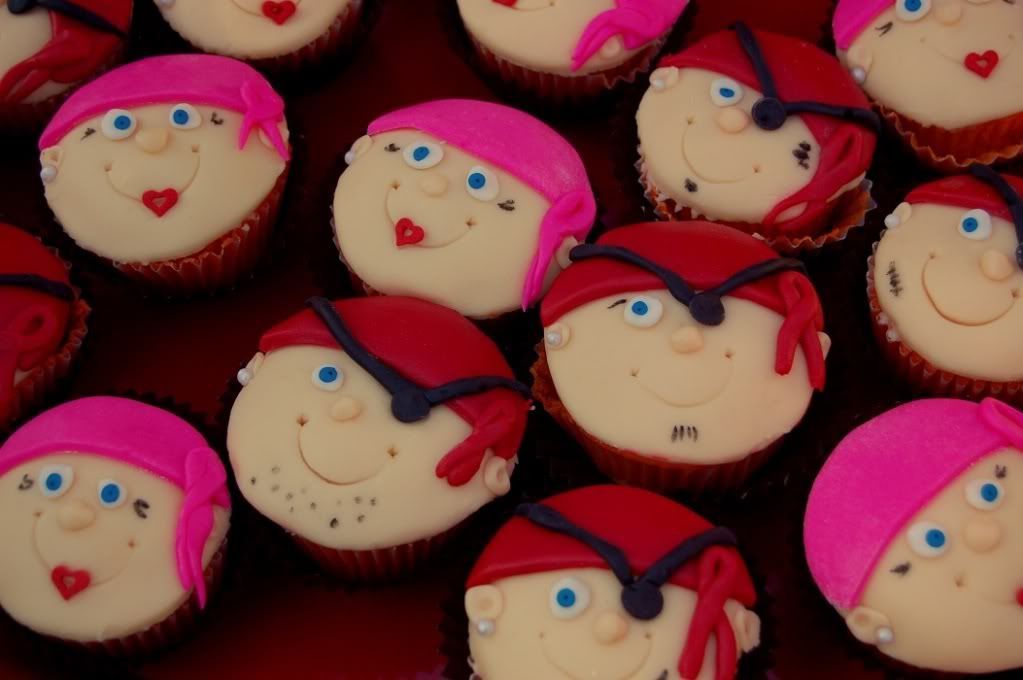
My little man turned four a few weeks ago. We had a big pirate party and since I like to try to make myself crazy I thought I would try out fondant for the first time. I skipped to marshmallow fondant since it's supposed to taste better.
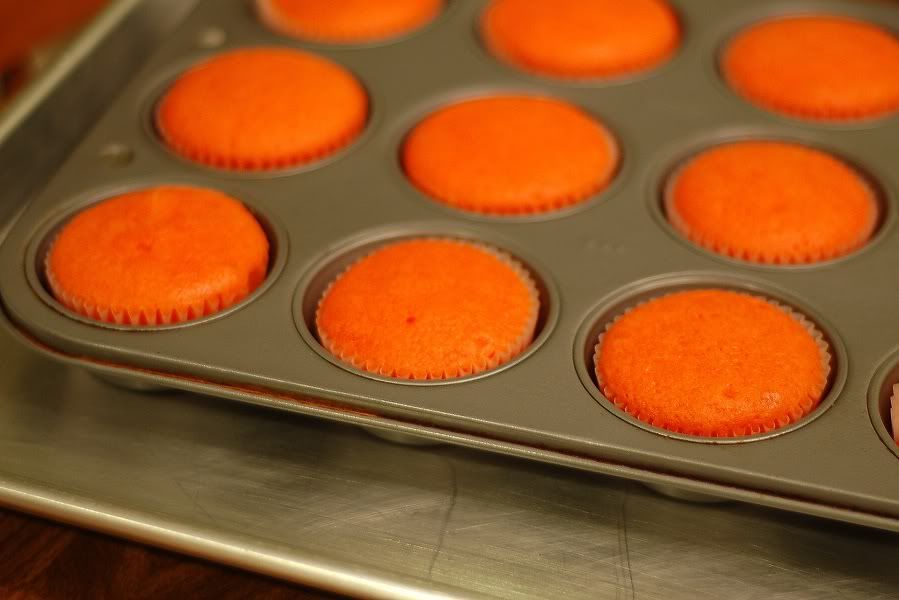 First, I made orange creamsicle cupcakes again (still his favorite color) with my standard doctored mix recipe.
 Then I dabbed a little frosting on top of each (I just whipped up some softened butter and powdered sugar, you could even use canned frosting, bleh!)
 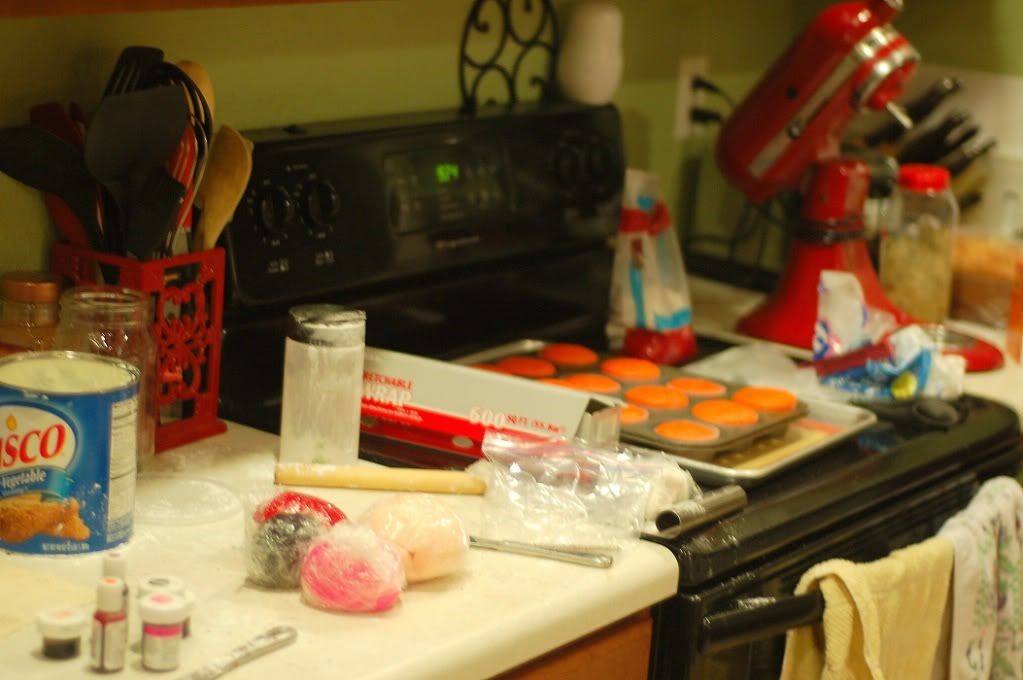 Next I made fondant. I followed Clara's awesome directions and made it in the microwave using C&H Powdered sugar, Jet Puff Marshmallows, and water. She's awesome and took pictures of the fondant process. You can see the recipe below. After you knead it and let it rest, you portion it out into the different colors you need. Get out the rolling pin, powdered sugar, and shortening. Look past the excessive mess. To color the fondant, you just knead in the gel food coloring until you reach the desired color. Make sure your hands are generously greased with Crisco (my tall man helped me knead my rich red, it took forever, and that really grossed him out!) Then rewrap and set aside each color.
*update*- I had a reader ask where I found the flesh colored gel food coloring. It is from a Wilton Dora the Explorer Gel Food Coloring Kit I found at Joann ages ago on clearance (red and pink are infinetely practical at this house!)The color is called 'Dora Skin Tone'. Here is a link where you can find it on Amazon for about $5 with free prime/super saver shipping.
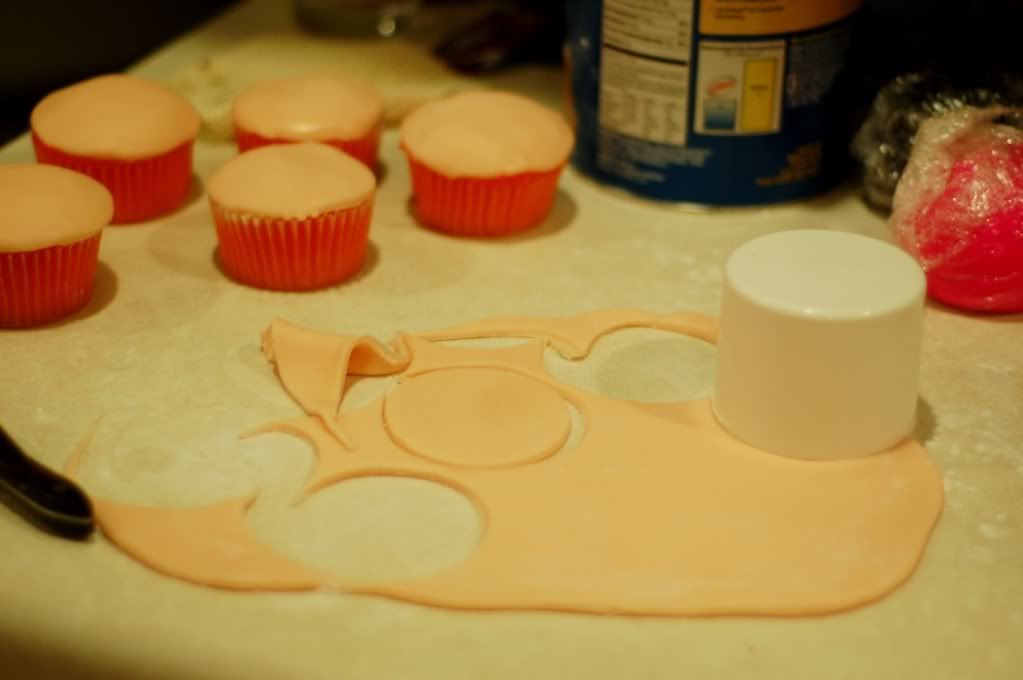
To make the pirates, generously dust your surface with powdered sugar. Roll out the skin tone and use a cutter to cut circles the same size as the cupcakes to make the faces. I used my cooking spray lid. Now I totally faked how to make these pirates off of a picture I found online (like this one but I can't find the original now). I forgot that I would also need to make pirate ears and noses with the flesh tone- so make sure you save a little extra. This color is the one you need the most of by far. Smooth the circle over the cupcake and then shape little ears and nose. Mine are far from perfect but that's okay. I used a new cheap paintbrush from Michael's and dipped it in water then brushed the back of the pieces and pushed them onto the fondant. Then I used the other end of the brush to make the ear indentations. I've never taken a fondant class and just read a couple things online and they were perfectly cute and fine, even if they were far from perfect! So don't stress it too much!
 Next I rolled out the color for the scarves (pink and red). I cut strips about an inch wide and then used the same cutter to make the faces to cut matching circles for the hats. Paint brush, press on, etc. The I rolled little snakes out of the same color and criss crossed them to make the tie and put them on the right side. Then I did the same for little eyes- one for the boys and two for the girls. Then I pushed on big round blue sprinkles to be the irises (I marked them an edible food marker to be the pupils).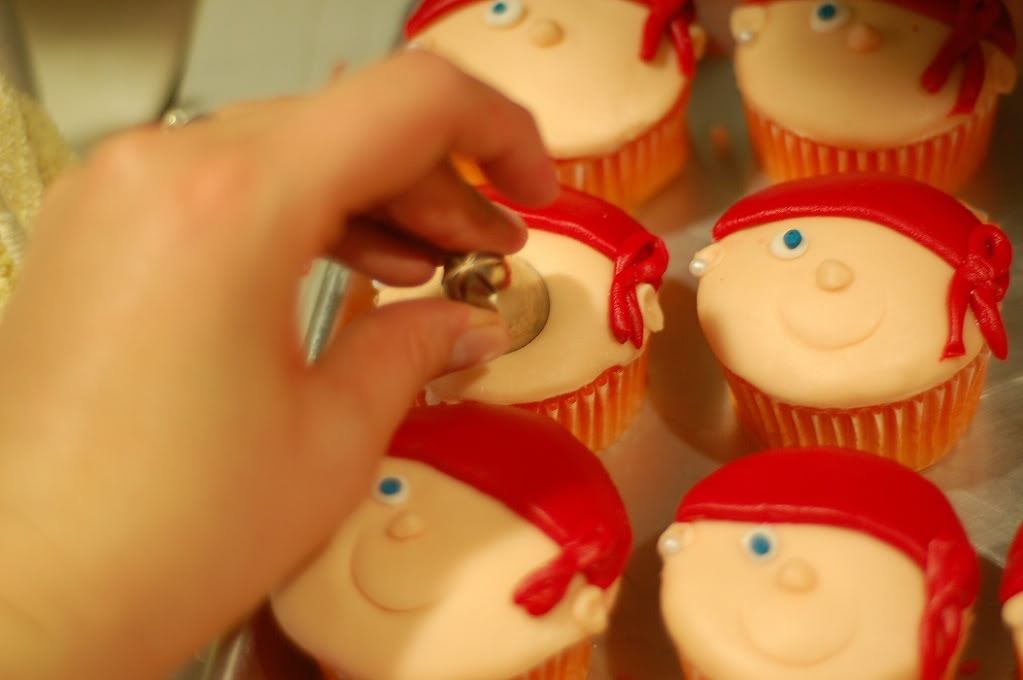
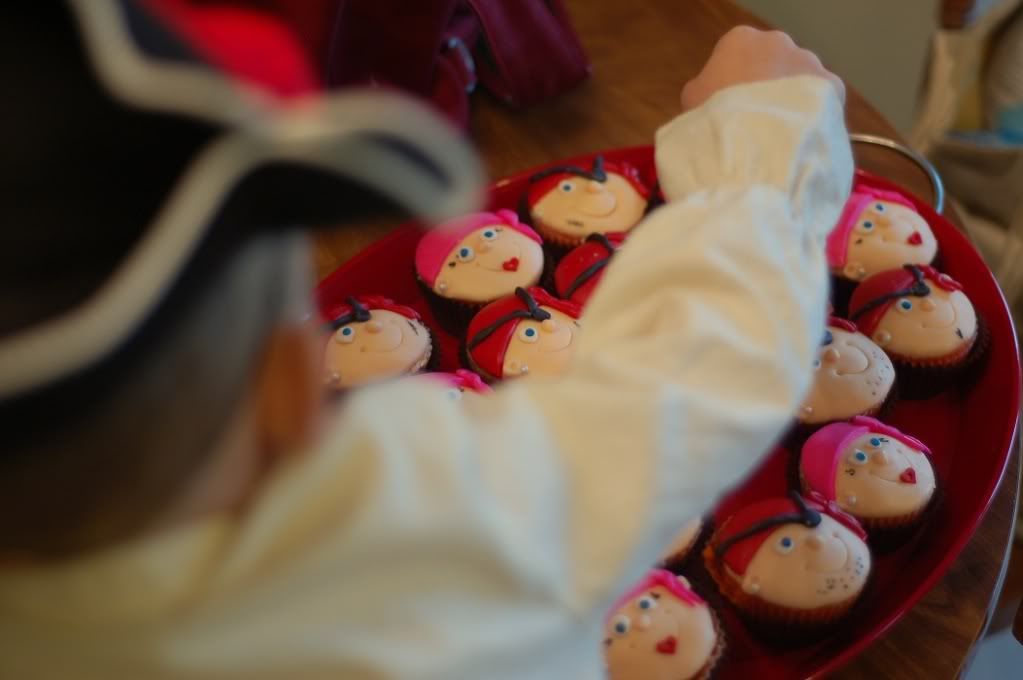
I used my big cake decorating tip, the fat end, to make their smiles. You could use a paring knife instead. Then made little smiley marks by pushing in the tine of a fork carefully. To make the patches, roll a little circle and squish it (or use another big round bullet frosting tip to cut a circle). Glue it on with the wet paintbrush. Roll a little of the black fondant into a long strip and attach it to make the straps for the patch. There you have it! Just use the marker to add facial hair and scars. You can draw little lips on the ladies or use a big heart sprinkle like I did. Don't forget their eyelashes and earrings (also a big sprinkle- I used edible pearls but regular dragees would be perfect). Check out Michael's or the cake decorating store. This was my favorite part of the whole process, it was really fun to do all the scars and different faces!

Marshmallow Fondant
{printable recipe here}
from Fondant 101 via Cuppycakes
Makes about 3 lbs of marshmallow fondant
16 ounces Jet Puff White Mini-Marshmallows
2-5 tbsp water
2 lbs C&H Powdered Sugar
about 1/2 cup Crisco shortening, to grease hands and work surface
Melt marshmallows and 2 tbsp of water in a microwave safe bowl. Put the bowl in the microwave for 30 second intervals (stir between intervals) for about 2-1/2 minutes until marshmallows are melted. Place 1 to 1-1/2 lbs of the powdered sugar on the top of the melted marshmallow mix.
Grease your entire hands and surface generously and dump the bowl of marshmallow/sugar mixture in the middle.
Start kneading like you would bread dough. It will be VERY sticky at this stage! Add the rest of the powdered sugar and knead some more. Re-grease your hands and surface when the fondant starts sticking. If the mix is tearing easily or it is to dry, add water (about 1/2 tablespoon at a time). Continue to knead and add water until there are no bits of powder sugar visible. It usually takes about 8 minutes to get a firm smooth elastic ball so that it will stretch without tearing.
Prepare the fondant for storing by coating it with a good layer of Crisco shortening, double wrap with saran wrap and then put in ziploc bag. Squeeze out as much air as possible. Let rest overnight for best results.
Orange Creamsicle Cupcakes for my Little Man
by Anne Strawberry
{printable recipe here}
1/2 Cup Water
1/2 Cup Oil
1 Cup Sour Cream
1/2 teaspoon vanilla
3 eggs
Zest from two Oranges, finely grated
1 Yellow Cake Mix (I like Betty Crocker's)
Orange food coloring (or red and yellow)- I like Americolor Gel dyes but the basics will work just fine
Preheat the oven to 350.
Combine all ingredients except food coloring in stand mixer and mix on low to combine, about one minute. Then increase speed to medium high for two more minutes until well blended. Add drops of food coloring to achieve desired color and mix lightly until incorporated.
Using an ice cream scoop, portion batter into lined muffin tins and bake for 20 minutes, or until cupcakes spring back which touched with a finger tip and they look done.
February 7, 2011
Lemon Velvet Cupcakes

I tend to post a lot of lemon recipes but not only is lemon one of my favorite flavors, but my parents also have an enormous lemon tree that produces hundreds (maybe more) of lemons each year. When I'm over, it's super convenient to run out to the tree and grab a handful of fruit, to make homemade lemonade, lemon curd, lemon poppyseed muffins, garlic rosemary lemon chicken, etc. Lemon cake of course is delicious and the simple addition of lemon zest to the frosting and the cake makes all the difference.
We started calling these "lemon velvet" when we had to come up with a new red velvet replacement after my tall man couldn't eat chocolate any more. I still enjoy red velvet but we make this crowd-pleaser more often. It doesn't stain like the red velvet but is based off the same easy recipe. Instead of starting with a German chocolate cake, I used a lemon mix and add the zest of two lemons (in addition to the vanilla, sour cream, and extra eggs to doctor the mix). Then for the light cream cheese frosting, I replace the milk with fresh squeezed lemon juice and add the zest of another lemon. Now is the perfect time of year to make these, but even when I don't have fresh lemons on the tree, I reach for my stock of zest and juice in the freezer that I've built up during the winter. It's not a lot of work but has a huge impact on flavor.
I've had a lot of people ask me about the meringue powder I put in my cupcake frosting. I buy the Wilton brand- you can get it at Walmart, Michaels, or Hobby Lobby (or at Amazon of course). I usually buy the big can at Michael's with a 40% off coupon for the best price. It lasts forever and just a tablespoon mixed into the frosting with the powdered sugar will help "set" your icing so it holds its shape after you frost the cupcakes. The end result is a lot better and there's no taste difference. Try it and let me know what you think.
 Lemon Velvet Cupcakes with Lemon Cream Cheese Frosting
from Anne Strawberry
{printable recipe here}
1 cup sour cream (reduced fat is fine)
1/2 cup water
1/2 cup canola oil
3 eggs
1 tablespoon vanilla
zest of one or two lemons
1 box lemon cake mix (I prefer Betty Crocker and stock up when they are on sale)
Preheat the oven to 350.
Combine all ingredients in stand mixer and beat for two minutes until combined. Using a 2-tablespoon scoop, scoop into 24 paper-cup lined muffin tins.
Bake for 21-24 minutes or until cupcakes spring back slightly when touched and a tooth pick inserted into the middle comes out clean. Cool on racks and frost once completely cooled.
Lemon Cream Cheese Frosting
1 8 ounce package of cream cheese, softened (I like to use Neufchatel, less fat and I don't notice much difference)
1/2 cup butter, softened (one stick)
juice of one lemon (about two tablespoons)
1/2 teaspoon pure vanilla extract
zest of one lemon (about 1 teaspoon)
dash of salt
6 cups of powdered sugar (more or less to achieve desired consistency, this is a baseline)
1 Tablespoon meringue powder
In a mixer with the whisk attachment, combine the cream cheese and butter until light and fluffy. Add in the lemon juice, vanilla, zest, and salt, and blend.
Next, add the powdered sugar and meringue powder, cover the bowl of the mixer with a dish towel, and turn it on low until everything is combined. Then increase the speed for a minute or so until the frosting is light, fluffy, and delicious. The meringue powder will help set the frosting after it dries so it holds its shape.
January 27, 2011
My Shocking New Favorite- Oatmeal Cake
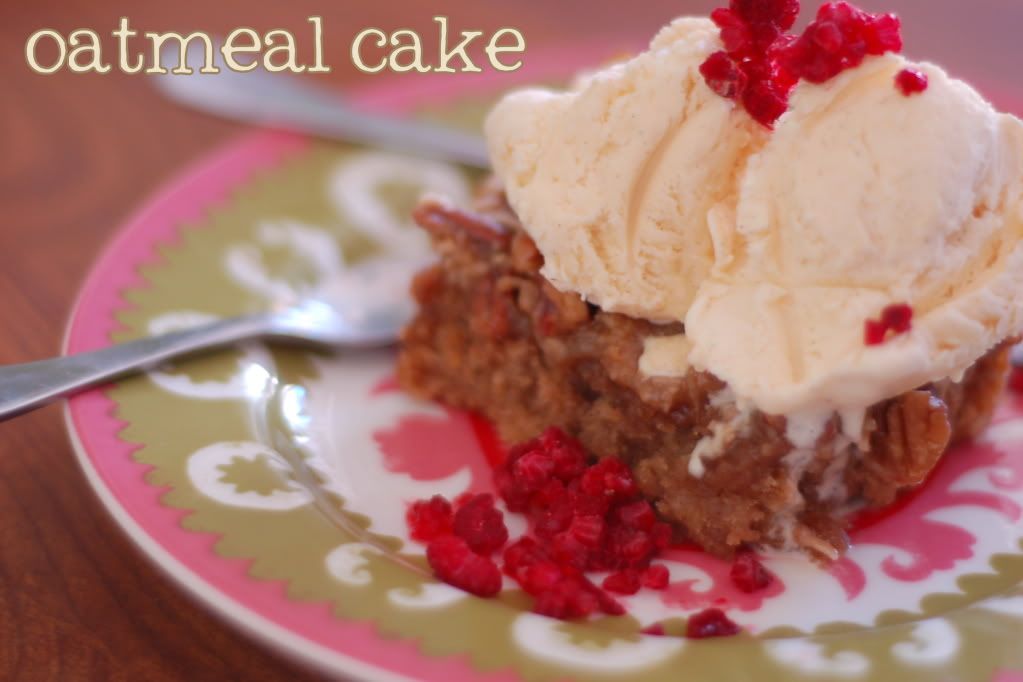
{printable recipe here}
I've said it before and I'll say it again, I don't like coconut, and I don't like oatmeal. Last weekend we had a dinner party to go to and we were supposed to bring dessert (seems to happen frequently). I was busy painting in the garage and hadn't decided what to make yet when my friend emailed me a recipe for Oatmeal Cake that she was making for her daughter's birthday. I had all the ingredients on hand and my tall man loves oatmeal so I figured it would be perfect- I could take a hit for the team and make something with coconut and oatmeal.
The first step is to boil some water and soak some oats to soften (then put your kids down to nap), then you use the creaming method (just like cookies), add the oatmeal, dry ingredients, and pour into the pan, bake it off- totally low-maintenance. Since the cake is flavored with cinnamon and nutmeg, I snuck in some whole wheat flour. The color and flavor of the spices mask the difference in taste from the whole wheat and no one is the wiser. While the cake bakes, you make the caramel-y frosting with a whole bunch of yummy things- butter, brown sugar, vanilla, evaporated milk, nuts and coconut. Spread it over when the cake comes out of the oven and enjoy as soon as it starts to cool.
Then stand back and be totally surprised when I actually liked this cake! Really, with oatmeal (totally undetectable), coconut and nuts in the frosting, I LOVED this cake. It goes to show that I can really trust Naomi. And maybe I'm growing up. And that I need to make this cake again. The ingredients are cheap and easy, you could make it by hand with a big bowl and spoon. It's flexible- different nuts, or none, more coconut, or none, whatever. My son could make it. It's SO good too. I'm totally making this again, and maybe this week. I had hand surgery Monday and only have one good hand but this cake is that easy and delicious (and no chopping or anything) and I owe my peeps for taking care of me. This is good payback cake. Yum.
I'm doing another review from CSN Stores. Yes you've heard about them all over the blogs, but it never ceases to amaze me all the things they carry! From modern bar stools to kitchen tools. We got my Bosch from them for Christmas and I'm looking forward to getting some accessories for it. If you have any favorites please let me know! I'm thinking about the Bosch blender or maybe some new bread pans. Any advice?

{printable recipe here}
from Celisa Smith
1 1/2 c. boiling water
1 c. rolled oats
1/2 c. butter
1 c. brown sugar
1 c. sugar
2 eggs, well beaten
1 1/2 c. flour (I used 1/2 whole wheat)
1 tsp. cinnamon (I always use a little more)
1/2 tsp. nutmeg (I always use less- just a dash)
1 tsp. baking soda
1/2 tsp. salt
Pour boiling water over oats and let stand until cool. Cream butter with sugars for one minute then add the eggs and beat until fluffy. Stir in oats and water mixture. Add flour with other dry ingredients and blend into creamed mixture. Pour into greased and lightly floured 9X13 inch pan. Bake 350 for 35-45 minutes or until done. Spread topping on baked cake as soon as it comes from the oven.
Topping:
1/2 c. butter
1 c. brown sugar
1/3 c. evaporated milk
1 c. coconut
1 c. nuts, chopped (I used pecans)
1 tsp. vanilla
In a small saucepan over medium heat, melt butter and add sugar. Blend. Add remaining ingredients and spread on baked hot cake. Place under broiler for a minute or two if you like a crisp topping. Serve cake with ice cream and fruit if desired.
January 19, 2011
Texas Sheet Cake
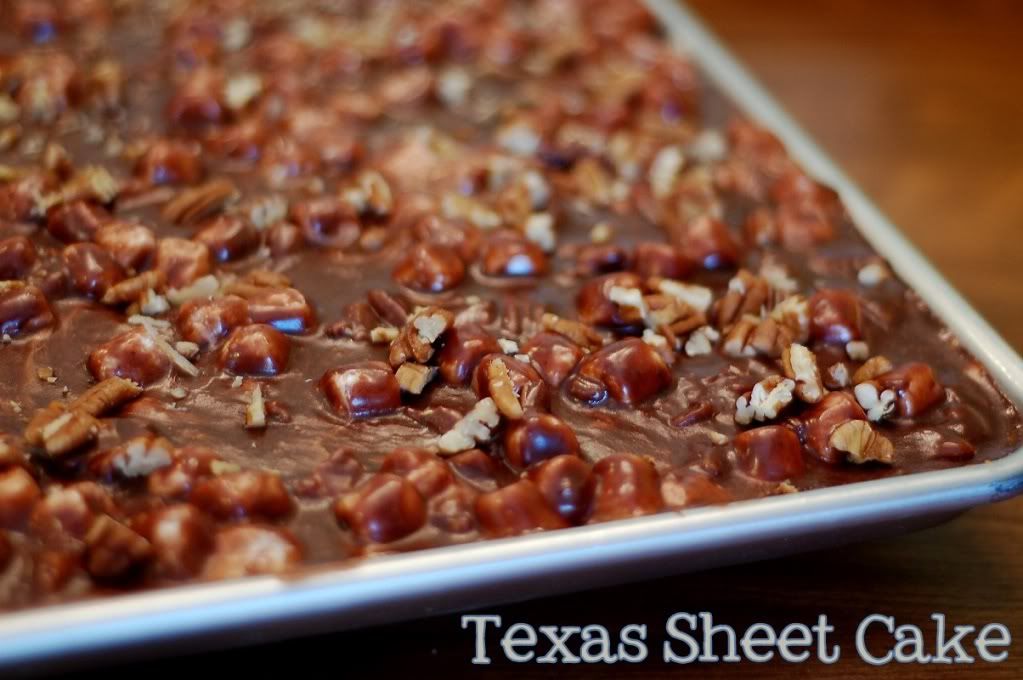
{printable recipe here}
Sheet Pan Chocolate Cake is far from a new invention but I love this stuff. I made this pan for a church event a few weekends ago. I had no idea how many people would be there so I liked the flexibility of a big pan, to slice big or small depending on the numbers (as opposed to strictly portioned cupcakes, my usual cake choice!) This Texas Sheet Cake recipe comes from my mom and there's a few things I love about it. It's cheap and easy to make- and tasty of course! The chocolate color and flavor is more intense than most similar cakes I've tried because the cocoa is boiled with the liquid before you bake it. It's a quick step that makes all the difference. The frosting is also boiled for the same effect. Stir in a few marshmallows (and nuts if you like) right when the cake comes out of the oven and ice it immediately. The end product is a beautiful, easy to make cake that tastes amazing. It's far from health food but great for a party (just make sure you send guests home with any extra slices or you'll be in trouble!) Serve it with ice cream for an even more decadent, but totally comforting treat.
One last thing, before I go make my dinner (My tall man cannot live on dessert alone unfortunately!) I'm sure you heard, but just in case, today only you can get a $20 Amazon Giftcard for only $10 from Living Social. Oh man. We've snapped a few up already because you can buy pretty much everything from Amazon (think of the Mixers, Silpats, Gadgets, Baking Sheets, even TVs- that one's on my husband's wish list of course!) You can even use it for diapers (not as fun but it's pretty great to have them come straight to the door!) I've bought a few things from Living Social and haven't been disappointed. If you buy a gift card please let me know what fun things you get! And wish me luck, that my card gets spent in the "Home and Garden" (my favorite department)- not "Electronics!"
Anne Strawberry's Texas Sheet Cake
{printable recipe here}
For the Cake
Preheat the oven to 350.
In a medium saucepan, combine and bring the following ingredients to a boil, then remove from heat and set aside:
1/2 cup canola oil
1 cup water
1/4 cup cocoa powder
1 cup butter
Meanwhile, combine the following and mix for two minutes in your mixer (or by hand, whatever, this is happy, easy cake!):
2 eggs
2 cups sugar
1/2 cup buttermilk (I never have this on hand, so I just sour 1/2 cup milk with a teaspoon or so of vinegar, it only takes a minute but adds a lot of flavor)
1 teaspoon vanilla
After the wet team is well mixed, gently mix in the dry ingredients:
2 cups flour
1 teaspoon soda
1 teaspoon salt
When everything is nice and mixed, turn the mixer on low and slowly pour in the boiled chocolate. Stir until just combined and pour into ungreased half sheet pan (a regular cookie sheet or jelly roll pan, as show above).
Bake at 350 for about 20 minutes, until the cake looks set and springs back slightly when you touch it. Meanwhile, prepare the frosting.
For the Frosting
Combine the following ingredients in a medium saucepan and bring to boil, then remove from heat and set aside:
1/2 stick (1/4 cup) butter
1/3 cup cocoa powder
1/3 cup milk
Add in the following ingredients and whisk until nice and smooth.
16 ounces powdered sugar
1 teaspoon vanilla
After it's shiny and smooth, stir in:
1 1/2 cups minimarshmallows
3/4 cup chopped nuts (pecans, almonds, etc)- optional
Set frosting aside and pour over cake as soon as it comes out of the oven. Spread it gently to cover the whole cake and let set for a few minutes. Garnish with additional nuts if desired.
This cake keeps well for a couple of days, just keep it well covered. It doesn't ever last at our house long enough to go bad, though!
November 10, 2010
Baked's Flourless Chocolate Cake

{printable recipe here}
Oh man, I can practically taste this chocolate cake as I look at the pictures and write this post. The texture was amazing- from the first slice through the cake to the last bite into my mouth. This recipe comes from Baked. I'm probably the last person to finally get my hands on this book (they even have a second, now) but I loved it when I finally did! So far I've tried this cake and their easy hot fudge sauce- both were hits. I loved browsing all the different recipes and really want to try their root beer cake. Do you have a favorite? Leave me a comment and let me know what I should try next. I loved this cake because although it's gluten free and perfect for my friend with a wheat allergy, you don't stop and think for one minute that you are missing out. I also found separating the eggs and folding them into the batter a little therapeutic, but that might just be me. I have a feel I'm not the only "emotional baker" out there though!
PS Come back soon for a sweet cookware giveaway!
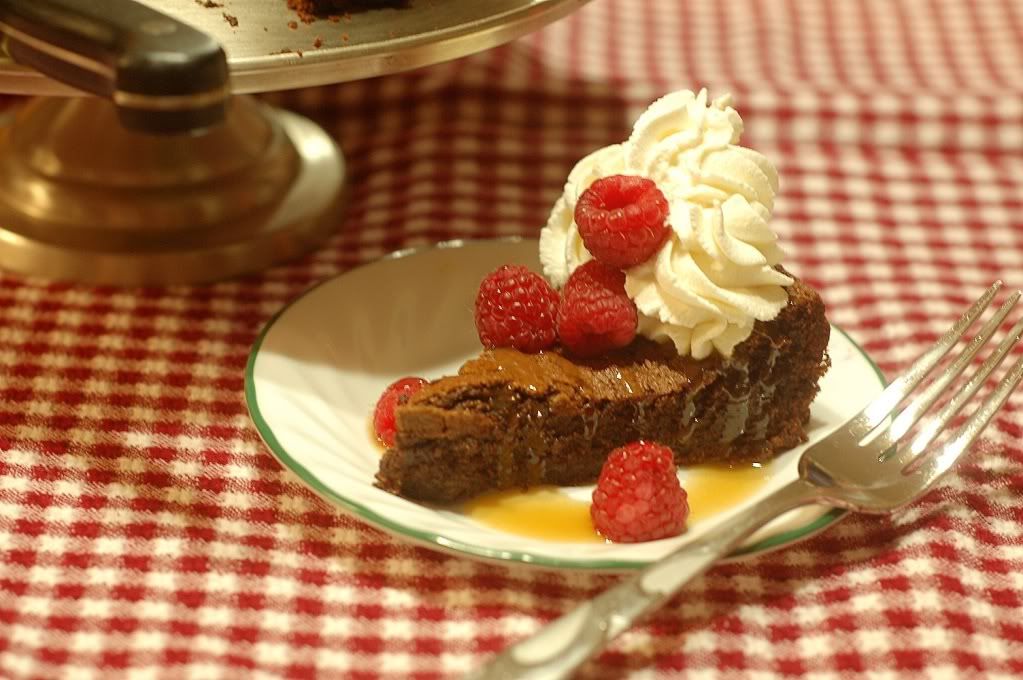
Note: I slathered this cake in whipped cream, raspberries, and caramel sauce. Use your imagination- just about anything would taste great with the chocolately goodness!
Flourless Chocolate Cake
from Baked by Matt Lewis and Renato Poliafito
{printable recipe here}
10 ounces dark chocolate, coarsely chopped
10 tablespoons butter, softened
1 cup sugar
7 large eggs, separated
1 teaspoon vanilla
1 teaspoon salt
Preheat the over to 350. Generously butter a 9 inch sprinform pan. Line the bottom with a parchment circle then butter the paper.
Melt the chocolate in the microwave or double boiler, set aside to cool.
Using a hand mixer, stand mixer, or whisk, whisk the egg whites and salt until they are stiff. Set aside.
In your stand mixer, use the paddle to beat the butter and sugar on high for about five minutes, until very light and well combined.
Reduce to low speed and add the egg yolks one at a time. After they are well incorporated, scrape the bowl down with a spatula, add in the cooled chocolate, and mix. Add in the vanilla and beat until just combined.
Using a spatula, gently fold one cup of the egg whites into the chocolate mixture. Add the remaining egg whites and gently fold until almost completely combined. Go slowly and lightly, making sure you are careful and don't overwork the batter.
Pour into the pan, smooth the top, and bake for 30 to 35 minutes (the cake should look set on top, but don't overbake it!) Let cool on a rack and then loosen the cake with a knife, remove the sides of the pan, and serve.
October 29, 2010
Marie Helene's Apple Cake
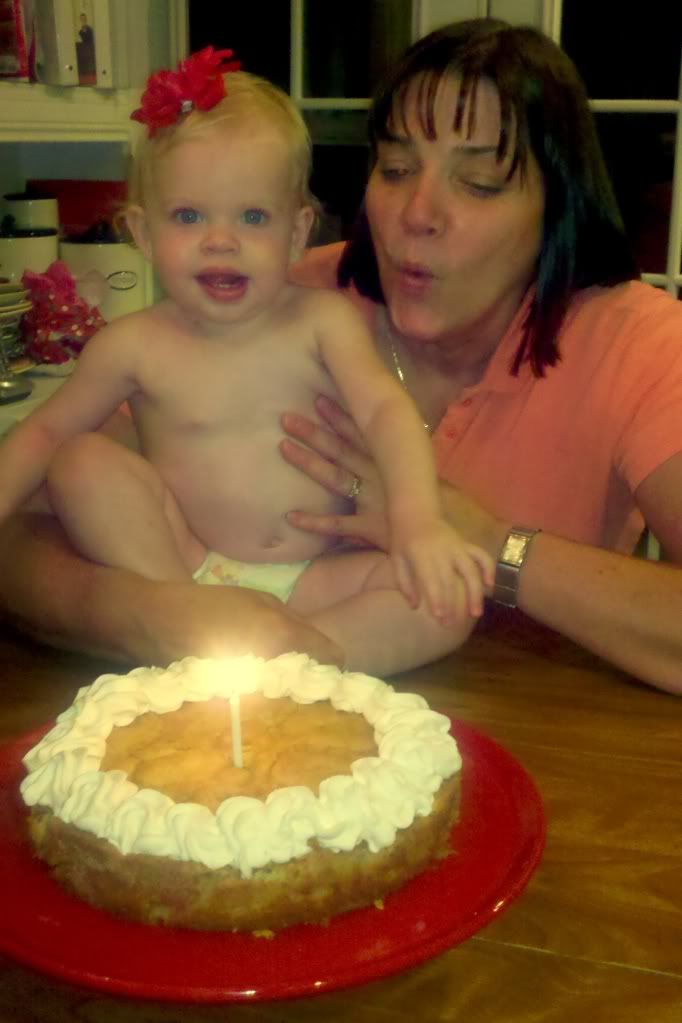
For this easy, yummy recipe you need to get a copy of Dorie's newest book, Around My French Table. It's on sale now!
PS This picture was taken by my phone when my beloved camera
 was in the shop! Thank goodness my pretty is back!
October 8, 2010
Boston Cream Cupcakes for Baby Strawberry

I mentioned it was Baby Strawberry's first birthday a couple of weeks ago (can you believe it?) We of course had lots of fun and lots of yummy food. With my little man, I had a big party at the house, fed everyone, made cute/high maintenance cupcakes, and loved it all! This time around (after another big birthday complete with Orange Creamsicle Cupcakes) I thought something simpler would be better. Since her birthday is right next to two of her cousins', we had an easy get together at the park with pizza and salads. I made vanilla bean and red velvet cupcakes that night and will post those next.
 Then we decided to do a simple dinner, just my family and my "sister", and celebrate together. For dinner I made roasted chicken, mashed potatoes, and green beans. Kara brought cornbread and an amazing salad with locally made meyer lemon olive oil and strawberry balsamic vinaigrette! So I confess the simple dinner took a lot longer than I thought it would- it always does (big thanks to my mom for letting me mess up her kitchen all day and helping clean it all up!) But we all enjoyed it and Kara went into labor the next day, so I think the food did it's job!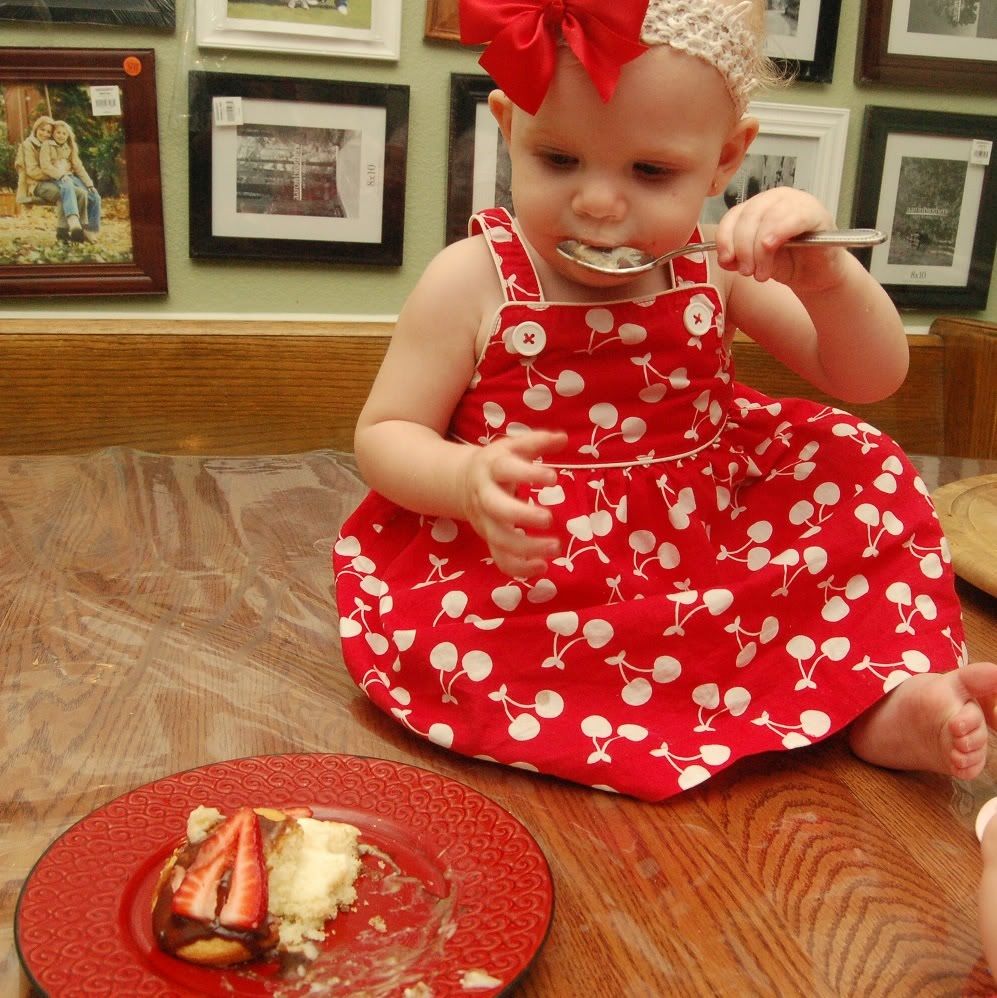
For dessert I made Martha Stewart's Boston Cream Cupcakes. I'm not sure why I was crazing Boston Cream Pie (since I've never actually had it!) It probably has to do with my affinity to pastry cream. This recipe was very simple to make, just a ganache for the topping, a pastry cream for the filling, and a quick, easy cake. Baby loved it, of course (she has a huge sweet tooth!) There are three components to make but each is very simple and doesn't take much time. I worked on each them between other steps for dinner and didn't hardly notice the time to make these- don't be intimidated!
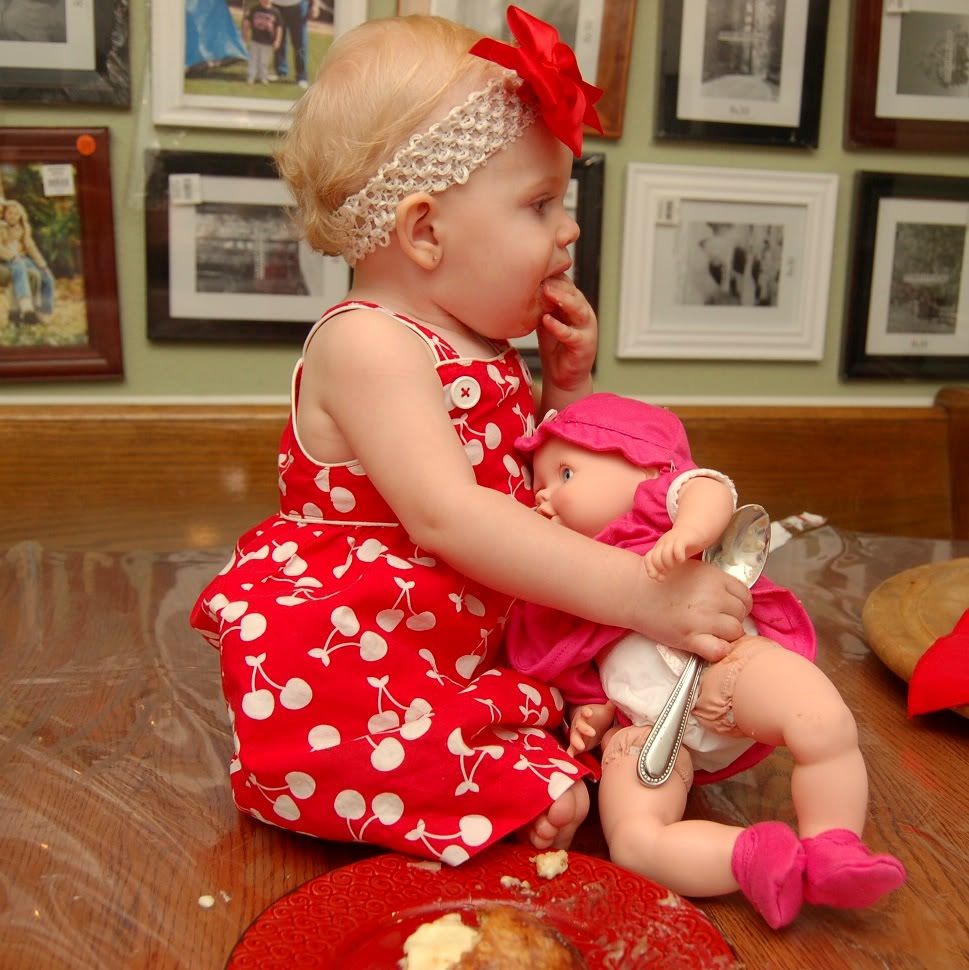 She even shared with her new baby that she wouldn't let go of for two days straight (baby is playing with her right now, actually, she was a hit!) It was a great birthday and totally worth all the dishes (especially since so many people helped out)! Happy birthday Baby Strawberry!)
 Boston Cream Cupcakes
from Anne Strawberry (recipe via Martha Stewart)
*note- My family has been (rightfully) accusing me of underbaking things so I tried to follow these directions exactly. However, I thought the cupcakes were just a minute overdone and a tiny bit dry for that reason, so I would be sure to remove them as soon they get a hint of color and their lovely smell wafts through your kitchen!
For the Cupcakes:
1 1/2 cups all-purpose flour, plus more for tins
1 1/2 teaspoons baking powder
1/2 teaspoon salt
1/2 cup whole milk
3 ounces (6 tablespoons) unsalted butter, softened, plus more for tins
3 large eggs
1 cup sugar
1 teaspoon pure vanilla extract
Preheat oven to 350 degrees. Butter and flour standard muffin tins. Whisk together flour, baking powder, and salt in a small bowl. Warm milk and butter in a saucepan over low heat.
Beat eggs and sugar with a mixer on high speed until thick and pale, about 5 minutes. Beat in dry ingredients.
Bring milk and butter to a boil. With mixer on low speed, add milk mixture to batter, and beat until smooth. Add vanilla. Divide batter among muffin cups, filling each halfway. Bake cupcakes until light gold (just barely starting to color), about 15 minutes. Let cool in tins for 10 minutes, then transfer to wire racks. Let cool.
Using a serrated knife, cut each in half horizontally. Spread 1 tablespoon vanilla cream (I used more) on each cupcake bottom. Sandwich with top. Spoon glaze over each, and serve immediately.
Vanilla Cream
*note- I prefer Dorie or Ina's pastry cream and will use my favorite "slightly lightened" version next time I make these.
2 large egg yolks
1/4 cup sugar
2 tablespoons plus 1/2 teaspoon cornstarch
Pinch of salt
1 cup whole milk
1/2 teaspoon pure vanilla extract
Whisk yolks until smooth. Mix sugar, cornstarch, and salt in a medium saucepan over medium heat. Add milk in a slow, steady stream. Cook, stirring, until mixture begins to bubble and thicken, about 5 minutes.
Pour 1/3 of milk mixture into yolks, whisking constantly. Return mixture to saucepan, and cook over medium heat, stirring often, until thick, 2 to 4 minutes. Stir in vanilla.
Pass vanilla cream through a fine sieve into a bowl. Press plastic wrap directly on surface. Refrigerate until cold, at least 1 hour, or up to 2 days.
Chocolate Ganache Glaze
2/3 cup heavy cream
6 ounces semisweet chocolate, finely chopped
1 tablespoon light corn syrup
September 14, 2010
TWD- Nectarine Upside Down Cake
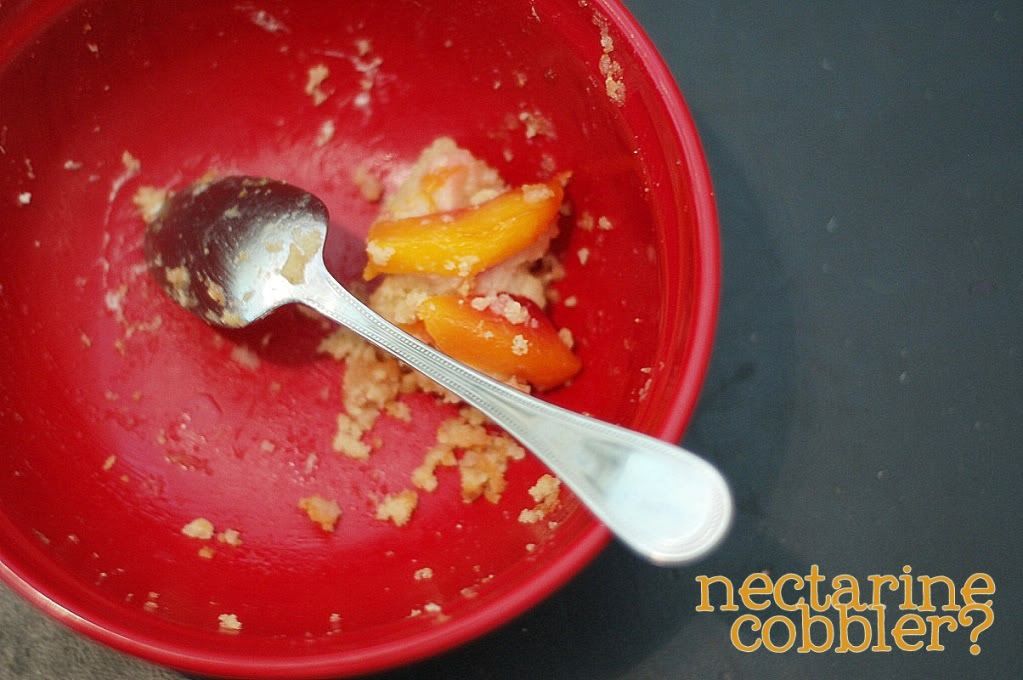 My family suffers from birthday clump up- my husband's, brother's, mine, and now Baby Strawberry's birthday are all within a couple of weeks. It's wonderful but crazy and when I found myself making yet another birthday dessert last week I hoped everything would align, knowing this summer time "Cranberry Upside downer" was important- going to my hubby's work! I also made the apple tart that morning, took care of two kiddos, and was all ready to leave when it was time to flip the cake onto the platter. I'm sure you can see the beginning from the end- the cake topped all over my baking sheet and table (which was thankfully clean, even if it isn't fancy and pretty like all these lovely kitchen tables) and was not interested in going back together! I was already late (as usual it seems) and there was no time to make something new, so I put it in my pretty red hobnail bowl and wished for the best.
Fortunately, Dorie delivered and even crumpled, this was one of the most delicious Dorie treats I've made yet! Of course, I was still pretty frazzled from the tragedy and while I remembered my camera bag, I forgot to put my camera inside! So all we have for pictures is the tiny bit of leftovers we brought back from my tall man's work. This stuff was yummy, I'm telling you! CSN Stores has offered to let me review something and I think I should finally get a cast iron skillet (of course I'm loving the expensive, red, Le Creuset one here but I'm sure I could be happy with something more practical like this). The first step to make the cake is to cook the sugar and butter together to make the glaze for the fruit. I bet I could do that step in the skillet, line up the fruit, and pour in the batter (not unlike the Tart Tatin). Throw it in the oven, pull it out and serve ice cream or whipped cream right on top, what do you think?

I have some new nectarines on the counter and can't wait to make this again- skillet method or even served right out of a bowl! Even blurry phone-pic Baby Strawberry wants more cobbler/cake/deliciousness- and I can't get her to eat fruit most days, despite her nickname! Thank you Sabrina for such a great choice! Get the recipe from her blog here (or buy the book already, it's wonderful!)
September 13, 2010
Bon Anniversaire
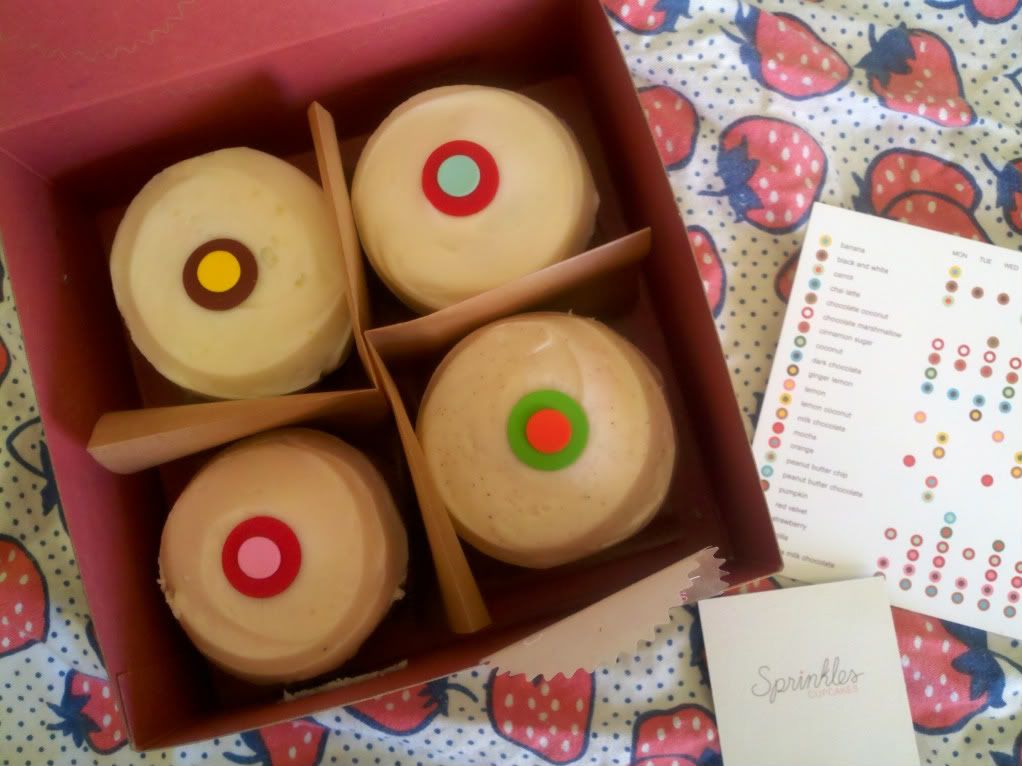
It was my birthday this weekend and my wonderful best friend brought me Sprinkles cupcakes. I'd never actually tried them before and felt pretty bad about that, since cupcakes are one of my favorite things to make! Will you forgive the camera phone picture? My lens is broken and it's making me crazy! My other beautiful friend made me an enormous red lips cake that was sparkly and shiny like my signature lipgloss. Then I went to the mother daughter church campout on my actual birthday and they surprised me by singing and giving me a mini strawberry cake (that Baby Strawberry promptly devoured). It was a great birthday. I'll be back tomorrow with a messy but delicious Dorie treat. In the meantime, I'm planning Baby Strawberry's birthday (crazy how time flies) and would love any inspiration for the perfect first birthday cupcake. I'm planning on working with my old favorite recipe and think I'll have to do pink... but that's all I have planned for now!
What's your favorite cupcake flavor? I'm a red velvet fan but that's no shocker. I was actually pretty surprised to see that my Orange Creamsicle Cupcakes are the second most searched of my recipes (first? Cafe Rio Pork of course!)
July 2, 2010
Red Velvet Cupcakes in a Jar for the 4th

Happy Fourth everyone! We are spending the weekend with family- it's going to be crazy and fun. We had a BBQ last night with my family and I made these Red Velvet Cupcakes for dessert. I saw these Cupcakes in a Jar a few months ago and couldn't wait to try them out. We had to laugh because the women saw right away that they were cupcakes, just the trifle version. As for my Dad, I asked him if he wanted a regular cupcake or one of these, and he picked this, saying, "I don't want a cupcake, yuck." So we thought we could trick him into eating one of these if we didn't tell him what it was (you do that too, right?) It worked for a minute until he realized it was still a cupcake! These were really cute, though, and simple to make. Just bake a cupcake without a liner and cut it in half after it cools. Layer up cupcakes, frosting, and topping until you like it.
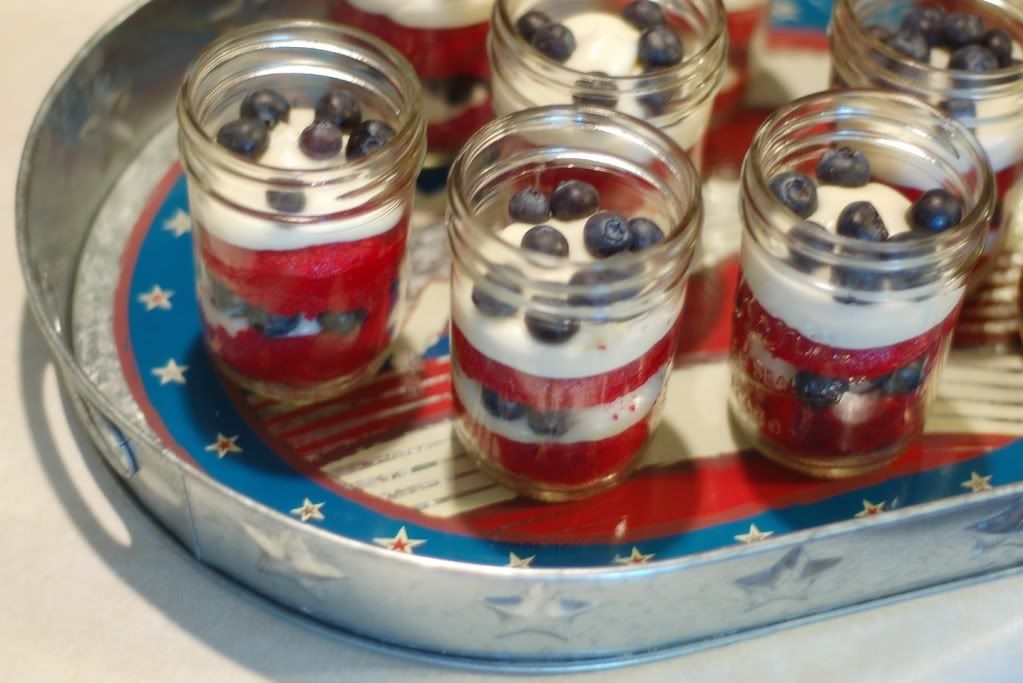
Because my tall man can't have chocolate, I made a "Lemon Velvet" cupcake. I know it's not at all true to form but it tasted great. Basically, I made my regular doctored cake mix red velvet style, but I used a lemon cake instead. I topped them with blueberries for color and because lemon blueberry is one of my favorite combos. A light, lemony cream cheese frosting on top sealed the deal. Give these a try next time you want to serve cake. Even if the guys didn't care, the presentation really went well with the women! Happy fourth of July- be safe and enjoy it!

Quick Red Velvet Cupcakes Recipe
My Favorite Frosting Recipe
March 29, 2010
Quick Desserts and a Betty Crocker/Safeway Giveaway


Orange Creamsicle Cupcakes (or any cupcake for that matter- I have five German Chocolate cake mixes ready to go in case of a Red Velvet Cupcake emergency. A little sour cream and extra flavoring- vanilla, zest, etc- makes a world of difference!)

So when MyBlogSpark contacted me about doing a giveaway featuring a Betty Crocker baking prize pack and $25 Safeway card I was totally on board. I hate to sound like a sell out with giveaways but really these are my favorite and Safeway is my favorite grocery store so I knew this was a match made in heaven. Betty Crocker cake mixes and traditional brownie mixes are on sale at Safeway through April 6th for only $.69 so you can bet I'm going to cram more into my already overflowing pantry (especially since my normal stock up price for those is a buck! Yay!) They also have a lot of great looking desserts and ecoupons you can load onto your Safeway card on their site here.
So leave me a comment letting me know what you like to make with cake and brownie mixes- I'd love some fresh ideas! One entry per person, US addresses only please. And PLEASE leave your email or a way to contact you- I hate when I can't get a hold of the winner! Giveaway ends one week from now.
Disclosure- the coupon, prize pack, information and additional prize pack to give away were all given to me from Safeway and Betty Crocker through MyBlogSpark- but the opinions are my own!
February 2, 2010
Milk Chocolate Mini Bundt Cakes
 This week's Tuesdays with Dorie recipe is the Milk Chocolate Mini Bundt Cakes. I'm no bundt connoisseur like Mary but I did lust after one of those cathedral bundt pans at Williams Sonoma for a couple of years before I found this mini one on clearance there for $9.99 when I was pregnant with my little man (and my tall man was more than willing to placate his crazy wife, thank goodness!). Well I'll be honest and tell you I've only used it three times so far but the results have been adorable each time so I think it was worth it.
 Really though, I have serious issues with baking pans. Every time I see a fancy pan I pick it up, look it over, and have to really convince myself to put it back (or if I'm at Ross or TJ Maxx and find a good deal I carefully put it in the cart and hope my husband doesn't notice my growing collection!). The pan I've really been looking to get lately is a Mini Cheesecake Pan, one that has the removable bottoms for perfect bite size cheesecake any time. Anyways, I hope I'm not the only one with these issues! Thank goodness for Tuesdays with Dorie and so many different recipes to test my boundaries and use my many purchases. I'm also grateful for the nice tall cabinet in my garage right outside my kitchen door to house my overflowing kitchen appliances and pans!
 So back to these cakes. They come together in a snap and house a nice layer of cocoa powdered coated walnuts. That was my favorite part of the cake. Next time I would use bittersweet chocolate since the chocolate flavor was very weak and then top them with ganache. The melted chocolate with corn syrup never came together for me but my kitchen helpers were happy to eat it right away. We actually dipped almonds in the extra failed glaze and that snack was as delicious as the cake!
When my brother tried one he said, "it's kind of like a donut, eh." So my mom of course told him not to eat it if he didn't like it, to which he replied, "Oh I'll eat it, don't worry!" Yay for single guys, too funny. So while this wasn't our favorite we certainly ate it. Dorie is spoiling us all!
See the recipe at Kristen's blog and come back next week for Brownies. Yum.
 Baby Strawberry (who is getting so big and starting to get mad when I don't share my baked goods with her) hopes you have a great day and reminds you to enter the Chocolate Cheerios Giveaway! I'll announce the winner this week and with any luck will have an awesome recipe featuring my favorite new cereal. And yes, it will be a dessert!
January 28, 2010
Orange Creamsicle Cupcakes
 {printable recipe here}
My little man is three. I'm in total shock. He's been all about birthdays lately (what with everyone else in the family having a summer/fall day- so he's had a lot of birthday experiences to remember!) When his started getting close he kept asking for orange cupcakes and orange balloons. My mom asked him a couple weeks ago what we would have for his birthday and he again insisted, "People always have cupcakes for their birthdays!" She then said, "Sometimes people have brownies," to which he quickly replied, "Cupcakes with brownies on top?"
Maybe next year I'll make the cupcakes with brownies on top happen. For this year, though, we made Orange Cupcakes (my little man is a very willing helper when it comes to baked goods- sits right on the counter and is in charge of dumping in ingredients and locking and unlocking the mixer). I flavored a yellow cake with orange zest and made orange frosting by adding orange zest and subbing fresh orange juice for the milk in my usual cream cheese frosting. I also made a batch of chocolate cupcakes, thinking only the kids would go for the obnoxious orange colored food. I was wrong- the newly dubbed "Orange Creamsicle Cupcakes" flew off the pan (which explains the crappy picture, no time to play with your food when guests are clamoring!) Try these- they're good for adults and kids alike, although I would definitely go with a milder orange color if you aren't catering to the kiddos!
 Orange Creamsicle Cupcakes for my Little Man
by Anne Strawberry
{printable recipe here}
1/2 Cup Water
1/2 Cup Oil
1 Cup Sour Cream
1/2 teaspoon vanilla
3 eggs
Zest from one Orange, finely grated
1 Yellow Cake Mix (I like Betty Crocker's)
Orange food coloring (or red and yellow)
Preheat the oven to 350.
Combine all ingredients except food coloring in stand mixer and mix on low to combine, about one minute. Then increase speed to medium high for two more minutes until well blended. Add drops of food coloring to achieve desired color and mix lightly until incorporated.
Using an ice cream scoop, portion batter into lined muffin tins and bake for 20 minutes, or until cupcakes spring back which touched with a finger tip and they look done.
Orange Cream Cheese Frosting
1 block Neufchatel (reduced fat) cream cheese, softened
1 stick of butter, softened
1 teaspoon orange zest
1/2 bag (1 pound) powdered sugar
Fresh squeezed orange juice (from the zested oranges), as needed (about 1 tablespoon)
Cream the cream cheese, butter, and orange zest until smooth and well combined. With the mixer off, add the powdered sugar. Cover with a clean dish towel and combine on low speed until the sugar is incorporated. Remove towel and increase speed to make a smooth frosting, adding orange juice or more sugar until desired consistency is reached. Using a large tip (or a gallon baggie with a small corner clipped off) pipe onto cooled cupcakes.
Subscribe to:
Posts (Atom)