Showing posts with label Lemon. Show all posts

April 22, 2011

By the Book Friday- Parmesan Asparagus for Easter

{printable recipe here}
Can you believe Easter weekend is here? It's snuck up on me again. We are going to have our standard menu- ham (Costco style), potatoes, homemade rolls, and Parmesan asparagus or green beans (whichever is on sale, is that awful?) I usually make something fruity for dessert, like Lemon Curd Cheesecake. This week I tried out a Cherry Pineapple Cobbler thanks to Lucky Leaf Pie Filling. I will post that delicious recipe later today (crossing my fingers!)

The recipe that inspired today's By the Book Friday Post comes from Ina Garten's Barefoot Contessa Family Style. It's no secret that I have a big crush on Ina and she really can't do any wrong in my eyes. I'll admit that I didn't follow the recipe exactly, as she roasts the asparagus and my oven was full at the time (oh, to have a double oven!) So instead, I blanched the asparagus by cooking them for two or three minutes in boiling water, then stopping the cooking by covering them with ice water. Then I crisped them up in a hot skillet with a little butter and olive oil and added the rest of the flavors in Ina's recipe- kosher salt, freshly ground pepper, generous Parmesan cheese, and lemon juice. It just takes a couple minutes and the final product is really fragrant and delicious (even my little man ate these up). And like I said, you can use fresh green beans instead- either makes a delicious spring dinner side dish.

Do you have any Easter favorites that you make every year? I hope you have a wonderful Easter weekend!

Parmesan Asparagus with Lemon from Anne Strawberry
{printable recipe here}
adapted from Ina Garten

2 1/2 pounds fresh asparagus (about 30 large)
2 tablespoons good olive oil
1/2 teaspoon kosher salt
1/4 teaspoon freshly ground black pepper
1/2 cup freshly grated Parmesan
2 lemons cut in wedges, for serving

Preheat the oven to 400 degrees F. (note- I blanked them instead, so I boiled a large pan of water to begin).

If the stalks of the asparagus are thick, peel the bottom 1/2 of each. Lay them in a single layer on a sheet pan and drizzle with olive oil. Sprinkle with salt and pepper. Roast for 15 to 20 minutes, until tender. Sprinkle with the Parmesan and return to the oven for another minute. Serve with lemon wedges.

Variation: Instead of roasting in the oven, I blanched the asparagus for three minutes in salted boiling water. Next, submerge the asparagus in ice water to 'shock' it. Transfer to a skillet warmed over medium high with a couple tablespoons of olive oil or butter and brown for just one or two minutes. Then season and garnish as above, with salt, pepper, sliced Parmesan cheese, and the juice of half a lemon. Serve immediately.

March 15, 2011

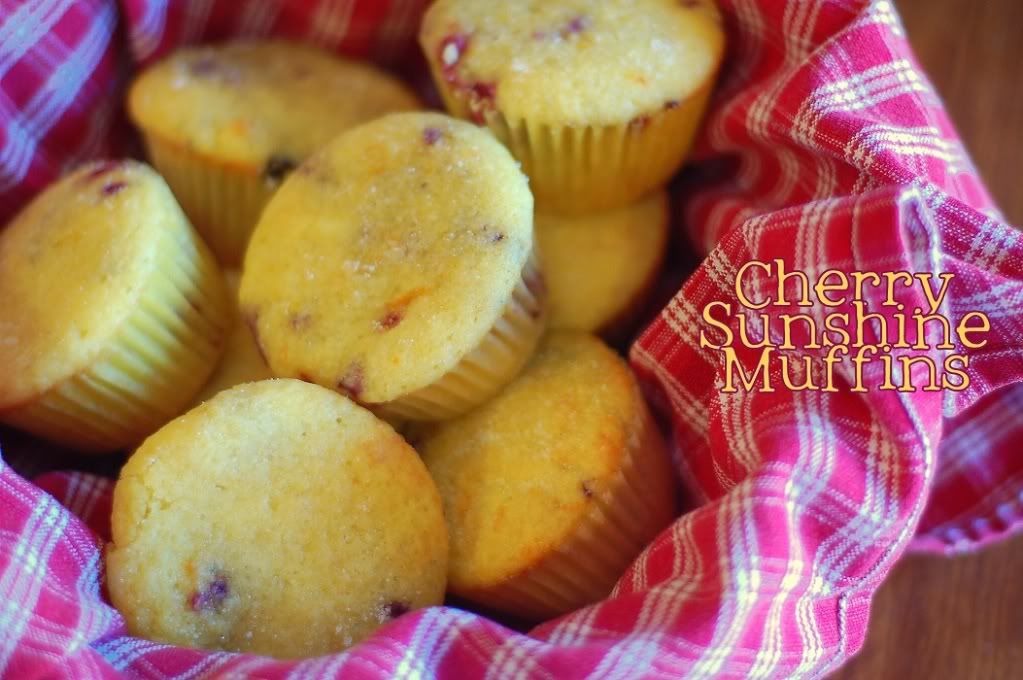
TWD- Cherry Sunshine Muffins

Cherry Sunshine Muffins
I have a love hate relationship with muffins. They're so easy and quick to make, so flexible on ingredients. They're also usually so full of butter- and they taste so good. So yeah, we try to limit our muffin making but of course we loved these! Next time I'll sub in some whole wheat flour to make up for the butter. With some extra tart dried cherries and lots of citrus zest and juice (orange and lemon both), I don't think you'd really notice. The trick to muffins is just to handle the batter delicately and to make sure that you don't try to work out every single lump. And the actual hardest part? Don't eat too many- don't let the dried fruit fool you, they're chock full of butter (and SO good!) And since I can't leave well enough alone, I brushed them with butter right out of the oven and sprinkled them with sugar so they were a little sparkly.

Photobucket
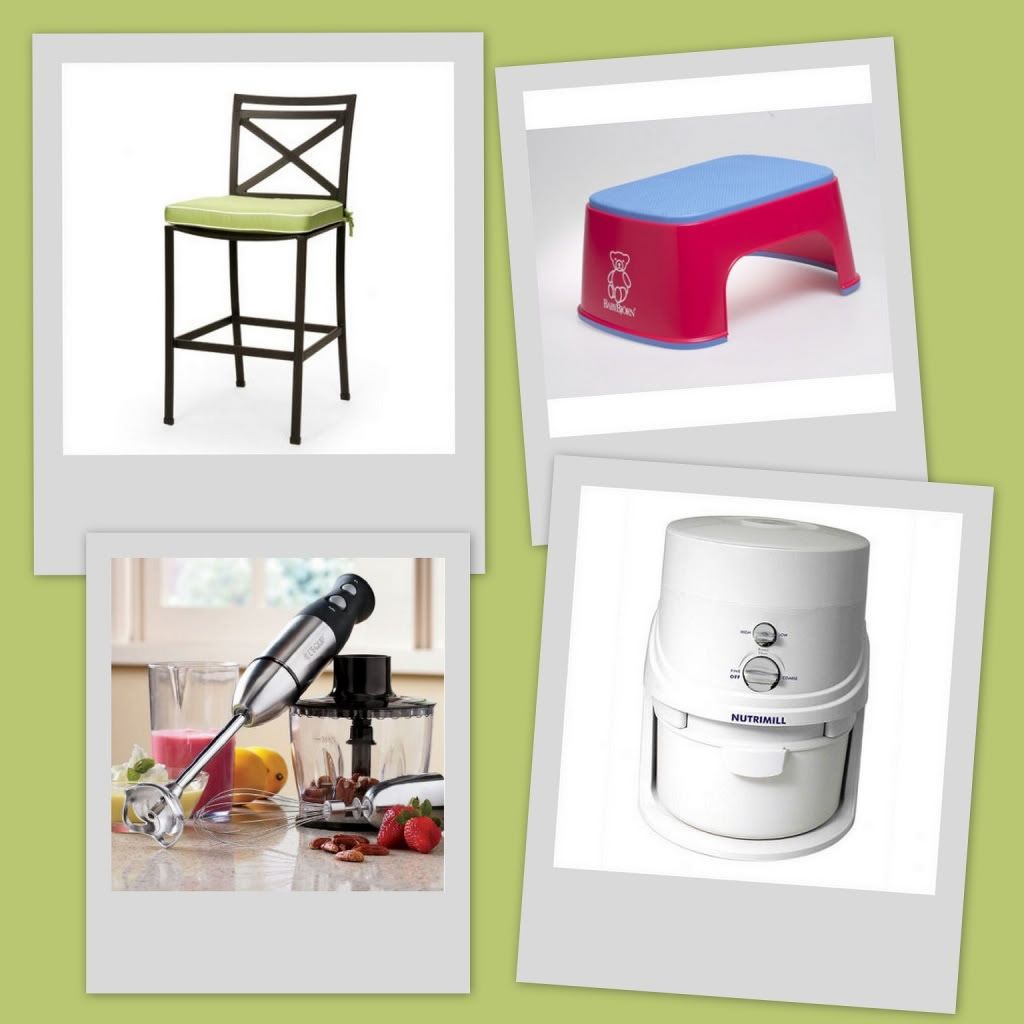
I'm super excited to have the chance to do another review for CSN Stores. I seem to always have furniture on my mind and love these gorgeous modern bar stools. Around here though it seems like baby step stools are more practical even if they aren't as pretty as that apple green cross-backed beauty above! As always though, kitchen stuff is on my mind. I've been trying to nicely steal my mom's immersion blender for ages and she's not budging (not fair considering I made her buy and fall in love with it in the first place!) My real hope is to finally get a grain mill. I've been mooching *I mean borrowing* my friends' Nutrimill when I make bread and I think it's about time, but I'm having a hard time committing to the cost! Suggestions anyone? Anyone of you have an love a Nutrimill? Fortunately they're all available on CSN Stores and I think it's going to be a win win, if I can ever decide!

PS Come back tomorrow for a nice, minty St. Patty's day treat!

February 7, 2011

Lemon Velvet Cupcakes

Lemon Velvet Cupcakes 
{printable recipe here}
I tend to post a lot of lemon recipes but not only is lemon one of my favorite flavors, but my parents also have an enormous lemon tree that produces hundreds (maybe more) of lemons each year. When I'm over, it's super convenient to run out to the tree and grab a handful of fruit, to make homemade lemonade, lemon curd, lemon poppyseed muffins, garlic rosemary lemon chicken, etc. Lemon cake of course is delicious and the simple addition of lemon zest to the frosting and the cake makes all the difference.

We started calling these "lemon velvet" when we had to come up with a new red velvet replacement after my tall man couldn't eat chocolate any more. I still enjoy red velvet but we make this crowd-pleaser more often. It doesn't stain like the red velvet but is based off the same easy recipe. Instead of starting with a German chocolate cake, I used a lemon mix and add the zest of two lemons (in addition to the vanilla, sour cream, and extra eggs to doctor the mix). Then for the light cream cheese frosting, I replace the milk with fresh squeezed lemon juice and add the zest of another lemon. Now is the perfect time of year to make these, but even when I don't have fresh lemons on the tree, I reach for my stock of zest and juice in the freezer that I've built up during the winter. It's not a lot of work but has a huge impact on flavor.

I've had a lot of people ask me about the meringue powder I put in my cupcake frosting. I buy the Wilton brand- you can get it at Walmart, Michaels, or Hobby Lobby (or at Amazon of course). I usually buy the big can at Michael's with a 40% off coupon for the best price. It lasts forever and just a tablespoon mixed into the frosting with the powdered sugar will help "set" your icing so it holds its shape after you frost the cupcakes. The end result is a lot better and there's no taste difference. Try it and let me know what you think.

Lemon Velvet CupcakesLemon Velvet Cupcakes with Lemon Cream Cheese Frosting

from Anne Strawberry
{printable recipe here}

1 cup sour cream (reduced fat is fine)
1/2 cup water
1/2 cup canola oil
3 eggs
1 tablespoon vanilla
zest of one or two lemons
1 box lemon cake mix (I prefer Betty Crocker and stock up when they are on sale)

Preheat the oven to 350.

Combine all ingredients in stand mixer and beat for two minutes until combined. Using a 2-tablespoon scoop, scoop into 24 paper-cup lined muffin tins.

Bake for 21-24 minutes or until cupcakes spring back slightly when touched and a tooth pick inserted into the middle comes out clean. Cool on racks and frost once completely cooled.

Lemon Cream Cheese Frosting


1 8 ounce package of cream cheese, softened (I like to use Neufchatel, less fat and I don't notice much difference)
1/2 cup butter, softened (one stick)
juice of one lemon (about two tablespoons)
1/2 teaspoon pure vanilla extract
zest of one lemon (about 1 teaspoon)
dash of salt
6 cups of powdered sugar (more or less to achieve desired consistency, this is a baseline)
1 Tablespoon meringue powder

In a mixer with the whisk attachment, combine the cream cheese and butter until light and fluffy. Add in the lemon juice, vanilla, zest, and salt, and blend.

Next, add the powdered sugar and meringue powder, cover the bowl of the mixer with a dish towel, and turn it on low until everything is combined. Then increase the speed for a minute or so until the frosting is light, fluffy, and delicious. The meringue powder will help set the frosting after it dries so it holds its shape.

January 18, 2011

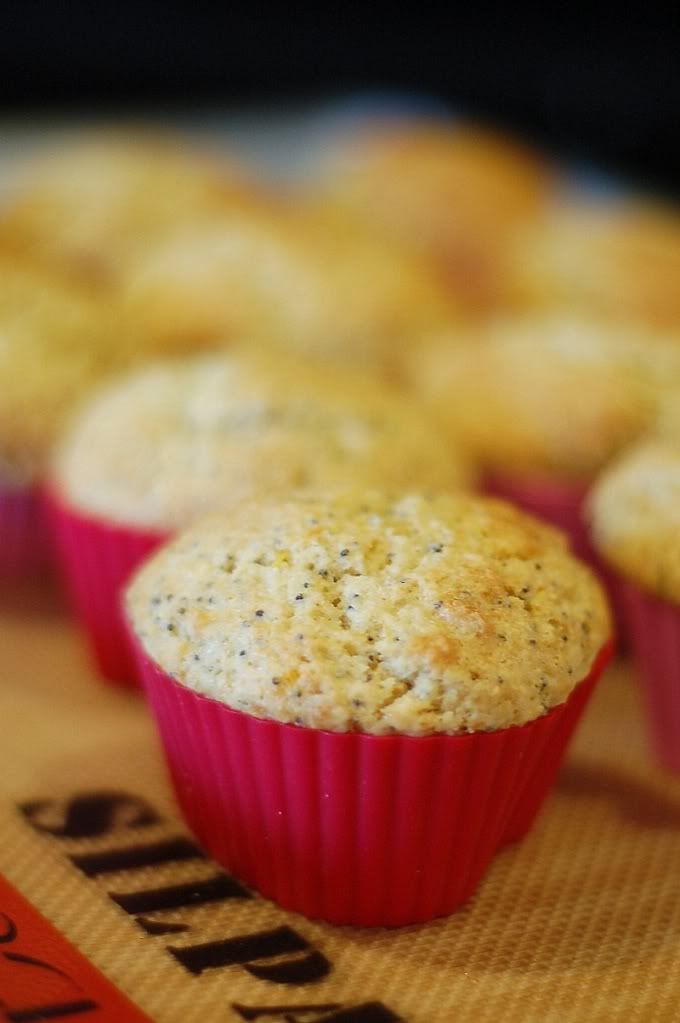
Orange Poppyseed Muffins

Orange PoppySeed Muffins 
I love to try a fancy, new dessert recipe but I also really appreciate a simple Tuesdays with Dorie recipe like these muffins. Right now it's citrus season and the trees are beautiful and heavy with delicious fruit, so I had a hard choice to make between lemon and orange for these babies. I went with orange merely because my little man asked so nicely (it is his favorite color still!) These muffins came together quickly and were super yummy, especially after the glaze went on top. I even subbed in 1/3 whole wheat flour and no one was the wiser. I can't seem to get my muffins to stay fresh more than one day (tips anyone?) but I am going to make these again for Sunday breakfast for sure. My favorite muffin from Dorie is still her Orange Berry muffins but this was a fun chance of pace. Get the recipe from Betsy or from Dorie's wonderful book here or try my favorite Lemon Poppyseed Muffin recipe. It's a classic. Just take it easy on the mixing and have a quick and special breakfast! Come back later this week for my first try with fondant (and overly ambitious pirate cupcakes for my little man's birthday!)

PS- I used some silicone muffin cups for the first time. NOT recommended in case you were wondering! I scored a whole stack of heart shaped ones for a buck at Goodwill at thought it would be fun, but instead of getting heart shaped muffins I have blobs in muffin liners that need to be washed (lame!) I do, however, 100 percent recommend buying a few Silpats to line your baking sheets. No more burned cookies or muffins, easy clean up, a million uses- I can't say enough about these things.

July 2, 2010

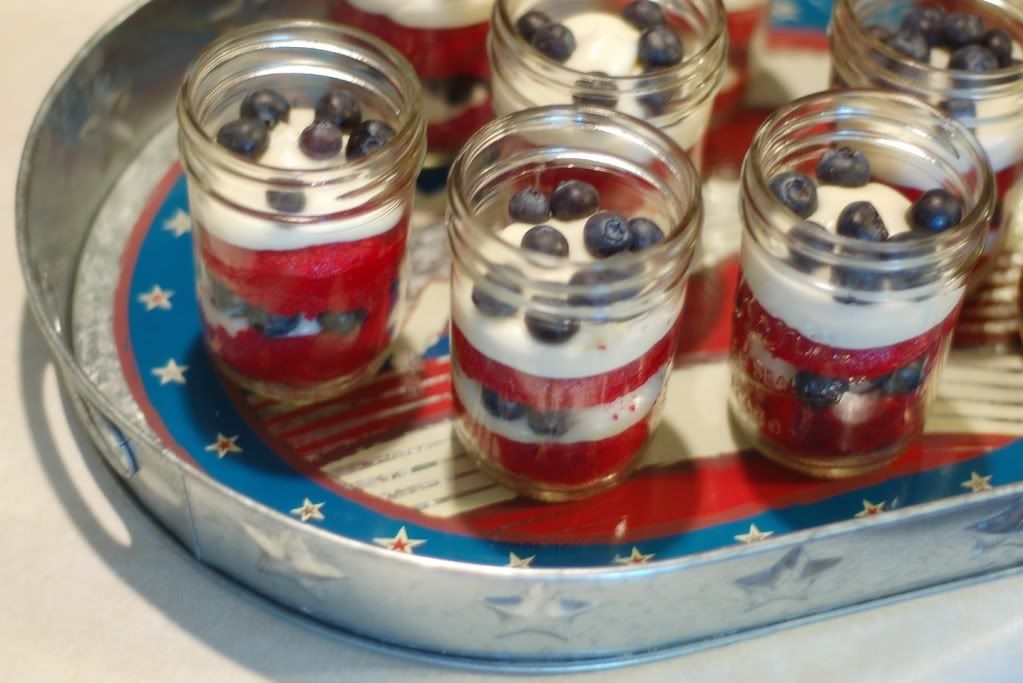
Red Velvet Cupcakes in a Jar for the 4th

Photobucket
Happy Fourth everyone! We are spending the weekend with family- it's going to be crazy and fun. We had a BBQ last night with my family and I made these Red Velvet Cupcakes for dessert. I saw these Cupcakes in a Jar a few months ago and couldn't wait to try them out. We had to laugh because the women saw right away that they were cupcakes, just the trifle version. As for my Dad, I asked him if he wanted a regular cupcake or one of these, and he picked this, saying, "I don't want a cupcake, yuck." So we thought we could trick him into eating one of these if we didn't tell him what it was (you do that too, right?) It worked for a minute until he realized it was still a cupcake! These were really cute, though, and simple to make. Just bake a cupcake without a liner and cut it in half after it cools. Layer up cupcakes, frosting, and topping until you like it.

Photobucket
Because my tall man can't have chocolate, I made a "Lemon Velvet" cupcake. I know it's not at all true to form but it tasted great. Basically, I made my regular doctored cake mix red velvet style, but I used a lemon cake instead. I topped them with blueberries for color and because lemon blueberry is one of my favorite combos. A light, lemony cream cheese frosting on top sealed the deal. Give these a try next time you want to serve cake. Even if the guys didn't care, the presentation really went well with the women! Happy fourth of July- be safe and enjoy it!

Photobucket
Quick Red Velvet Cupcakes Recipe
My Favorite Frosting Recipe

June 29, 2010

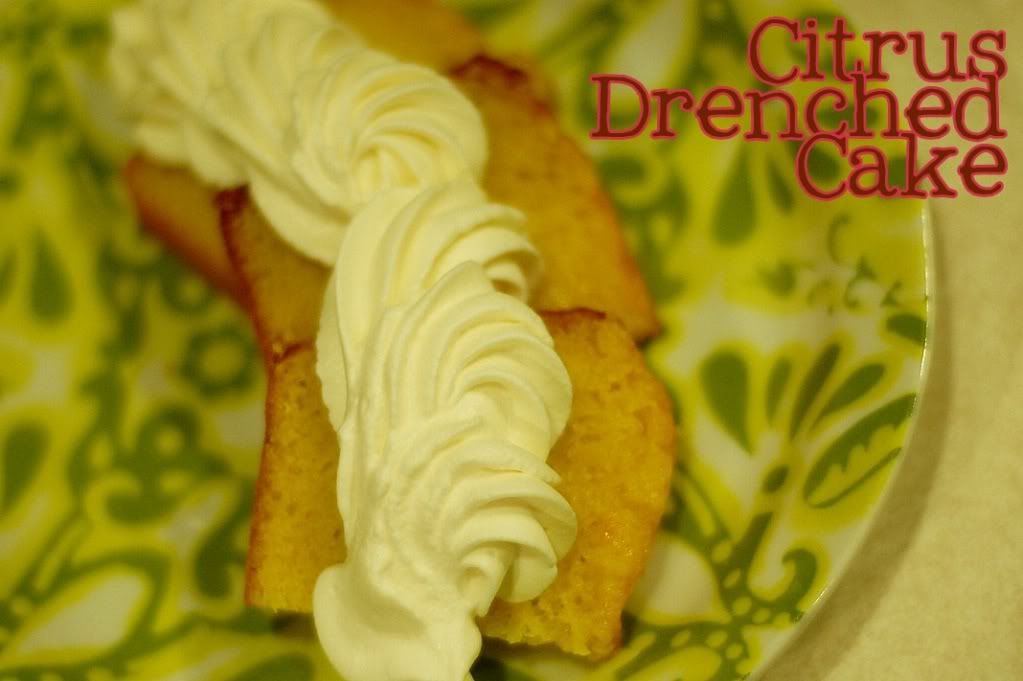
TWD- Citrus Drenched Cake

Photobucket
{printable recipe here}
Do I put whipped cream on everything? No. Really, no, but apparently I do it put it on almost everything that goes on my blog. And of course, whipped cream was a delicious accompaniment to my loose adaptation of Dorie's Rum Drenched Vanilla cake (thanks for the great choice, Wendy!) After ten too many trips to the store, I opted to make do with what was in the kitchen, so my halved version of the recipe doesn't include the rum, the vanilla bean, or even the cream (except on top- I thankfully had some of that in the fridge!) It does have lots of zest and fresh juice. It's delicious. Just make sure you don't underbake it, like I have a tendency to do!

PhotobucketCitrus Drenched Cake
from Anne Strawberry
{printable recipe here}
adapted from Baking by Dorie Greenspan

For the Cake-

1 1/3 cups all-purpose flour
1 1/4 teaspoons baking powder
Pinch of salt
1 1/4 cups of sugar
1 teaspoon pure vanilla extract
1 teaspoon lemon extract
1 teaspoon lemon or orange zest
3 large eggs, room temperature
1/3 cup of heavy cream (I used milk- it was fine, but I'm sure cream would make this even better!)
1 stick butter, melted and cooled

For the Syrup
1/3 cup water
1/4 cup sugar
1/4 cup freshly squeezed orange juice

Center a rack in the oven and preheat the oven to 350. Butter a 8 1/2-x-4 1/2-x-2 1/2 -inch loaf pan, dust the inside with flour and tap out the excess. Place the pan on an insulated baking sheet or on two regular sheets stacked one on top of the other.

Sift the flour, baking powder and salt together.

Put the sugar and the lemon zest in a large bowl and, working with your fingers, rub them together until the sugar is moist and fragrant. (If you are using vanilla extract, add it later, after you’ve added the eggs.) Add the eggs and whisk them into the sugar, beating until they are thoroughly incorporated. Whisk in the extract, if you are using it, then whisk in the cream, followed by the rum. Continuing with the whisk or switching to a large rubber spatula, gently stir in the dry ingredients in 3 or 4 additions; the batter will be smooth and thick. Finish by folding in the melted butter in 2 or 3 additions. Pour the batter into the pans, smoothing the tops with a rubber spatula.

Bake for 55 to 60 minutes, or until a knife inserted into the center of the cakes comes out clean. (As soon as the cakes go into the oven, make the syrup.) After about 30 minutes in the oven, check the cakes for color–if they are browning too quickly, cover them lightly with foil tents.
Meanwhile, Make the Syrup: Stir the water and sugar together in a medium saucepan over medium heat until the sugar melts, then bring to a boil. Remove the pan from the heat and stir in the juice. Pour the syrup into a heatproof bowl and let cool.

When the cake tests done, transfer to a wire rack to cool for 5 minutes before unmolding and turning right side up on the rack. Place the rack over a baking sheet lined with wax paper and, using a thin skewer, cake tester or thin-blade sharp knife, poke holes all over the cake. Brush all over with the syrup, working slowly so that the cake sops it up. Cool to room temperature.

April 30, 2010

Fresh Strawberry Pie

{printable recipe here}
Sometimes it takes longer to photograph and write up a recipe than it does to make it! This is one of those recipes- a quick graham crust (you could even buy it, though it wouldn't taste as great), sliced berries covered in a quick sauce (with a hint of lemon zest to surprise), and sweet whipped cream. It took only a few minutes to put together before I had to run to a Church meeting, and then this luscious, red pie sat in my fridge waiting. I was impatient. I'd made a yummy dinner but I couldn't stop thinking about this pie.

By the time everyone was ready to eat it there was no time for photos! I took a couple and we dug in. The pie was gone faster than it was made. I ran these pictures through this fun site and love the old look to them. This is a simple, classic dessert. I don't know a soul who would turn it down. Thank goodness strawberries are in season, because I must to make this again. Thanks Romaine for the new family favorite.

Fresh Strawberry Pie
{printable recipe here}
from Anne Strawberry
adapted from the wonderful Romaine

For the crust:

1 sleeve of graham crackers (or 1 3/4 cups graham cracker crumbs)
3 tablespoons sugar
Pinch of salt
1/2 stick (4 tablespoons) unsalted butter, melted

Center a rack in the oven, preheat the oven to 350°F. Butter a 9-inch springform pan. Pulse the graham crackers in a food processor with the sugar and salt. After they are smooth, turn the machine on and pour the melted butter through the tube until just combine. Gently press into the springform pan (or pie or tart pan) and smooth over bottom and sides, as desired (I usually make mine pretty rough edged, it doesn't have to be perfect!) Place the pan on a baking sheet and bake for 10 minutes. Set the crust aside to cool on a rack while you make the filling.

For the filling:

2 pounds of strawberries, washed and sliced
2/3 cup cold water
2 tablespoons corn starch
3 tablespoons powdered strawberry jello (1/2 a small, 4 ounce box)
3/4 cup corn syrup
zest of one lemon

Whisk water and cornstarch in a medium saucepan. Beat in cornstarch, jello, and syrup and bring to a boil over medium high heat. Stir constantly until mixture thickens and starts to bubble. Remove from heat, stir in lemon zest, and mix in the sliced strawberries. Stir gently and pour over crust. Refrigerate at least two hours before serving with whipped cream or ice cream.


Have a great day!

March 26, 2010

Strawberry Lemonade Bars

{printable recipe here}
Auburn called to see if she could test drive my food processor for an awesome new recipe she found. Lemon, strawberries, pastry crust? You bet! These are made with a quick crust pressed into a pan and then the strawberry lemon puree is poured over top. The whole thing took us onto 10 minutes or so, even with five million little children asking for drinks, balls, attention, treats, you know. Don't forget to take the extra 30 seconds to line the pan with foil before starting. After they cool, lift them right out and slice. They'll look better, make less waste, and less mess around the edges of the pan. Not that my husband MINDS cleaning up that mess!

We made these in a big baking dish but decided we'd like them better a little thicker, so I'm including my changes below. You could also make this without a food processor if you don't have one by pureeing the strawberries in a blender. Whichever method you use I would remove the seeds from the strawberry puree with a mesh sieve. The final product will have a much better texture that way.

Come back Monday for a giveaway!

Strawberry Lemonade Bars
from AnneStrawberry
adapted from Baking Bites

for the crust-
1/4 cup sugar
1/2 cup butter, room temperature
1 1/2 cups all purpose flour
1/4 tsp salt

for the filling-
1 cup fresh squeezed lemon juice
3 teaspoons lemon zest
1/2 cup pureed strawberries (about 3/4 cup berries, pureed and seeds removed)
1 1/4 cups sugar
4 large eggs
1/4 cup all purpose flour
1/2 teaspoon baking powder
1/4 teaspoon salt

Preheat oven to 350F. Line a small rectangular pan with foil (a 9 x 13 works for thinner bars, but I like my small rectangular Pyrex- it's bigger than a square dish but not too big).
In a large bowl, cream together sugar and butter till fluffy. Gradually beat in flour and salt until mixture is crumbly. Pour into prepared pan and lightly press into an even layer. Bake for about 17 minutes, until set at the edges.

Meanwhile, prepare the filling. In the bowl of a food processor, combine lemon juice, lemon zest, strawberry puree, sugar and eggs and process until smooth. Add in flour, baking powder and salt, then pulse until smooth.

Gently pour the filling over the hot crust when it has finished baking. Return pan to oven and bake for about 30 minutes. The filling should be a little set. It may have a sugary crust on top- just make sure it's semi solid. It will continue to harden in the fridge.

Cool completely in the fridge then slice with a damp knife, cleaning between cuts to get the best final product. Top with sliced strawberries if desired. Help bars to keep their shape by storing in the fridge.

December 5, 2009

Lemon Tart Giveaway

Recently I heard about the book Lemon Tart- a culinary mystery. I couldn't get over the "culinary mystery" part so I decided to check it out. This book centers around a homemaker who loves to bake and includes the recipes along the way. I loved reading it and couldn't wait to try a recipe- so of course, I made the lemon tart. It was simple enough that I could make it with Little Man's help and Baby Strawberry in my arms. That's the kind of recipe I prefer these days. So really, anyone can make it. You could even sub out a graham crust if you don't want to bother with the pastry.

C&H also sent me some money to buy some of their sugar (which I did, in bulk, at Costco. I'm not the only one that buys the 30 pound bag and fills a huge bucket in the pantry, right? Right? Well, I know my mom does too, so I don't feel too bad). I used the granulated sugar in the tart and the powdered sugar in the crust and whipped cream. My husband loves to eat the C&H dark brown sugar right out of the bag. Don't let him know I told you that. They also have a huge selection of holiday recipes on their site. I'm going to feature one next week... as soon as I pick which one to try. I'm thinking maybe the egg-free sugar cookie dough for my beautiful (allergic to eggs) niece Carlee or the peanut butter topped toffee bars for my Tall Man. He's going to get hungry after he finishes off that bag of brown sugar (fortunately I have several back ups, he's lucky to be married to a stockpiler!) Either way, check back next week. It's going to be delicious.

You can read the first chapter here and see the recipes she has included. There is also a nice interview here about the book and how she came up with the ideas. I also contacted the author and she agreed to giveaway a copy of the book to one of my readers. Leave a comment letting me know the best book you've read lately. And don't forget to check out Lemon Tart and the next in the series, English Trifle for a fun and refreshing read. You can find out more about Josi Kilpack at her blog or site. Thanks Josi for the fun giveaway!

Here's a culinary mystery for you... who swiped a lick of that cream? I'll give you one guess...

Lemon Tart
adapted from the book "Lemon Tart" by Josi Kilpack

Crust
1 cup all-purpose flour
1/3 cup C&H powdered sugar
Pinch of salt
1/2 cup (1 stick) cold unsalted butter, cut into smaller pieces
1 egg yolk, beaten with 1 tablespoon cold water (I added this to get my dough to come together)

Preheat oven to 425 degrees. In a food processor or mixer, combine ingredients for crust. Pulse together until a dough starts to form in clumps (then I pulsed in the egg). Press into tart pan, making sure to cover bottom and sides evenly. Pierve the bottom of the crust with a fork and place in freezer for 10 to 15 minutes.

Place tart on a cookie sheet and bake until crust is a golden-brown color, approximately 12 minutes. Remove from oven and let cool.

Filling (I made about double of this, using the whole stick of cream cheese and 3 eggs, since my tart pan was especially deep)

5 ounces cream cheese, softened (I used neufchatel)
1/2 cup C&H granulated cane sugar (I would use another 1/4 cup like she suggests since my Tall Man likes things sweet)
3/4 cup fresh lemon juice
2 large eggs
zest from one lemon (get zest from lemon before juicing)

Reduce oven temperature to 350. Mix cream cheese with electric beaters until smooth. Add sugar. Mix until well blended. Add the eggs one at a time, mixing thoroughly after each egg. Stop and scrape bowl halfway through. Add the lemon juice and zest and mix until smooth.

Pour the filling into the tart crust and bake on cookie sheet for 20 to 30 minutes or until filling is set. Let tart cool on wire cooling rack. Cover and refrigerate until well chilled.

Use whipped cream as an optional topping. It can be piped on in stars or served on top with each piece (I liked lots and lots of top of mine!).


The giveaway will accept entries until next Thursday night, December 10, at midnight AZ time. U.S. addresses only and one entry per person please.

(This giveaway is now closed... thanks for all the entries!)

June 30, 2009

TWD- Perfect (90th Birthday) Party Cake

A few weeks ago I had a great time making the Perfect Party Cake to celebrate my husband's Grandma's 90th birthday (wow!) I was excited for this week's Tuesdays with Dorie choice because I actually had a good excuse for this enormous, gorgeous cake. I pulled out all the stops- home made strawberry jam, cream cheese icing, and white chocolate for decorating. And it was a big fat mess.

The cake came together perfectly and the flavors were amazing, but my icing was too soft and I used too much jam (I think). I assembled it and then we took it to the party, and by the time we got there (in the 100 something degree heat, of course) the cake made the Tower of Pisa look straight backed. Seriously. I hid it in the back of the kitchen and was relieved to know that each slice looked beautiful with all the layers, even if the whole cake didn't.

Nonetheless, this is one delicious cake you don't want to miss. I've included my favorite frosting recipe that is not so cream cheesy that it makes you sick, but doesn't feel as sugar heavy as most powdered sugar icings do. It's delicious on graham crackers, cakes, cupcakes, spatulas, whatever you have. :) I'd add husbands to that list (like I always tease Auburn, the biggest frosting lover I know, about) but there are nice old ladies from my Church that know about my cooking blog somehow. So make a big batch for whatever you'd like. And don't look to closely at that big blotch of strawberry jam oozing out of my cake. It was freaking good nonetheless.

Perfect Party Cake tips from Dorie (don't miss these!)

Cream Cheese Frosting

1 package of cream cheese, softened (I like to use Neufchatel, less fat and I don't notice much difference)
1/2 C. butter, softened (one stick)
2 T. milk
2 t. pure vanilla extract
dash of salt
6 cups of powdered sugar (more or less to achieve desired consistency, this is a baseline)
1 T. meringue powder

In a mixer with the whisk attachment, combine the cream cheese and butter until they are light and fluffy. Then add in the milk, vanilla, and salt, and blend.

Next, add the powdered sugar and meringue powder, cover the bowl of the mixer with a dish towel, and turn it on low until everything is combined. Then increase the speed for a minute or so until the frosting is light, fluffy, and delicious. The meringue powder will help set the frosting after it dries so it holds its shape.

Variation:
Add 1 T. Lemon or orange zest and substitute juice for the milk to make a tangy citrus frosting .


Cake recipe posted here from my last birthday. Enjoy!

May 12, 2009

TWD- Tartest Lemon Tart (sans crust!)

This would have been the perfect Mother's Day dessert. Before that (I love having all the recipes for Tuesdays with Dorie announced early) it would have been the perfect dinner party dessert. However, misreading the instructions (What's that, Dorie, you said partially baked tart crust? I followed your hints and cooked this thing until it was nice and golden brown...) and using my son's naptime on Sunday to nap myself prevented me from making these for either of those events. Instead, I found myself Monday night making this tart in the few minutes I had before my husband got home from work. Since we've gotten into our first real house of our own, my baking even seems to be dictated by the on peak/off peak hours for the electricity (my Dad would be so bugged to know I never learned these things while I was in his house).

So instead of making the time and electricity intensive crust (I don't mind the process at all, I love making tart shells now), I opted to make this beautiful tart into crustless ramekins. I followed the advice to remove the pith but just peeling the lemon with a vegetable peeler to remove the zest in big strips, then peeling the lemon like an orange (discard the pith), removing the seeds and throwing it all into the food processor. I was shocked at how quickly this came together- a few minutes pulverizing and it was smooth and delicious. I poured the cream into buttered ramekins, placed them in a dish with a hot water bath, and baked at 325 for about 30 minutes. After the were about set, I let them cool on the counter before putting them in the fridge for an hour. At this point they were begging for whipped cream, but my little guy has a tendency to rush out of bed if he hears the KitchenAid, so I ate mine without. Wow. This tartest crustless tart was AMAZING. It was thick on top and a little runny on the bottom- not quite puckery lemon but enough to liven things up. You can bet I'm whipping up some cream for tomorrows breakfast. These babies deserve it. Grab the recipe at Babette's and see for yourself (my modifications follow). You can bet I'm making this with a crust in the near future. During off peak hours, of course.

Tartest Lemon Tart

adapted from Baking by Dorie Greenspan
1 1/2 lemons, scrubbed and dried
1 1/2 cups sugar
1 large egg, room temperature
2 large egg yolks, room temp
1 1/2 tbsp cornstarch
1/2 cup heavy cream
1/2 stick unsalted butter, melted and cooled (I used room temperature butter, but it's warm in my AZ kitchen!)
Whipped cream

Getting Ready: Center a rack in the oven and preheat the oven to 325 degrees F.

Peel lemon with a vegetable peeler to remove zest. Remove all pith by peeling like an orange, then slice whole lemon in half and pull out seeds. Repeat with the rest of the lemon.

Put lemons and sugar in blender and pulse, blend and scrape down sides until you have smooth mix. Add remaining filling ingredients and pulse and blend until filling is homogeneous. Rap bowl on counter several times to de-bubble filling as much as possible, and pour it into buttered ramekins placed inside a casserole dish. Set into oven and fill the dish with hot water half way up the ramekins. Bake for 30-40 minutes, until almost set. Chill, if you'd like, before serving with cream or dusting of confectioners' sugar.

April 15, 2009

Lemon Curd Marbled Cheesecake

For Easter dinner, my family keeps it pretty simple. We always have a ham (simple and delicious, thank you Costco), "funeral potatoes" (I'm sure half of you know just what those are, for the other half, they're cheesy, buttery, sour-creamy shredded potatoes), green beans, and rolls. We did decide, though, to mix it up with a new dessert. I found this recipe about a month ago and I've been dying to try it- so this was the perfect excuse. I subbed neufchatel cheese (reduced fat cream cheese) for two of the bricks. I added a little Ultra gel to thicken it up a bit. Even so, I had to bake this for almost twice as long as the recipe called for. It is pretty simple, though- no water bath, no foil wrapping, no luxuriating. I'll have to try making Dorie's awesome cheesecake again with the lemon curd for a real taste test. I'm sure my family won't mind, but I'd better find another holiday or something for an excuse. Even with the reduced fat cream cheese, this dessert is a serious caloric investment. And totally worth it. Happy tax day, everyone! Lemon Curd Marbled Cheesecake adapted from Epicurious 1 1/4 Cups (about) Lemon Curd (recipe below and here) For crust 1 1/3 cups finely ground graham cracker crumbs or 1 sleeve graham crackers, ground 1/3 cup sugar 3/4 teaspoon salt 5 tablespoons unsalted butter, melted For filling 3 (8-oz) packages cream cheese, softened 1 cup sugar 3 large eggs 3/4 cup sour cream 1 teaspoon vanilla Make and bake crust: Put oven rack in middle position and preheat oven to 350°F. Invert bottom of springform pan (to make it easier to slide cake off bottom), then lock on side. Stir together crust ingredients in a bowl, then press onto bottom and 1 inch up side of springform pan. Place springform pan in a shallow baking pan and bake 10 minutes, then cool crust completely in springform pan on a rack. Make filling and bake cheesecake: Reduce oven temperature to 300°F. Beat together cream cheese and sugar in a bowl with an electric mixer at medium speed until smooth, 1 to 2 minutes. Reduce speed to low and add eggs 1 at a time, beating until incorporated. Beat in sour cream and vanilla until combined. Pour two thirds of cream cheese filling into crust, then spoon half of lemon curd over filling and swirl curd into filling with a small knife. (Avoid touching crust with knife to prevent crumbs getting into filling.) Repeat with remaining filling and curd. Bake cheesecake until set 1 1/2 inches from edge but center trembles when pan is gently shaken, about 45 minutes (took about 75 minutes for me- just check every five or ten minutes after 40). (Center of cake will appear very loose but will continue to set as it cools.) Transfer springform pan to a rack and immediately run a knife around top edge of cake to loosen. Cool completely, about 2 hours, then chill, uncovered, at least 4 hours. Remove side of springform pan before serving. Cooks' Notes: Lemon curd can be made 1 week ahead and chilled, covered. Crust (without filling) can be made 1 day ahead and kept, covered, at room temperature. Cheesecake can be chilled, loosely covered, up to 2 days. Cheesecake must be completely chilled before covering to prevent condensation on its surface. Lemon Curd from Epicurious *note: Next time I'll pulverize the zest and the sugar in the food processor before starting the cooking so the final product is a little smoother but still flavorful 1/2 cup fresh lemon juice 2 teaspoons finely grated fresh lemon zest 1/2 cup sugar 3 large eggs 3/4 stick (6 tablespoons) unsalted butter, cut into bits Whisk together juice, zest, sugar, and eggs in a 2-quart heavy saucepan. Stir in butter and cook over moderately low heat, whisking frequently, until curd is thick enough to hold marks of whisk and first bubble appears on surface, about 6 minutes. Transfer lemon curd to a bowl and chill, its surface covered with plastic wrap, until cold, at least 1 hour.

March 17, 2009

French Yogurt Cake with Lemon Curd and Strawberries (and a surprise... and a giveaway!)

This is an exciting week! Not only was the Tuesdays with Dorie choice from Liliana fabulous, it was also delicious. I changed mine up a little my reducing the oil to 1/3 a cup.

I made mine with ground almonds as Dorie suggested and topped it with some homemade lemon curd and strawberries. I've never made lemon curd before and surely will again- it's simple, delicious, and a good way to use up some of the lemons that are over flowing in AZ right now!

Now for the kiddos I have a yogurt giveaway. You know how kids love Dora. However, I'm sure they would even appreciate this dessert with a little more sophisticated yogurt flavor than Dora Yoplait. My son loves this stuff (and the grown up versions too). However they enjoy their yogurt, I think everyone is glad to get a little calcium into picky eaters. I know my mom always was. Make sure to leave your email or that it's on your profile if you want to be entered in the giveaway (and US residents only for that, sorry kids!) I'll say the deadline for this contest is Saturday night (March 21) at Midnight, AZ time. I'll announce three winners next Tuesday (one entry per person please).

And now for my favorite picture of the week... meet my new little leprauchan (coming hopefully in time for my birthday in September!) and please accept my humble apologies for skipping out on the kitchen so often and for neglecting my blog. I'm happy to report I'm interested in food again (and feeding my poor husband) and we are all happy and healthy. And Happy St. Patty's day- you can bet we're eating Corned Beef and Cabbage tonight!

(Cake Recipe Here)


Lemon Curd
from Epicurious

*note: Next time I'll pulverize the zest and the sugar in the food processor before starting the cooking so the final product is a little smoother but still flavorful

1/2 cup fresh lemon juice
2 teaspoons finely grated fresh lemon zest
1/2 cup sugar
3 large eggs
3/4 stick (6 tablespoons) unsalted butter, cut into bits

Whisk together juice, zest, sugar, and eggs in a 2-quart heavy saucepan. Stir in butter and cook over moderately low heat, whisking frequently, until curd is thick enough to hold marks of whisk and first bubble appears on surface, about 6 minutes.

Transfer lemon curd to a bowl and chill, its surface covered with plastic wrap, until cold, at least 1 hour.

March 12, 2009

Barefoot Bloggers- Chicken Piccata

I love watching Barefoot Contessa and laugh when every time Ina makes chicken for Jeffrey and they show him at the end saying, "This is even better than my favorite roast chicken, and you know how I love chicken!" She laughs and says she loves him and they pan out showing their beautiful home and I smile. Well, my man loves steak like Jeffrey loves chicken, but for the budget and cholesterol levels we try to stick with chicken for the most part. This recipe is as good as Jeffrey makes it out to be and while there are a lot of dishes from the breading, the end product is delicious. It doesn't even usually require a trip to the grocery store for me, which makes this recipe a winner. Thanks, Lindsey, for the fun choice and don't forget to see all the other Barefoot Bloggers delicious dinners!

Chicken Piccata
from Ina Garten

2 split (1 whole) boneless, skinless chicken breasts
Kosher salt and freshly ground black pepper
1/2 cup all-purpose flour
1 extra-large egg
1/2 tablespoon water
3/4 cup seasoned dry bread crumbs (whole wheat)
Good olive oil
3 tablespoons unsalted butter, room temperature, divided
1/3 cup freshly squeezed lemon juice (2 lemons), lemon halves reserved
1/2 cup dry white wine (I used white grape juice)
Sliced lemon, for serving
Chopped fresh parsley leaves, for serving

Preheat the oven to 400 degrees F. Line a sheet pan with parchment paper.

Place each chicken breast between 2 sheets of parchment paper or plastic wrap and pound out to 1/4-inch thick. Sprinkle both sides with salt and pepper.

Mix the flour, 1/2 teaspoon salt, and 1/4 teaspoon of pepper in a shallow plate. In a second plate, beat the egg and 1/2 tablespoon of water together. Place the bread crumbs on a third plate. Dip each chicken breast first in the flour, shake off the excess, and then dip in the egg and bread crumb mixtures.

Heat 1 tablespoon of olive oil in a large saute pan over medium to medium-low heat. Add the chicken breasts and cook for 2 minutes on each side, until browned. Place them on the sheet pan and allow them to bake for 5 to 10 minutes while you make the sauce.

For the sauce, wipe out the saute pan with a dry paper towel. Over medium heat, melt 1 tablespoon of the butter and then add the lemon juice, wine, the reserved lemon halves, 1/2 teaspoon salt, and 1/4 teaspoon pepper. Boil over high heat until reduced in half, about 2 minutes. Off the heat, add the remaining 2 tablespoons of butter and swirl to combine. Discard the lemon halves and serve 1 chicken breast on each plate. Spoon on the sauce and serve with a slice of lemon and a sprinkling of fresh parsley.

March 10, 2009

TWD- Lemon Cup Custard

For such a simple little dessert, this week's Tuesdays with Dorie selection sure brought out a lot of opinions! I made it during beloved "nap time" Sunday afternoon and liked how quickly it came together. We have an enormous lemon tree so a quick trip into the beautiful "winter" AZ weather and I had two enormous lemons ready to zest. I used a veggie peeler to cut wide pieces off the lemons to steep in the milk. I thought the final product had a nice lemon taste and it complimented the vanilla- I used about 1 tablespoon of vanilla extract but let's be honest, I just dump that stuff in (my bottle even has a flip top) like the vanilla junky that I am.

I attempted to unmold these little buddies and while they were less than cute, I like that this photo shows the texture of the final product. I baked them just about as long as Dorie recommended and they were still a little jiggly but totally done. I had two faithful taste testers and they both agreed that this was fine, but not enough. My husband thought there should be some sort of crust (like a tart? he suggested) and my mom thought there should be a lot of drippy caramel or lemon sauce (like flan!)

I thought that while this dessert was simple, didn't require any weird or expensive ingredients, and was even pretty fast, it's just not worth the calories to me. Not when I could be making pastry cream with the same ingredients. I'd love to hear your flavor ideas, though, for some inspiration. I think there's something to be said for such a simple and quick dessert. I'm glad I made it, but if you'll excuse me, now I'm really feeling the need to make some pastry cream. Now that's a treat that doesn't even need a tart shell or caramel sauce!

(Recipe available at Bridget's beautiful blog)

December 9, 2008

TWD- Sugar Cookies

Sugar cookies! Nothing says Christmas more than these, especially to my husband. His family used to make these every year for Christmas and at some point (I'm presuming during their teenage years) they decided it just wasn't worth it. I've tried my best to reincarnate this holiday tradition and every Christmas since we got married, even when we were stuck in Utah two years ago since I was too pregnant to travel home, we've made them. Even better, this recipe is easy to make, has DELICIOUS dough, and rolls out like a dream. I made a double batch and put 50 straight into the freezer to take to scouts on Thursday. I'm sure the boys will end up with some interesting designs- it should be a lot of fun for everyone!

Thanks to Ulrike for this fun choice. Find the recipe there and whip some up tonight. With a quick dough, good freezability, and perfect rolling texture, I think these are just right. Next time I'll roll them a little thicker since I prefer a chewy sugar cookie (well, I prefer all my cookies to be chewier) but these crisp, easy to ice cookies are perfect. Don't miss all the other beautiful sugar cookies from the talented Tuesdays with Dorie bakers.

Lemon Glaze
1 tablespoon freshly squeezed lemon juice
1 cup powdered sugar
1 tablespoon meringue powder

Combine all ingredients and stir until smooth. Dip cookies to ice and allow frosting to harden.

November 16, 2008

Ina's Chicken Piccata

Last week's herb roasted onions were a hit but the star of the show was definetely the Chicken Piccata. With simple ingredients I almost always have on hand, this was a fabulous dinner. It does take a good amount of dishes with the breading, but it's delicious and worth it!

I'll go so far as to say I like this even better than Ina's Chicken Parmesan, which we love around here. The flavor of the sauce is delicate and delicious. Next time I make this, I'll include some mashed potatoes. I think my husband will be in heaven (thanks Ina!)

Chicken Piccata

from Ina Garten
2 split (1 whole) boneless, skinless chicken breasts
Kosher salt and freshly ground black pepper
1/2 cup all-purpose flour
1 extra-large egg
1/2 tablespoon water
3/4 cup seasoned dry bread crumbs (whole wheat)
Good olive oil
3 tablespoons unsalted butter, room temperature, divided
1/3 cup freshly squeezed lemon juice (2 lemons), lemon halves reserved
1/2 cup dry white wine (I used white grape juice)
Sliced lemon, for serving
Chopped fresh parsley leaves, for serving

Preheat the oven to 400 degrees F. Line a sheet pan with parchment paper.

Place each chicken breast between 2 sheets of parchment paper or plastic wrap and pound out to 1/4-inch thick. Sprinkle both sides with salt and pepper.

Mix the flour, 1/2 teaspoon salt, and 1/4 teaspoon of pepper in a shallow plate. In a second plate, beat the egg and 1/2 tablespoon of water together. Place the bread crumbs on a third plate. Dip each chicken breast first in the flour, shake off the excess, and then dip in the egg and bread crumb mixtures.

Heat 1 tablespoon of olive oil in a large saute pan over medium to medium-low heat. Add the chicken breasts and cook for 2 minutes on each side, until browned. Place them on the sheet pan and allow them to bake for 5 to 10 minutes while you make the sauce.

For the sauce, wipe out the saute pan with a dry paper towel. Over medium heat, melt 1 tablespoon of the butter and then add the lemon juice, wine, the reserved lemon halves, 1/2 teaspoon salt, and 1/4 teaspoon pepper. Boil over high heat until reduced in half, about 2 minutes. Off the heat, add the remaining 2 tablespoons of butter and swirl to combine. Discard the lemon halves and serve 1 chicken breast on each plate. Spoon on the sauce and serve with a slice of lemon and a sprinkling of fresh parsley.

September 25, 2008

Perfect Party Cake

Post-it notes decorate my Baking book, flagging things I'm dying to make and gorgeous photos. One in particular has been calling my name since I first saw it. The perfect party cake. I finally made it last week for my birthday party. I know you don't normally make your own cake, but honestly, I don't really like cake. I never have. I just like to make them. And my friends like to eat cake. So that was a perfect arrangement. Besides, I'd never justify making this enormous, rich, and lovely cake on a regular night.

With my good excuse in hand, I plopped open the book and had a great morning making it. My cake pans are a little smaller so I made two 8 inch cakes and one 4 inch, that I've tucked away in the freezer for another day. Then I worked on the icing. I've actually never made a buttercream frosting before and loved how it turned out. I was alarmed by all of the butter in the icing but it was so smooth and delicious. I might not love cake, but I do love icing. This was wonderful. I didn't have quite enough to frost the cake so I only made three layers instead of four, since I didn't have time to make another batch and didn't want to run out!

I also layered in frozen black raspberries that I found at Trader Joe's. They were such a beautiful, dark color (but I hate how they kind of smeared the inside of the cake- they were too juicy!). Next time, I'll make a sauce out of the fruit instead of using whole raspberries to avoid that problem. They were so delicious, though, that it was totally worth it. All together, this cake was fun to make, moist and light- just delicious. I loved the delicate flavor with just a hint of lemon and I'm sure I'll make several variations of this great recipe.

Lastly, meet my lovely new apron from icing-loving Auburn. With a pretty like that, I'm more than happy to whip up some icing for her (cake optional)!

Perfect Party Cake
From Baking by Dorie Greenspan

For the Cake
2 ¼ cups cake flour
1 tablespoon baking powder
½ teaspoon salt
1 ¼ cups whole milk or buttermilk (I prefer buttermilk with the lemon)
4 large egg whites
1 ½ cups sugar
2 teaspoons grated lemon zest
1 stick (8 tablespoons or 4 ounces) unsalted butter, at room temperature
½ teaspoon pure lemon extract

For the Buttercream
1 cup sugar
4 large egg whites
3 sticks (12 ounces) unsalted butter, at room temperature
¼ cup fresh lemon juice (from 2 large lemons)
1 teaspoon pure vanilla extract

For Finishing
2/3 cup seedless raspberry preserves stirred vigorously or warmed gently until spreadable
About 1 ½ cups sweetened shredded coconut

Getting Ready
Center a rack in the oven and preheat the oven to 350 degrees F. Butter two 9 x 2 inch round cake pans and line the bottom of each pan with a round of buttered parchment or wax paper. Put the pans on a baking sheet.

To Make the Cake
Sift together the flour, baking powder and salt. Whisk together the milk and egg whites in a medium bowl. Whisk together the sugar and lemon zest in a mixer bowl or another large bowl and rub them together with your fingers until the sugar is moist and fragrant.

Add the butter and working with the paddle or whisk attachment, or with a hand mixer, beat at medium speed for a full 3 minutes, until the butter and sugar are very light. Beat in the extract, then add one third of the flour mixture, still beating on medium speed.

Beat in half of the milk-egg mixture, then beat in half of the remaining dry ingredients until incorporated. Add the rest of the milk and eggs beating until the batter is homogeneous, then add the last of the dry ingredients. Finally, give the batter a good 2- minute beating to ensure that it is thoroughly mixed and well aerated.

Divide the batter between the two pans and smooth the tops with a rubber spatula.
Bake for 30-35 minutes, or until the cakes are well risen and springy to the touch – a thin knife inserted into the centers should come out clean

Transfer the cakes to cooling racks and cool for about 5 minutes, then run a knife around the sides of the cakes, unfold them and peel off the paper liners. Invert and cool to room temperature, right side up (the cooled cake layers can be wrapped airtight and stored at room temperature overnight or frozen for up to two months).

To Make the Buttercream


Put the sugar and egg whites in a mixer bowl or another large heatproof bowl, fit the bowl over a plan of simmering water and whisk constantly, keeping the mixture over the heat, until it feels hot to the touch, about 3 minutes.

The sugar should be dissolved, and the mixture will look like shiny marshmallow cream. Remove the bowl from the heat.

Working with the whisk attachment or with a hand mixer, beat the meringue on medium speed until it is cool, about 5 minutes. Switch to the paddle attachment if you have one, and add the butter a stick at a time, beating until smooth.

Once all the butter is in, beat in the buttercream on medium-high speed until it is thick and very smooth, 6-10 minutes. During this time the buttercream may curdle or separate – just keep beating and it will come together again.

On medium speed, gradually beat in more lemon juice, waiting until each addition is absorbed before adding more, and then the vanilla. You should have a shiny smooth, velvety, pristine white buttercream. Press a piece of plastic against the surface of the buttercream and set aside briefly.

To Assemble the Cake
Using a sharp serrated knife and a gentle sawing motion, slice each layer horizontally in half. Put one layer cut side up on a cardboard cake round or a cake plate protected by strips of wax or parchment paper.

Spread it with one third of the preserves. Cover the jam evenly with about one quarter of the buttercream. Top with another layer, spread with preserves and buttercream and then do the same with a third layer (you’ll have used all the jam and have buttercream leftover). Place the last layer cut side down on top of the cake and use the remaining buttercream to frost the sides and top.

Press the coconut into the frosting, patting it gently all over the sides and top. (I omitted this and topped the cake with more raspberries)

Serving
The cake is ready to serve as soon as it is assembled, but I think it’s best to let it sit and set for a couple of hours in a cool room – not the refrigerator. Whether you wait or slice and enjoy it immediately, the cake should be served at room temperature; it loses all its subtlety when it’s cold. Depending on your audience you can serve the cake with just about anything from milk to sweet or bubbly wine.

Storing
The cake is best the day it is made, but you can refrigerate it, well covered, for up to two days. Bring it to room temperature before serving. If you want to freeze the cake, slide it into the freezer to set, then wrap it really well – it will keep for up to 2 months in the freezer; defrost it, still wrapped overnight in the refrigerator.

August 28, 2008

Barefoot Bloggers- Butterflied (Lemon Rosemary) Chicken

This week's Barefoot Bloggers recipe come from Stefany and it was such a great choice! It's nice to "have" to try something new besides a dessert recipe (though they are still my favorite to make!) This Barefoot Contessa recipe is simple, easy, and flavorful- exactly what Ina is known for. Because the Safeway butcher said he couldn't debone a chicken (and gave me a friendly laugh at the suggestion) I decided to buy chicken breasts with the skin and bone. I followed the recipe, making a little extra seasoning to cover the extra surface area, and baked the chicken in the oven after searing it on the grill pan. It took about thirty minutes to reach 165 and came out beautiful and fragrant. I tossed the chicken in a big bowl, served it with some of Ina's Parmesan Mashed Potatoes and broccoli for a hearty summer dinner- perfect to share with friends. The chicken was so moist and flavorful. I used the leftover chicken for sandwiches and salads and everyone was happy . What can I say... we love Ina around here! We finished the meal with her Berry Pavlova, made into miniatures and snatched up too quickly to get a picture. Imagine two toddlers eating mixed berry soaked meringue cookies and licking the juice off the plate when it was all done. Well, the adults did about the same thing...

Butterflied Chicken
by Ina Garten
1/4 cup chopped fresh rosemary leaves, plus 2 sprigs
3 garlic cloves, chopped
1 teaspoon lemon zest
1 1/2 tablespoons lemon juice
Good olive oil
Kosher salt
Freshly ground black pepper
2 roasting chickens (2 1/2 to 3 pounds each), deboned and butterflied
1/2 lemon, thinly sliced

Mix the chopped rosemary, garlic, lemon zest, lemon juice, 1 tablespoon olive oil, 2 teaspoons salt and 1/2 teaspoon pepper together in a small bowl to make a paste.

Place the chickens on a sheet pan, skin side up, and loosen the skin from the meat with your fingers. Place 1/2 of the paste under the skin of each chicken. Rub any remaining paste on the outside and underside of the chickens.

Turn the chicken skin side down and scatter the lemon slices and sprigs of rosemary over each chicken. Season with salt and pepper. Roll each chicken up, cover with plastic wrap and refrigerate for at least 1 hour.

Heat a grill with coals. Spread the coals out in 1 dense layer and brush the grill with oil. Unroll the chickens, place them on the grill and cook for 12 minutes on each side. (Or bake on a baking sheet at 425 until internal temperature reaches 165, about 30 minutes).

July 21, 2008

Lemon Meringue Tart

Last Monday we celebrated Bastille Day (kind of the French 4th of July). I invited my cousin over who lived in Paris for a couple years and we had a nice time eating French food, drinking Orangina, and wrestling our children (her daughter is the adorable little girl with the blueberry tongue).

Our menu included:
Goat Cheese Salad from Barefoot in Paris
Chicken with 40 Cloves of Garlic
Herbed New Potatoes from Barefoot in Paris
Lemon Meringue Tart
Plum Nectarine Blackberry Galette from Baking from My Home to Yours

We had a great time and loved all the delicious French food. I love Barefoot in Paris and crack up every time I read the dedication- "For Jeffrey, who makes Paris so delicious". She's so cute.

I used the Lemon meringue tart filling from Ina's book but used Dorie's Sweet Tart Crust since it's so easy and delicious (plus, with that menu and a full day I didn't to risk trying something new!). I loved the taste of this tart but I was a little disappointed with the look of the meringue. It was so beautiful in Ina's book! I think part of the problem is the enormity of my tart pan- 11 instead of 9 inches! It takes one and a half crust recipes to fill and it made the loops of piped meringue look a little stretchy instead of perfect. Oh well, it was delicious!

Sweet Tart Dough
from Baking by Dorie Greenspan
1 ½ cups all purpose flour
½ cup confectioners’ sugar
¼ tsp salt
1 stick plus 1 tablespoon (9 T) very cold (or frozen) unsalted butter, cut into small pieces
1 large egg yolk

Put the flour, sugar, and salt in a food processor and pulse a couple of times to combine. Scatter the pieces of butter over the dry ingredients and pulse until the butter is coarsely cut in- you should have some pieces the size of oatmeal fakes and others the size of peas. Stir the yolk, just to break it up, and add it a little at a time, pulsing after each addition. When the egg is in, process in long pulses- about 10 seconds each- until the dough, which will look granular soon after the egg is added, forms clumps and curds. Just before you reach this stage, the sound of the machine working the dough will change- heads up. Turn the dough out onto a work surface and, very lightly and sparingly, knead the dough just to incorporate and dry ingredients that might have escaped mixing.

To press the dough into the pan: butter a 9-inch fluted tart pan with a removable bottom. Press the dough evenly over the bottom and up the sides of the pan, using all but one little piece of dough, which you should save in the refrigerator to patch any cracks after the crust is baked. Don’t be too heavy handed- press the crust in so that the edges of the pieces cling to one another, but not so hard that the crust loses its crumbly texture. Freeze the crust for at least 30 minutes, preferable longer, before baking.

To partially or fully bake the crust: center a rack in the center of the oven and preheat to 375 degrees F.

Butter the shiny side of aluminum foil and fit the foil, buttered side down, against the crust. (since you froze it, you can bake it without weights). Put the tart pan on a baking sheet and bake the crust for 25 minutes. Carefully remove the foil. If the crust has puffed, carefully press it down with the back of a spoon. For partially baked crust, patch the crust if necessary, then transfer the crust to a cooling rack. To fully bake the crust, bake for another 8 minutes or so, or until it is firm and golden brown. Transfer pan to a rack and cool the crust to room temperature before filling.

Lemon Filling
from Barefoot in Paris by Ina Garten
1/4-pound (1 stick) unsalted butter, at room temperature
1 1/2 cups sugar
4 extra-large eggs
3 extra-large egg yolks (save the whites for the meringue)
1/4 cup finely grated lemon zest (6 to 8 lemons)
1/2 cup freshly squeezed lemon juice
1/8 teaspoon kosher salt

Cream the butter and sugar in the bowl of an electric mixer fitted with the paddle attachment for 1 minute. On low speed, add the eggs and egg yolks one at a time, and then add the lemon zest, lemon juice, and salt. Don't worry; it will look curdled.

Pour the mixture into a small saucepan and cook over medium-low heat for 8 to 10 minutes, until thick, stirring constantly with a wooden spoon. Whisk briskly when it starts to thicken and cook over low heat for 1 to 2 minutes, whisking constantly. Don't allow it to boil! It will be 175 degrees F on an instant-read thermometer. Pour into a bowl and cool to room temperature.

Meringue topping
4 extra-large egg whites, at room temperature
1/4 teaspoon cream of tartar

Raise the oven temperature to 425 degrees F.

For the meringue, whip the egg whites, cream of tartar, and 1/4 teaspoon salt in the bowl of an electric mixer fitted with the whisk attachment on high speed until frothy. With the mixer still running, slowly add the remaining 1/2 cup of sugar and beat until the meringue is thick and shiny, about 2 minutes.

To Assemble the Tart:
Immediately spread the lemon filling in the cooled tart shell and pipe the meringue over it with a large star tip. Be sure the meringue covers the entire top and touches the edges of the shell, to prevent it from shrinking. Bake for 3 to 5 minutes, until the meringue is lightly browned. Cool to room temperature.