March 30, 2011

Wednesday Want- Silpats

Photobucket
Today I took two sheet cakes to Church and couldn't believe how clean and perfect the extra sheet pans in the kitchen were, compared to mine (that are only about six months old, and diligently scrubbed). Whenever someone sees my pans, though, they instantly comment on the liners and ask what they are and why I have them. I'm crazy for Silpats and usually start an overly long conversation about how awesome they are, how much they cost, where to buy them, why you need one, two, four, whatever, and how I couldn't live without them. So I figured that sharing Silpat's with you for my first Wednesday Want was appropriate!

Here's the scoop from the source- "Silpat nonstick baking sheets are made of woven glass coated with food-standard silicone. Used daily by professionals, the sheets offer multipurpose uses for preparing, cooking, and heating up food. They're also easy to clean--simply wipe them off using hot water and dish soap. Store them by either rolling them up or keeping them flat. Do not cut Silpat baking sheets with metal, but with DeMarle's Exoglass cutters or knives. Silpat baking sheets replace parchment paper, and are heat-resistant up to 480 degrees F. The Silpat makes any baking sheet nonstick- no greasing necessary. The baking sheets are made in France."
Photobucket
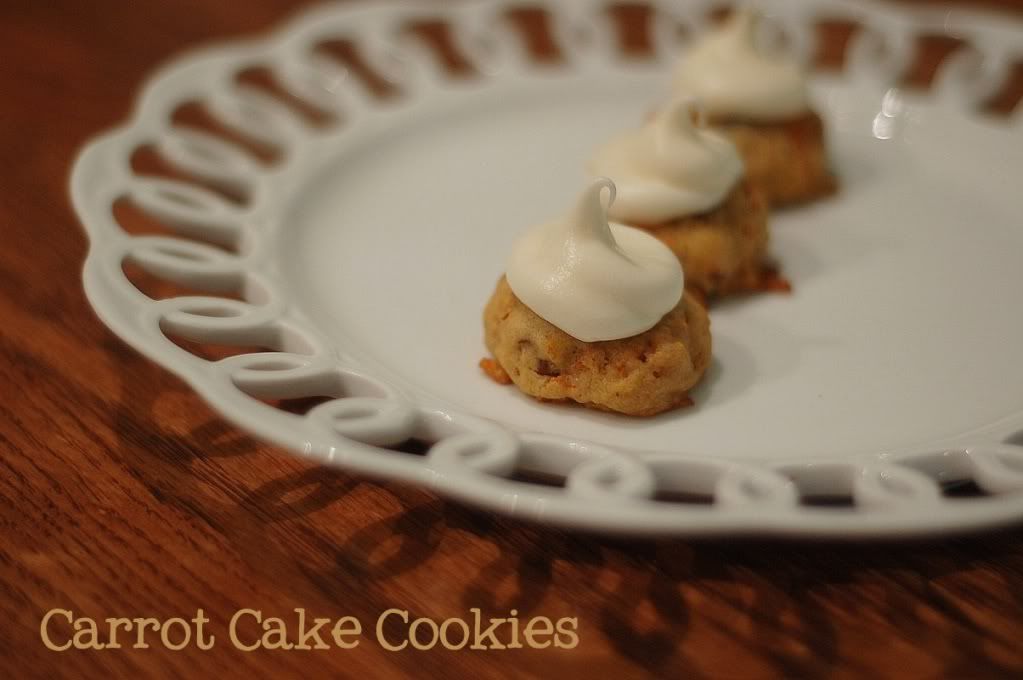
When I made Dorie's Carrot Cake Cookies, I didn't have enough Silpats for all of my baking sheets. I used an airbake sheet for one batch and they came out totally flat and malformed, instead of perfectly shaped (and pleasantly plump) like those baked on the Silpats.

Photobucket
With certain recipes, I really prefer flat cookies- but this is more irregular and accidental than perfectly thin.

Silpats aren't just good for cookies, though- I like to roast veggies or meat on them, bake my rolls on top (no greasing necessary, remember?) Sometimes I roll out pie crust on my sheets. They also help keep the mess down when I'm baking pies, muffins, or cupcakes (I put the lined pan right under the pie or muffin tin and there's no mess, overspill, or "brown bottoms" on the muffins!) They're easy to clean and don't require you to scrub the whole sheet pan or to throw away endless parchment. No, Silpat doesn't know anything about me or my little blog but I really think you should get to know them. I've tried the Wilton and Cuisinart knock offs and assure you that the Silpats, the real deal, are worth every penny. Please leave a comment and let me know your favorite thing use for Silpats!

PS- One more thing- these babies will last forever (I think 3000 uses is even enough for me) but make sure you never cut on them!

March 29, 2011

TWD- Mexican Wedding Cookies

 
Things have been a little busy and stressful lately. When that happens I love to tackle a good project- clean the pantry, paint a piece of furniture, do some over the top recipe, try to paint Baby Strawberry's toenails (that one ended with 'Redipus Oedipus' all over my bath tub and my new top coat bottle shattered on the bathroom floor, remind me to cross baby pedicures off the "relaxing a little Anne" list!) When I make a huge mess and dedicate a lot of time to a project, it makes me feel better (especially after it's all cleaned up). So last week for Greek Independence Day, on top of the regular dishes, I decided to make homemade pitas and herb feta stuffed rolls. And then some key lime pie. There was a lot of mess and a lot of distraction (thanks for the help and the company, Lauren!) That said, I love a quick and easy recipe- and some days that's exactly what I need. These "Pecan Powder Puffs" as Dorie calls them come together in the food processor, with regular pantry ingredients. I'm not normally a huge fan of these cookies but Dorie did it again and changed my mind. They're sandy and light, flavorful and bite size (my little man loves that). Pretty awesome. I've liked "not liking" certain desserts and knowing I wouldn't be tempted, but Dorie keeps expanding my horizons (that didn't necessarily need expanding!)

Give this recipe a try- you can see it over at Buttercream Barbie or in the fabulous Baking by Dorie Greenspan. You never know what you might end up liking!

PS Come back tomorrow for the first "Wednesday Want"!

March 28, 2011

Banana Birthday Cake

{printable recipe here}
This month marks the third year for my cooking blog. The first two recipes I posted were Baked Chicken Cordon Bleu and Cafe Rio Pork Salads (that's still one of my top recipes).  From there I was on to a whole lot of baked goods- tons of Dorie Greenspan and Barefoot Contessa recipes. Clearly, not much has changed! I've met so many great people and learned a lot in this crazy process and I really appreciate everyone that stops by, comments, and let's me know how the recipes turn out!

I wanted to make something fun to celebrate and had a bunch of bananas ready to go, so I pulled up all the good sounding banana recipes from my cookbooks and let my facebook peeps guide me. Ina's Banana Cake was the clear winner so I got to work making that. It's simple and delicious, pretty much fool proof and pretty, too. That's why we love the Barefoot Contessa! I also lightened the recipe up a tiny bit with plain yogurt in place of the sour cream. I then un-lightened it by smothering it in cream cheese frosting, what can you do?
I have a lot of great changes coming to my little virtual kitchen here. I still struggle with balance (and not leaving my little blog behind too frequently). I'm going to bring a little structure in, though, and even try to get ahead. Maybe I'm learning? :) I'll participate in TWD (hopefully more frequently), share my favorite baked goods as usual, and then I'll have two new "days" to help keep me on track. First, I'm borrowing inspiration from the fabulous Freckles in April for the "Wednesday Want", where I'll post my favorite kitchen products and great recipes to use them (first up? Probably Silpats, I can't stop telling people how awesome they are!) Next, I'm dedicating Fridays to a new recipe from one of my cookbooks. Not revolutionary, but helpful to me! I know I'm not the only one that has too many gorgeous cookbooks sitting unused, so I'm going to promise myself to try one totally new recipe a week from one of my books and let you know how it turns out. I'm still working on a name (the best I've come up with is "By the Book Friday", yeah, this is not my forte and I would certainly love some help there!)

I also have my Yoplait delights giveaway from Yoplait via myBlogSpark winner to post, finally. The random winner is "Cassidy's Cakes". Please get me your info as soon as possible so I can pass it along and have it sent out! I'm sorry about the delay on the giveaway and lack of posting but we've had one crazy week. A seven year old little boy from Church passed away unexpectedly this week and we've all found ourselves hugging our kids, dropping off cookies, and hoping our hugs and prayers are helping a little. If you have an extra prayers do send them off for the Ellsworth family. You can also donate here to help with the incurred expenses. And give your family an extra squeeze, because there's nothing more important!


Old Fashioned Banana Cake
{printable recipe here}
Adapted by Anne Strawberry from Ina Garten's "How Easy Is That"


3/4 cup sugar
1/2 cup brown sugar (I prefer dark but whatever you have on hand is fine)
grated zest of one orange
3 very ripe bananas, mashed (I make my little man help me with this)
1/2 cup vegetable oil
2 eggs
1/2 cup plain, nonfat yogurt (Ina called for sour cream but yogurt worked great here, either is great)
1 teaspoon vanilla

2 cups flour
1 teaspoon baking soda
1/2 teaspoon salt (I always use kosher but it's up to you)
1/2 cup coarsely chopped nuts (option- I omitted these for baby Strawberry's sake, but I would recommend pecans here)
cream cheese frosting (recipe below)

Preheat the oven to 350. Grease and flour a 9 x 2 inch round cake pan (note- a small casserole pan would work great too, or cupcakes- I'd guess you'd get about 18-20- just lower the cooking time to about 20-25 minutes).

In the bowl of your stand mixer, combine both sugars and the orange zest. Rub together until fragrant. Put on the paddle attachment and mix in the bananas until combined. Still on low, add the oil, eggs, yogurt, and vanilla and mix until smooth.

If you're feeling patient (not likely over here) sift together the dry team- flour, soda salt. Carefully add to the mixer on low speed, until just combined (you don't want to over do this and cause the cake to be tough). Stir in the nuts if desired (or chocolate chips!) Pour the batter into the prepared pan and bake for 45-50 minutes, until a toothpick inserted into the center comes out clean. Cool in the pan for 15 minutes then turn out onto a rack, flip it over again, and cool completely. Frost with cream cheese frosting, garnish with nuts, and enjoy!

Anne's Cream Cheese Frosting
8 ounces neufchatel (reduced fat cream cheese), very soft- that's one box
1 stick (1/2 cup) butter, also softened
1 teaspoon vanilla
1 pound powdered sugar (half a standard bag- about 4 cups)

Cream the cream cheese can butter until smooth and perfectly incorporated on low speed, being careful not to go too long or too fast to avoid excess air in the frosting. Add the vanilla and powdered sugar and mix until smooth and delicious. We use the extra to make coveted "graham cracker sandwiches", just spread a few tablespoons between graham crackers and freeze. Yum.

March 16, 2011

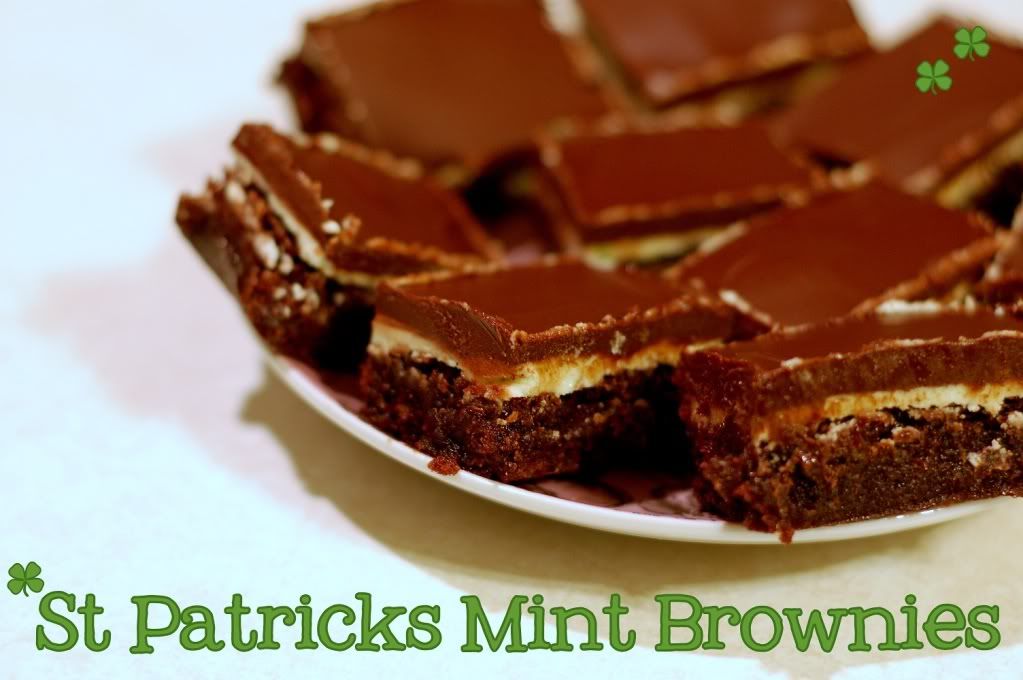
St. Patrick's Mint Brownies

St. Patricks Mint Brownies{printable recipe here}
My favorite frozen yogurt place has St. Patrick's Mint yogurt once a year. It's minty and delicious and tastes as great as 31 Flavors Mint Chocolate Chip, almost. The rest of the time, I remember it and order the peanut butter instead. These classic mint brownies, now dubbed St. Patrick's Mint Brownies in the froyo's honor, blow the delicious, hard to find frozen yogurt out of the water. I start with my favorite brownie mix (or recipe, whatever, but I usually use Betty Crocker Supreme, the kind with the extra chocolate chunks). While they bake, make a simple frosting with mint extract and green food coloring to your liking. Spread melted chocolate and butter on top, chill, and serve. They taste even better cold (is that possible?) Or warm? Either way, I think they are perfect for any holiday. I haven't made a fresh batch yet for tomorrow (Baby Strawberry has a double ear infection so survival is pretty much all that's cooking here!)

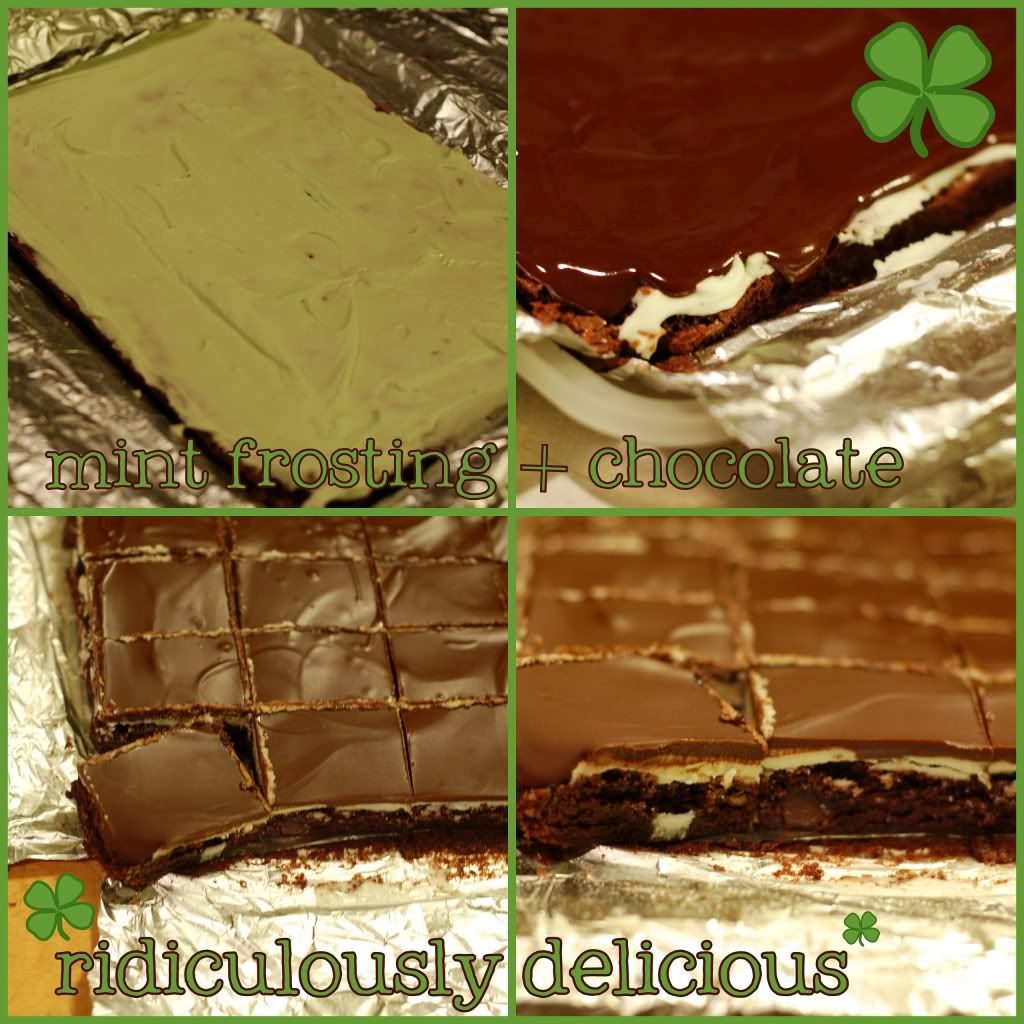
A quick note- these would taste amazing right out of the pan, but they look prettiest if you lift the whole thing out, slice the edges, and cut into pieces. I use my big chef's knife. If the brownies are nice and cold and the knife is a little wet they'll turn out a lot prettier than mine did (but we all know patience isn't my forte!)

There's a lot more mint deliciousness around here if you need more ideas for St. Patrick's Day:

St. Patricks Mint Brownies 
St Patrick's Mint Brownies (aka BYU Brownies)
{printable recipe here}
from Anne Strawberry
adapted from Linda Buchanan

One 9 x 13 pan of Brownies, cooked and cooled (I like to line the pan with foil or parchment before I grease it, then I can lift them right out after they cool. Peel off the foil for a nice, neat sheet of chocolate deliciousness).

Mint Frosting:
1/2 Cup Softened Butter
2 Cups Powdered Sugar
2 Tablespoons Milk
1 Teaspoon Pure Peppermint Extract
Green Food Coloring

Cream butter with 1/2 the powdered sugar until well incorporated. Add the remaining sugar and milk until desired consistency is reached (it should be light and nice and spread-able). Add extract and coloring to taste. Spread over cooled brownies and refrigerate.

Chocolate Topping:
1 Cup Semi-sweet Chocolate Chips
6 Tablespoons Butter

Make a double boiler by setting a heat proof bowl over an inch or so of simmering water. Slowly melt the butter and chocolate, making sure to remove from heat just before the chocolate is completely melted. Stir until smooth and pour over cooled, frosted brownies. Place in freeze until firm and cut into small pieces.

March 15, 2011

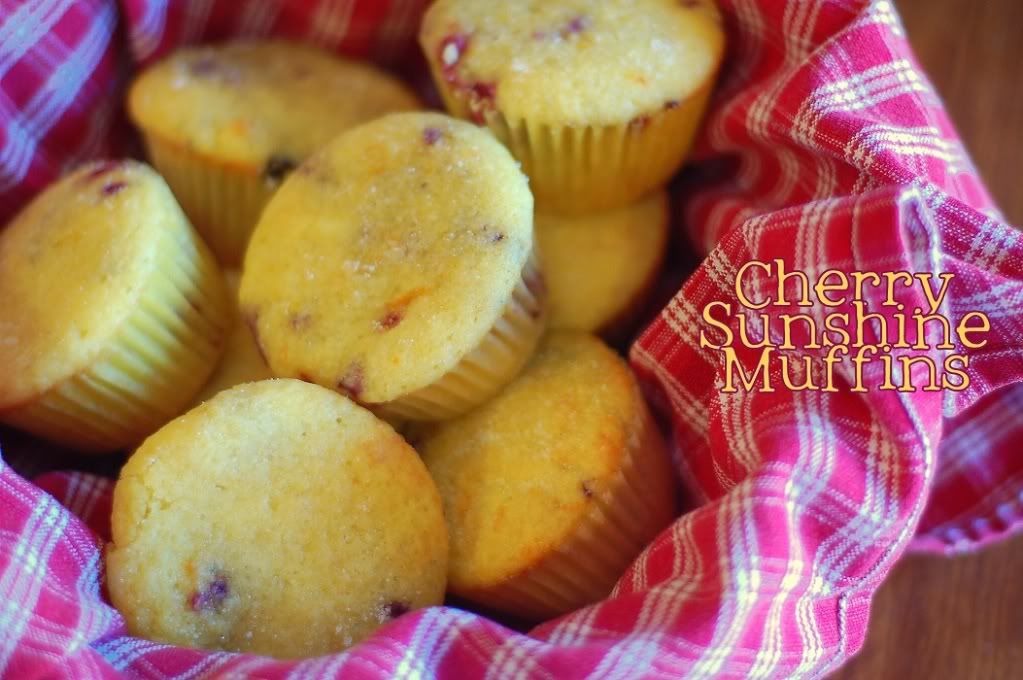
TWD- Cherry Sunshine Muffins

Cherry Sunshine Muffins
I have a love hate relationship with muffins. They're so easy and quick to make, so flexible on ingredients. They're also usually so full of butter- and they taste so good. So yeah, we try to limit our muffin making but of course we loved these! Next time I'll sub in some whole wheat flour to make up for the butter. With some extra tart dried cherries and lots of citrus zest and juice (orange and lemon both), I don't think you'd really notice. The trick to muffins is just to handle the batter delicately and to make sure that you don't try to work out every single lump. And the actual hardest part? Don't eat too many- don't let the dried fruit fool you, they're chock full of butter (and SO good!) And since I can't leave well enough alone, I brushed them with butter right out of the oven and sprinkled them with sugar so they were a little sparkly.

Photobucket
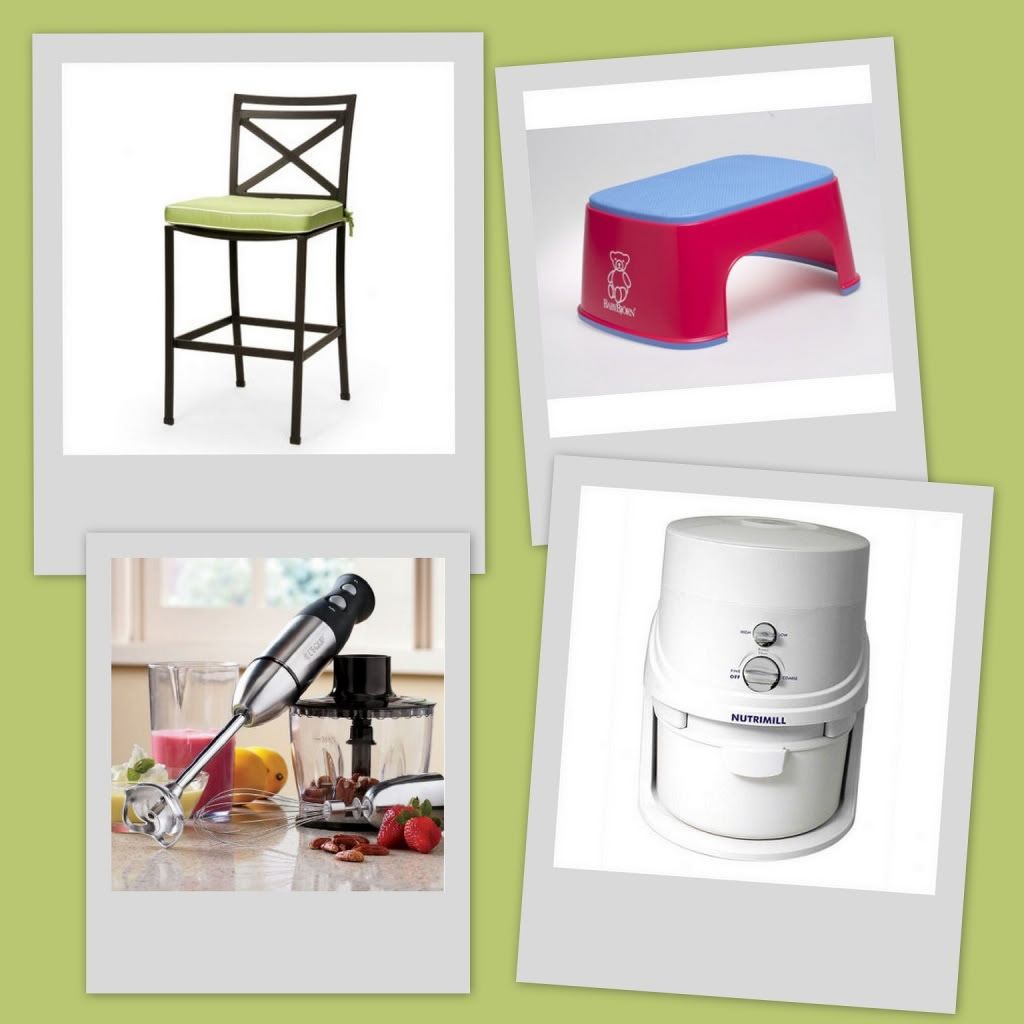
I'm super excited to have the chance to do another review for CSN Stores. I seem to always have furniture on my mind and love these gorgeous modern bar stools. Around here though it seems like baby step stools are more practical even if they aren't as pretty as that apple green cross-backed beauty above! As always though, kitchen stuff is on my mind. I've been trying to nicely steal my mom's immersion blender for ages and she's not budging (not fair considering I made her buy and fall in love with it in the first place!) My real hope is to finally get a grain mill. I've been mooching *I mean borrowing* my friends' Nutrimill when I make bread and I think it's about time, but I'm having a hard time committing to the cost! Suggestions anyone? Anyone of you have an love a Nutrimill? Fortunately they're all available on CSN Stores and I think it's going to be a win win, if I can ever decide!

PS Come back tomorrow for a nice, minty St. Patty's day treat!