October 29, 2010

Marie Helene's Apple Cake

Photobucket
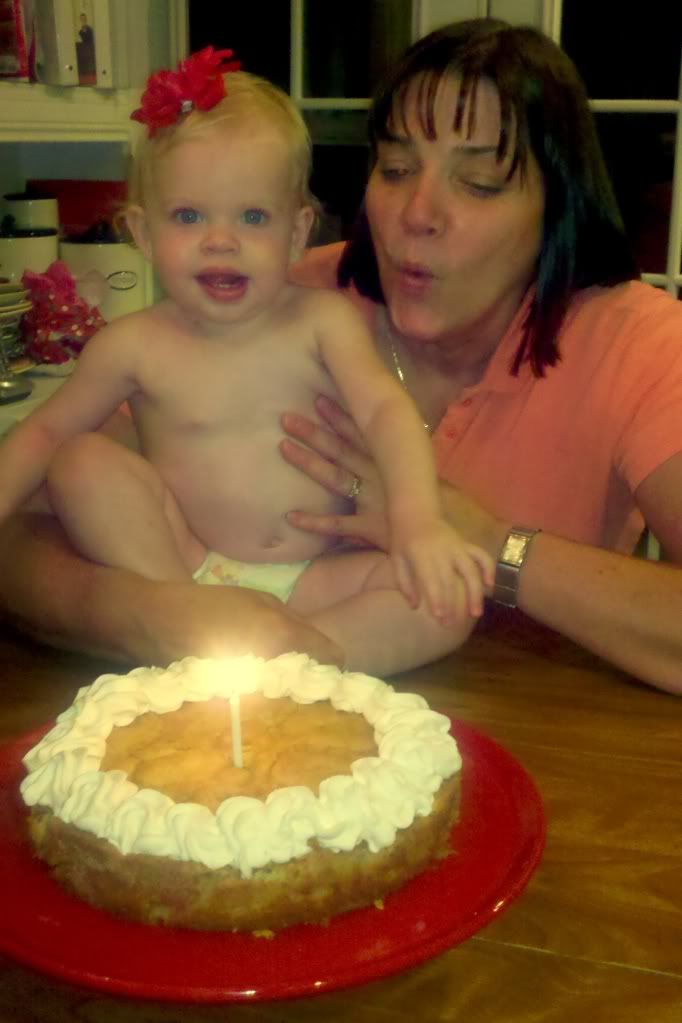
We love apples at our house and while cake is growing on me, I'm still a frosting girl at heart. So when I read that this week's French Fridays with Dorie recipe, Marie Helene's Apple Cake, was more "apple" than "cake" I was on board. I made it for my mom's birthday dinner (that's her above with Baby Strawberry, who since her birthday has decided that people singing to her is the single best thing in the world). Since we don't have any alcohol around here, I opted for extra vanilla and a little almond extract to flavor the cake batter. It was delicious and I love how quickly it came together. I'll definetely be making this cake again when I'm looking for something simple and tasty- that's how we like it around here.

For this easy, yummy recipe you need to get a copy of Dorie's newest book, Around My French Table. It's on sale now!

PS This picture was taken by my phone when my beloved camera was in the shop! Thank goodness my pretty is back!

October 28, 2010

Halloween Orange and Vanilla Bean Cupcakes

Orange Creamsicle Cupcakes{Orange Creamsicle Cupcakes- printable recipe here}
{Vanilla Bean Filled Cupcakes- printable recipe here}
Today my son had his first big Halloween party at his cute preschool. He dressed up as a pirate and was so excited- even down to his little drawn on goatee! His teacher asked for volunteers helping in the class room and bringing cupcakes and other treats. I wasn't chosen to make the cupcakes (oh the rejection!) but got to come be a "mom helper" instead. The kids were so cute and excited about every single thing that I'm sure they would have eaten cupcakes made out of dirt as long as they included brightly colored toppings. That said, either of these happy cupcakes would have been perfect for the party! Instead, the vanilla bean cupcakes were destined to go to my husband's work event, where they were happily devoured by a bunch of lawyers. Honestly, the little Disney-clad preschoolers couldn't have appreciated the pastry cream filled vanilla bean cupcakes as much as they adults. I'll save the Orange Creamsicle Cupcakes (in their brightly colored glory) for the littles! Have a safe and happy Halloween, surely filled with candy, costumes, and baked goods!

Halloween Vanilla Bean CupcakesAnne Strawberry's Vanilla Bean Cupcakes
{printable recipe here}
1 cup sour cream (reduced fat is fine)
1/2 cup water
1/2 cup canola oil
3 eggs
1 tablespoon vanilla
seeds scraped from one vanilla bean
1 box betty crocker french vanilla cake mix

Preheat the oven to 350 and line a muffin tin with cupcake liners. Place atop a baking sheet and set aside.

Combine all ingredients in stand mixer and beat for two minutes until well combined. Using a 2-tablespoon scoop, scoop into muffin tins.

Bake for 21-24 minutes or until cupcakes spring back slightly when touched and a tooth pick inserted into the middle comes out clean. Cool on racks and frost once completely cooled.


Anne Strawberry's Favorite Frosting

1/2 cup butter, softened (one stick)
1 package of cream cheese, softened (I like to use Neufchatel, less fat and I don't notice much difference)

2 Tablespoons milk
2 teaspoon pure vanilla extract or the seeds of one vanilla pod, scraped
dash of salt
6 cups of powdered sugar (more or less to achieve desired consistency, this is a baseline)
1 Tablespoon meringue powder

In a mixer with the whisk attachment, combine the cream cheese and butter until light and fluffy. Add in the milk, vanilla, and salt, and blend.

Next, add the powdered sugar and meringue powder, cover the bowl of the mixer with a dish towel, and turn it on low until everything is combined. Then increase the speed for a minute or so until the frosting is light, fluffy, and delicious. The meringue powder will help set the frosting after it dries so it holds its shape.

Variation:
Add 1 T. Lemon or orange zest and substitute juice for the milk to make a tangy citrus frosting

For the filling:
Anne Strawberry's Slightly Lightened Pastry Cream
After the cupcakes have cooled, fit a pastry bag with a long, medium tip. Fill with cooled pastry cream and squeeze one or two tablespoons into the center of each cupcake, filling until the top of the cupcake starts to bulge slightly. Frost and decorate the cupcakes and serve.

October 27, 2010

Keys to Good Cooking

I posted about the Keys to Good Cooking preview a couple of months ago and was excited to get my hands on my own copy of the book. I started out like a dutiful student, reading from the beginning. Eventually, I felt like I was learning so much about things like appliances and tools, cooking methods and produce, that is was time to skip to my favorite chapter- Cakes, Muffins, and Cookies.

Here's a few things I learned from right away- "Cracked or peaked cakes result from overmixing batter or too high an oven temperature, so the center continues to expand after the surface has set. Try a lower temperature and/or shorter mixing." I've definitely had peaked cakes before, so I'm going to try to remember this next time I make a cake! In the section on muffins, it talks about mixing muffins as quickly as possible to avoid "losing leavening gas". I've known not to overbeat but I thought that referred to strokes, not necessarily time. For me, this is another push to bake "mise en place", or with all the ingredients out and ready to go before you start. I know that when I have everything ready and carefully read the recipe first (as opposed to reading it as I go, with a baby on my hip while I'm on the phone) I get much better results! Also on muffins, he says the secret to a "shapely peak" (super necessary for aesthetics since you can't "build" one out of frosting or it's no muffin) is to "make sure the batter isn't over-leavened, fill the pan cups almost full, and use a relatively high baking temperature, 400 to 425."
This wonderful book is also full of common sense tips that often make the biggest difference, like remembering to check doneness early and to allow things to start to cool and firm before removing them from the pan. Probably my favorite page so far is 439, where he says "Cookie recipes often need adjustment" and goes on to describe what to add or adjust to get the perfectly crisp/soft/tender/dark/moist cookie you're looking for. You can bet that page in my book is going to be covering flour and butter in no time!

There's a certainly a lot of info in here that I put into my "that's nice, hopefully I'll remember that in a couple years when I make my next turkey" or something like that. However, all the information is super accessible- the chapters are listed on the covers! The formatting is beautiful and easy to skim when you need to find just what you are looking for. The information is sorted logically and accessibly. I'm sure you have a few things that you are really great at making- along with a few things that are a little more daunting. While I feel very comfortable baking cookies or pies, I get a little more nervous with fancy cakes or caramel. I'll be the first to admit that I don't know the tricks to cooking everything, but with Keys to Good Cooking, I can find the tips to make my attempts successes. And since I know I have a great source to turn too, I'm not quite as worried about trying new things when the opportunity arises.

Come back tomorrow for Halloween cupcakes and Friday for apple cake (three posts in three days? I think I can, I think I can, haha!)

October 26, 2010

Dorie's Apple Pie

Apple Pie
{printable recipe here}
I've made a lot of pies, but the first I learned to make was apple and it's still my favorite- so I was super excited to have the All American Apple Pie chosen as this week's Dorie treat. Dorie's version is exceptional (big shock, right?) and one of my favorite parts is the layer of graham cracker crumbs under the filling. It soaks up the excess juices and leaves the bottom of the pastry crisp (my tall man's favorite part- he loves the buttery, delicious dough). And even though preparing apple pie can seem a daunting task, my surprisingly practical apple peeler and corer came to the rescue once again. From my morning apple cinnamon oatmeal, to apples to snack on for my son, to apple pie- I use this thing all the time. You can even peel potatoes with it!

Grab the recipe from Emily, this week's host, or buy the book here if you haven't already. Mine is tattered and covered in butter and flour- and it's been worth every penny!

PS Guess what- my beloved camera is back! Nikon officially diagnosed the body with "sand damage" (but I think it's more likely flour/powdered sugar damage!) and they repaired it free of charge, even though I'm well out of warranty. Thank you Nikon, I'm yours for life!
{printable recipe here}

October 13, 2010

Homemade Jello Playdoh + Candy Necklaces

2010-10-13_12-24-25_610.jpg
{my camera is in the shop and we are officially a phone camera only household for now- bear with me!}

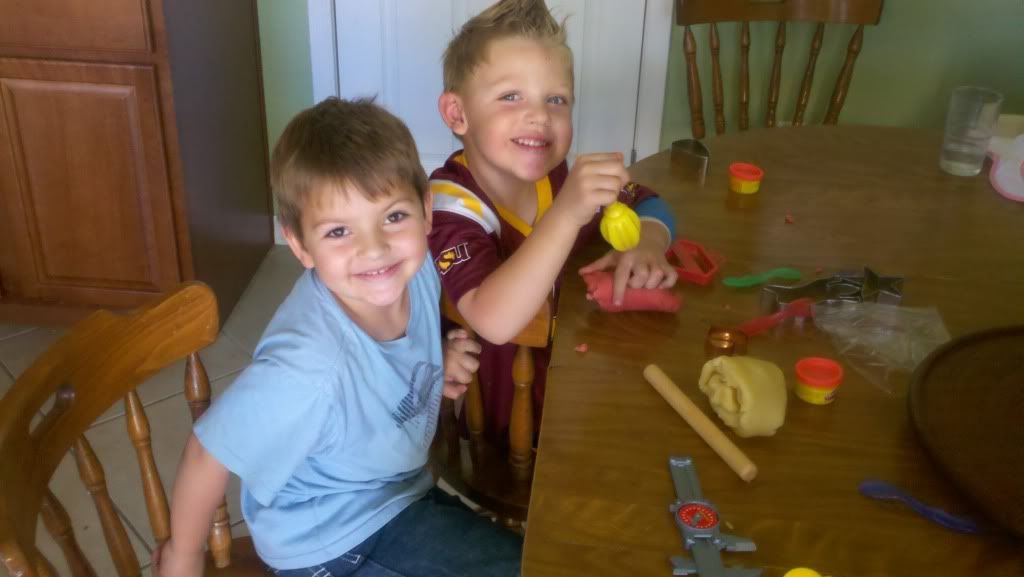
Today my little man has a buddy over and they decided they wanted to play with some playdoh. I only had one tub (a pink one at that, aren't I so nice?) so I told them we could make some so there would be plenty to share. I've always made my aunt's recipe but couldn't find it so I did a quick search and found this similar recipe. In the past I've added peppermint extract and food coloring to make a pretty and yummy smelling dough, but this recipe just calls for a box of jello to cover both bases. It only takes a couple of minutes on the stove and the one batch was plenty for my two busy boys- they sat and played for 45 minutes, so this "recipe" is a winner for sure! Keep leftovers in a baggie in the fridge and enjoy some cheap and easy fun!

{Update}- My friend Holly has a recipe to make homemade candy necklaces and they are adorable! Another fun project to do with the kids and add to my to do list... Check it out here.

Homemade Jello Playdoh 
Ingredients:

1 cup white flour
1/2 cup salt
2 T. cream of tartar
2 T. Vegetable oil
1 c. warm water
1 three oz. pkg. jello (any flavor)

Directions:

Combine ingredients and cook over medium heat until it thickens and pulls away from the sides of pot and becomes dull, about 3 or 4 minutes on my stove.


Note: it burns easily so don't put over too high a heat and keep stirring. Mold and knead until cool enough to touch. Store in a baggie in the fridge.